 Have you ever ran into an off-the-wall material at the craft store? I did. Approximately three years ago I was tagging along with the "Scrapbook Queen" at Michael's in Tacoma (Washington) and decided to venture off on my own. I have been in this particular store several times and figured I knew every nook and cranny (where the good stuff is found). However, on this day, I stumbled upon the Mother Lode of materials. Passing through the yarn section was a large flat table with a couple hundred skeins of an unique crochet type material called Moa Boa (www.sierrapacificcrafts.com) . Brown, black, olive, maroon, and/or a mottled combination of these colors were piled high with a large sign - CLEARANCE $1.00. Wow, a dollar for a skein of 85-yardsl! I can only describe the material as strung thread (like strung marabou or peacock herl)(unique eh?). After a closer "touchy feely" look the wheels upstairs starting to burn up the bearings (so to speak). "Wow, what a wonderful leechy material," I thought. Once home I immediately hit the bench and began tying different patterns. First, I tied various leech patterns (nice). Next were various dragonfly nymphs... (killer) "Wait a minute!" "I bet this mottled stuff would make a dynamite sculpin!," thinking aloud. After several different patterns I settled on tying this specific one. Simple, quick, and deadly- just they way I like my flies.
A couple of notes, (1) the more you fish one pattern, the more effective it becomes. The material is a little stiff at first, but individual strands unravel over time becoming soft, marabou-like. (2) It is particularily effective in faster tidal movements where the fibers react more, and (3) HANG ON!
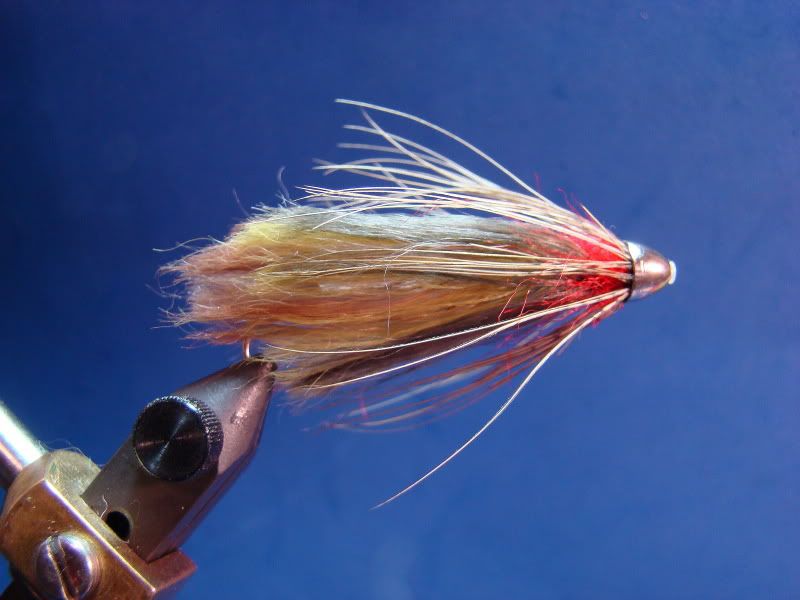
Material:
Thread: 6/0 color to match body (pictured is olive dun)
Tube: Pro Tube Fly System's Microtube with hook guide
Body: Mottled Moa Boa crochet material
Collar (1): Red STS dubbing (loose)
Collar (2): Natural pheasant rump or schlappen (or color to match)
Cone: Spirit River modified nickel plated cone
Hook: Choice (I am using a Gamakatsu SC15 #4)
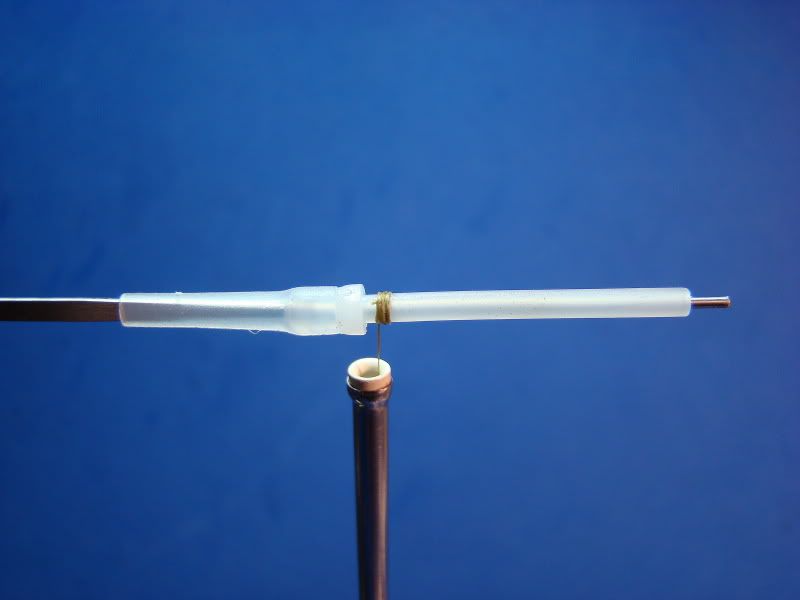
Step 1:
Apply a drop of Zap-A-Gap to the rear portion of the mircotube. Join mircotube with hook guide. Place on needle. Start thread at the rear of the tube (as pictured).
Step 2:
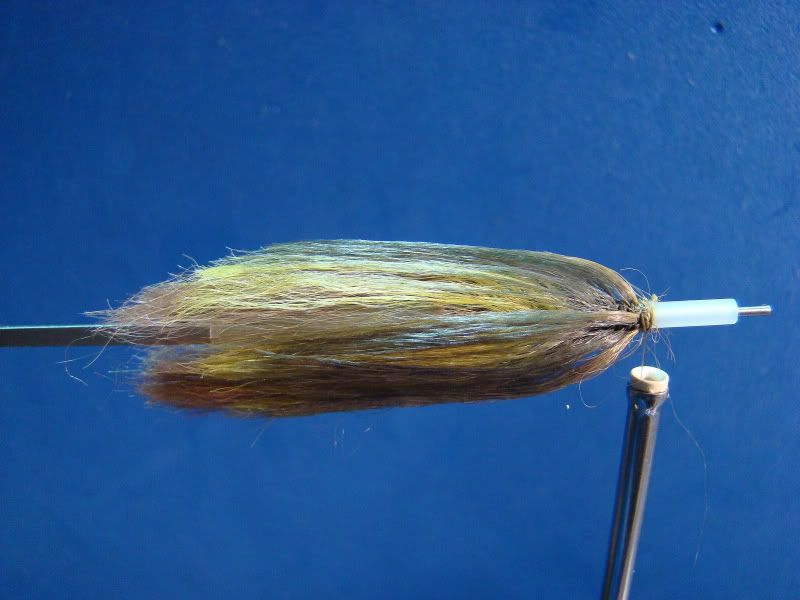
Tie in Moa Boa and wind forward. Wind each wrap close to the preceding turn, but do not overlap. This will allow the fibers to breathe and swim freely.
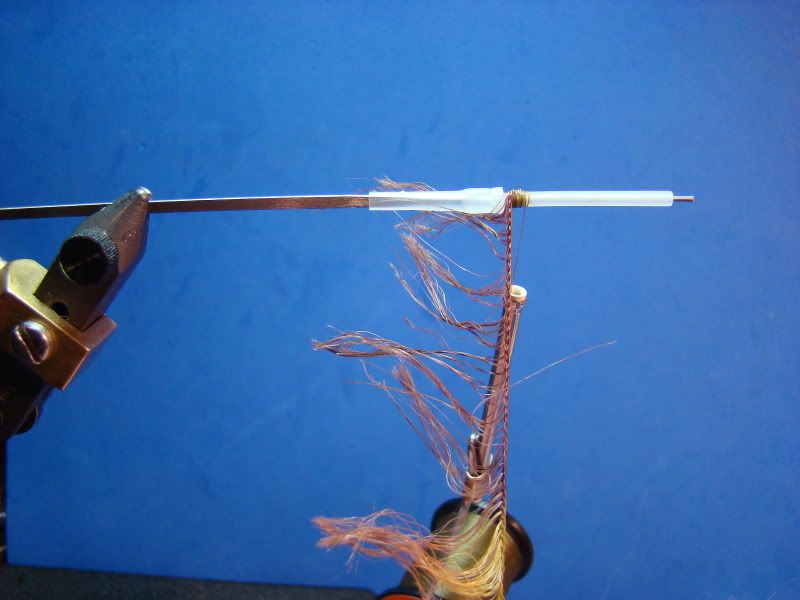
Note the excellent mottled effect- brown plus light and dark olive.
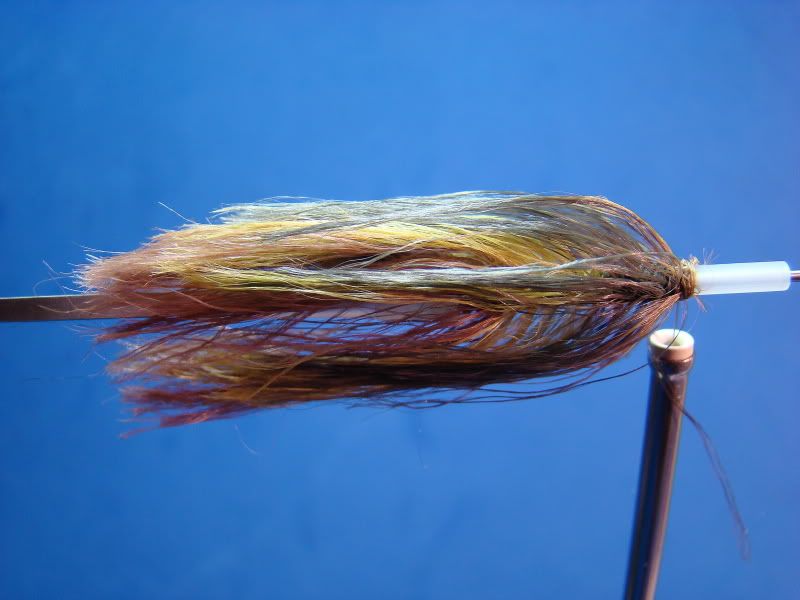
Use a brush and/or comb to unravel the thread fibers. This will take a few minutes.
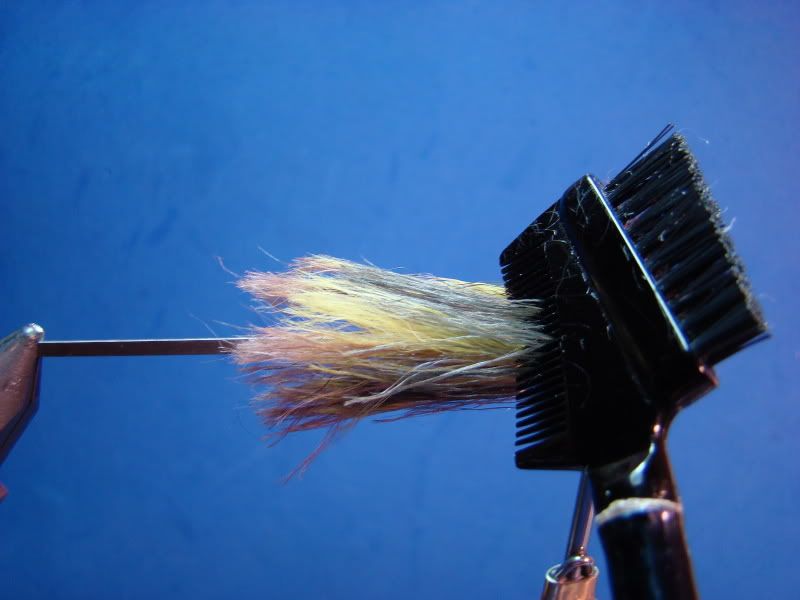
The fibers should have a softer appearance upon completion. Again, the fibers will further soften after fishing.
Step 4:
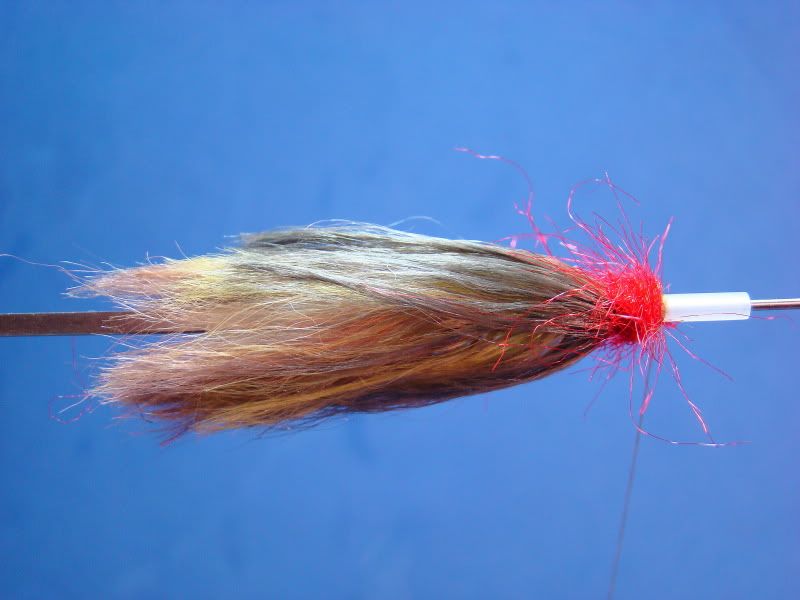
Loosely dub a small collar of red dubbing material (red STS dubbing is pictured).
Step 5:
Select, tie in, and fully wrap a longer pheasant rump hackle (color to match) or schlappen.
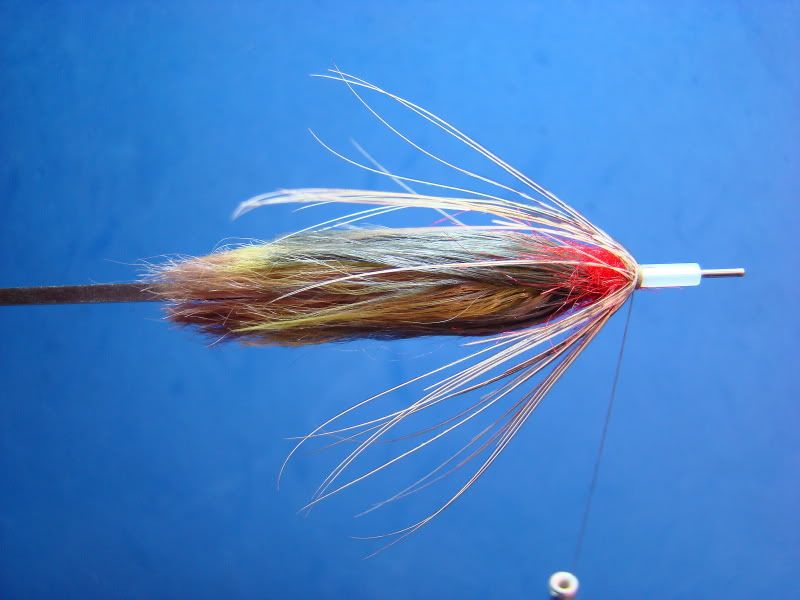
After winding pheasant rump, whip finish, apply Zap-A-Gap to thread, and immediately slide cone over the tube.

Step 6:
Remove tube from needle. Use a razor blade to remove the front portion of the tube. Leave approximately 1/16 of an inch. Use the blue portion of the flame to flare or roll back the tubing against the cone locking it in place
You are all finished!
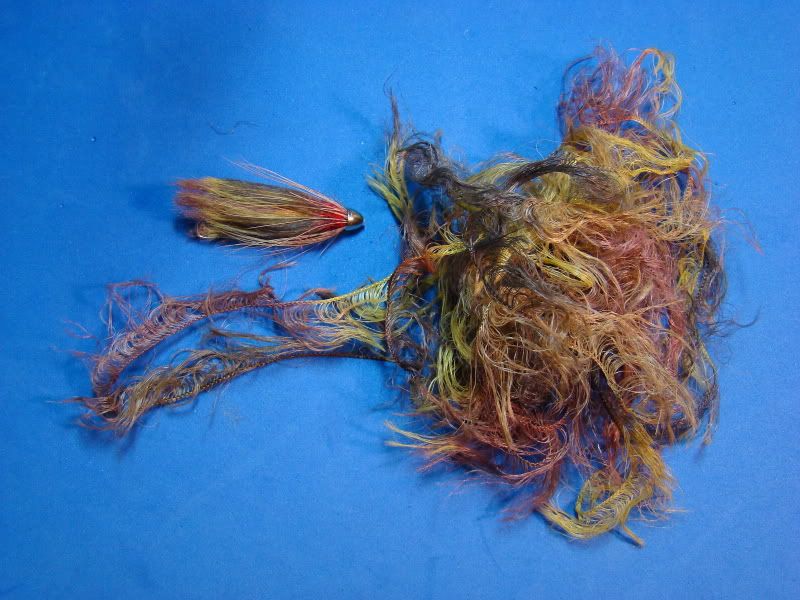
Here's approximately 10-feet of Moa Boa. This stuff is awesome! Can you see the sculpin pattern?
No comments:
Post a Comment