 I have seen a lot of different sand lance patterns over the years. The most successful patterns are tied with a thin profile, possess unparalleled movement, translucency, or a combination of all three- realistic for these eel-like fish. The myriad of material combinations are endless however, it will appear over time the simple ties are the most effective.
 My own JAB's Sand Lance has been a phenomenal producer. The tying techniques are nothing special; therefore, this is a great fly to learn how to tie sand lance patterns. However, the uniqueness comes from the wing material- australian sheep. The hair is extremely translucent, wispy, and possesses great movement in the water. In fact, I have been steadily replacing arctic fox, marabou, and some synthetics with australian sheep for my small harwing style patterns.
Should you decided to spend any amount of time throwing flies in the saltchuck it is highly recommended that you carry a few sand lance patterns. They flat out produce!
Lastly, by shortening the wing and adding a little more bulk you can effectively convert this into herring, sardine, or anchovy pattern.
Materials:
Hook: Gamakatsu SC15 (Size 4-8) (pictured is a size 6)
Thread: Uni- mono, clear/fine, size 4m
Wing: Australian sheep mixed with 4 to 6 strands of UV Minnow Belly or UV Lite Brite
Topping: Baitfish or peacock (color) Angel Hair
Eyes: Pearl 1.5 coated with Liquid Fusion
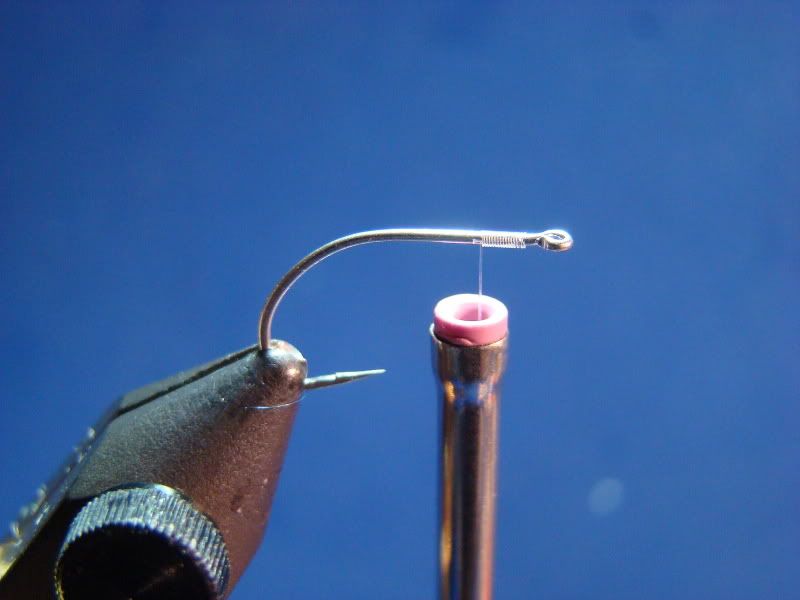
Step 1:
Start mono thread approximately one half eye length behing hook's eye. Wrap towards the rear approximately 15-turns. Apply a small drop of Zap-A-Gap. This will keep the wing from spinning over the hook shank.
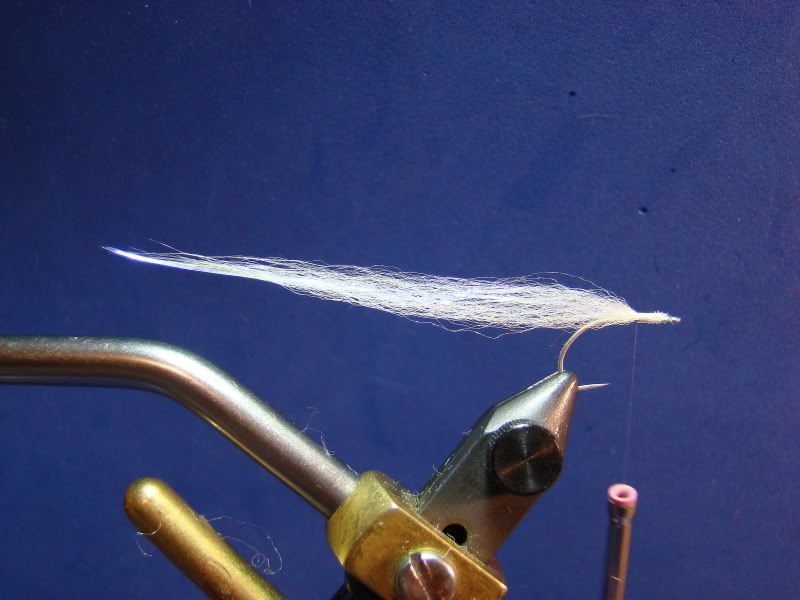
Step 2:
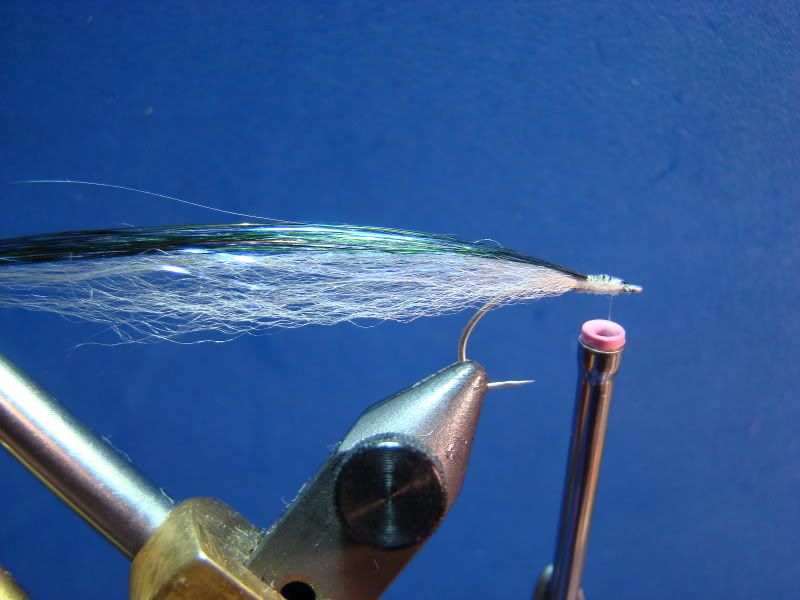
Select a small amount of australian sheep from patch. Comb out shorter hairs. Cut 4 to 6 strands of UV Minnow Bellow (or similiar) and mix into the wing. A quick way to mix the two materials is combing the UV Minnow Belly into the hair, or you can also use the "rolled" method. "Rolling" is best described as folding the material over itself until the two materials are equally mixed. When satisfied with the correct amount and mixed material cut a slight taper at the butt end of the hair. This will alleviate a sharp cut off point (or hump) at the tie in point. Secure with tight turns of mono thread. (Do not use excessive turns of mono thread to secure wing- keep it thin.) The length of the wing is approximately 5-hook lengths.
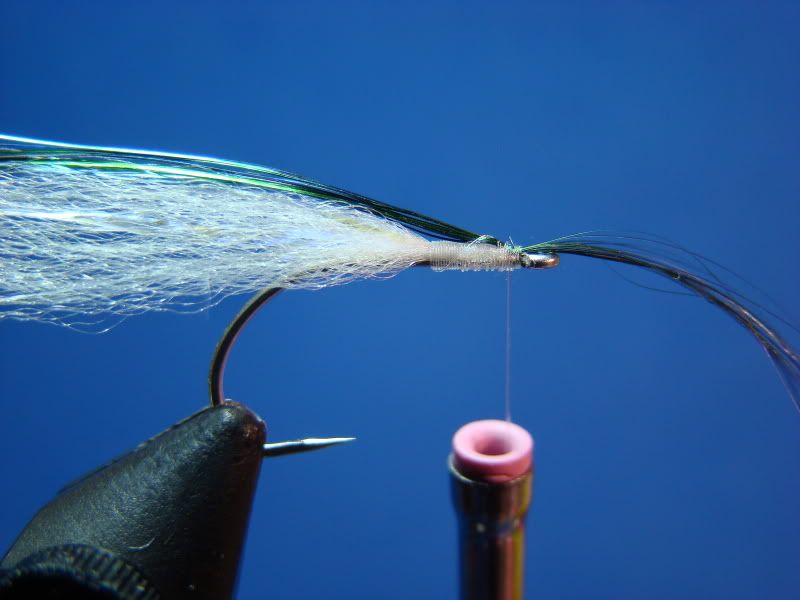
Step 3:
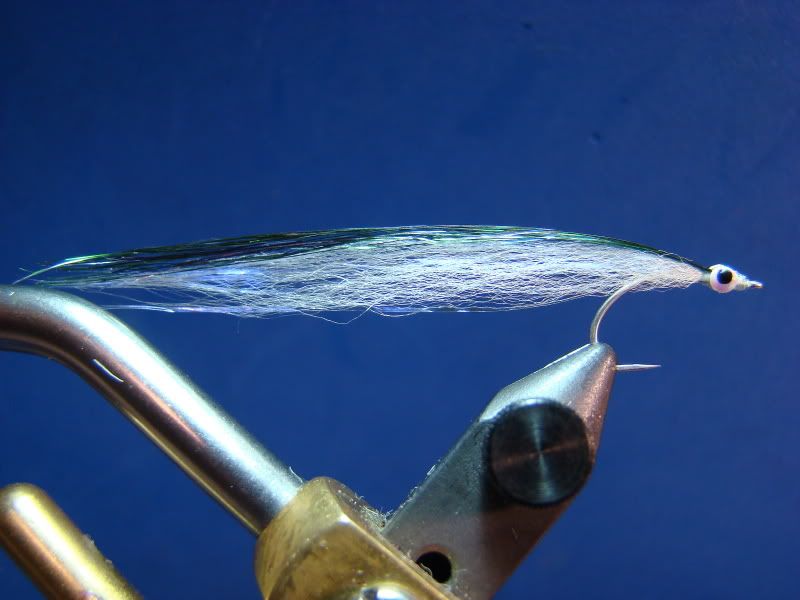
Select approximately 15 to 20 strands of Angel Hair and tie in at the mid way point (as pictured). The wraps should be tight to the eye. Once secured bring the Angel Hair back over the wing and wrap close intervals to the rear. Whip finish and cut mono thread.
Step 4:
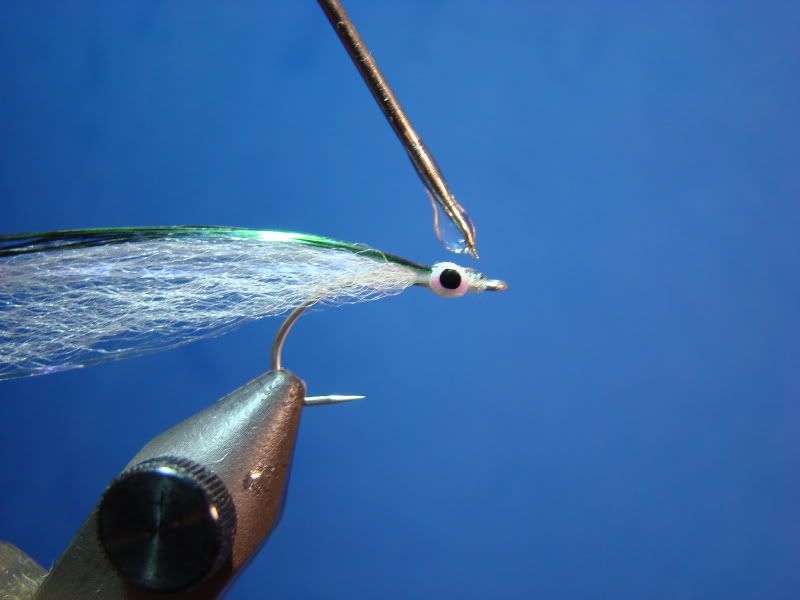
Remove an eye from backing and place into position. Repeat for opposite side. There are many ways to place adhesive eyes, but I find it easiest to use my bodkin. Normally the head of a fly would be a slightly larger diameter than pictured making eye placement easier. However, since we need to maintain a thin profile the eyes probably will not fully adhere to the contour of the head (as pictured). However, I have a solution!
Apply a small portion of Liquid Fusion like you would epoxy. One the greatest attributes this urethene glue has is it's shrinking nature when drying. Therefore, the eyes will receded onto the thread during the drying/curing phase.
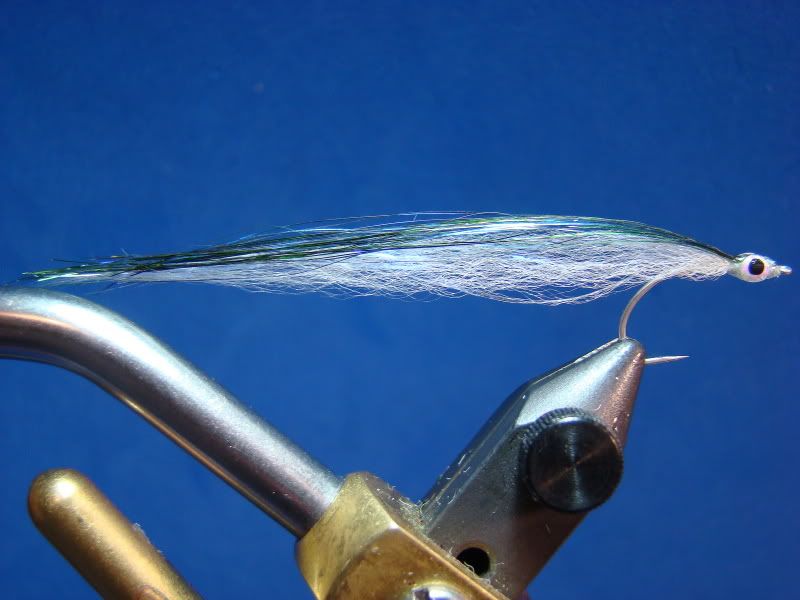
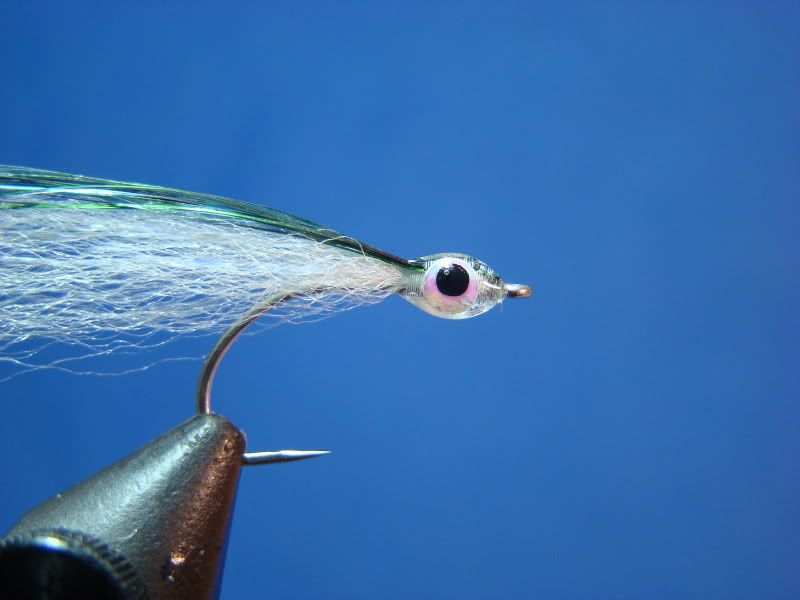 Cured and ready to fish!
Freshly applied Liquid Fusion.
Enjoy!
Are you new the The Benchside? Now would be a good time to mention I am giving away a nice patch of australian sheep on my Facebook page (The Benchside Fly Tyer). All you need to do is hit my page's "like" button and the "like " button under the Squidley Do-Right fly. I'll will pick someone at the end of the month. This material is absolutely gorgeous!
No comments:
Post a Comment