Sunday, January 29, 2012

Bucktail Coachman

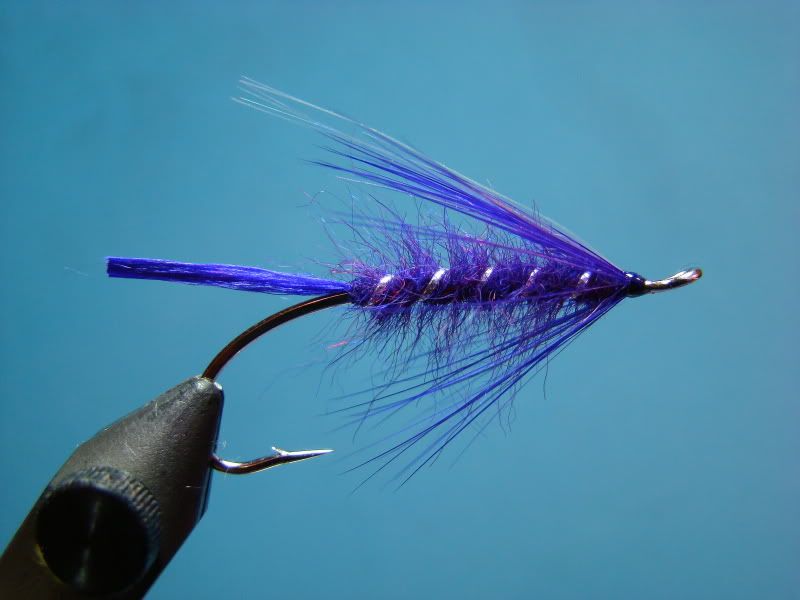
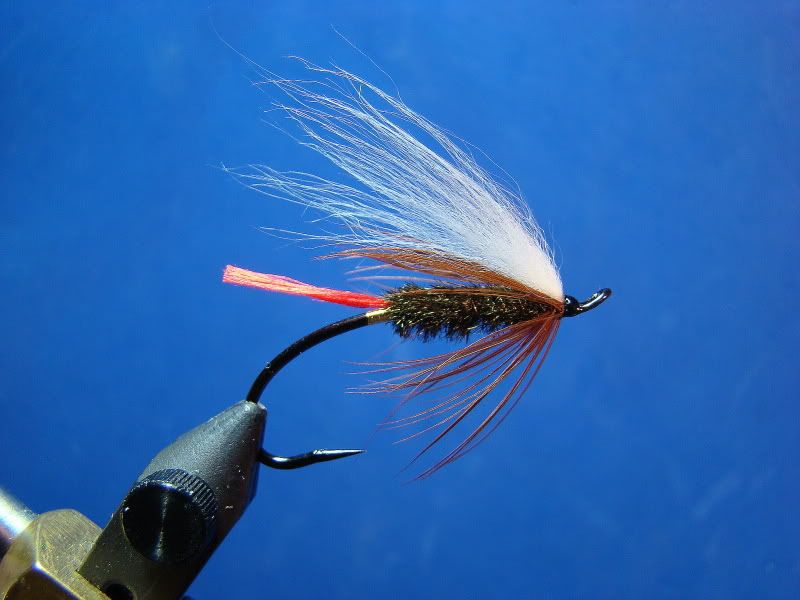
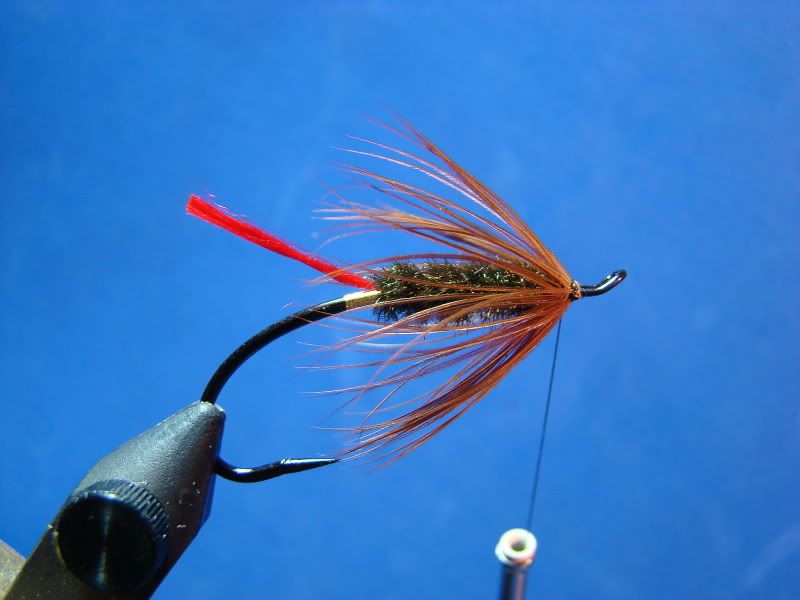
I am going to finish out the month with one last "oldie, but goodie" steelhead fly- the Bucktail Coachman.   Never underestimate the power of peacock herl!  This fly still pumps out a lot of steelhead for those that tie it on regularly.  When tied in smaller sizes the Bucktail Coachman is a sure bet on our eastside rivers such as the Methow and a favorite of mine in the late summer on the Kalama.


Materials

Hook:  Choice (Pictured is an Alec Jackson steelhead iron)
Tag:  (Optional) Fine gold Lagartun tinsel (Original did not have a tag,)
Tag:  Red silk floss (Originally red hackle fibers)
Rib:  (Optional) Fine gold wire
Body:  Peacock herl
Hackle:  Brown hen
Wing:  White Australian sheep (Originally bucktail)
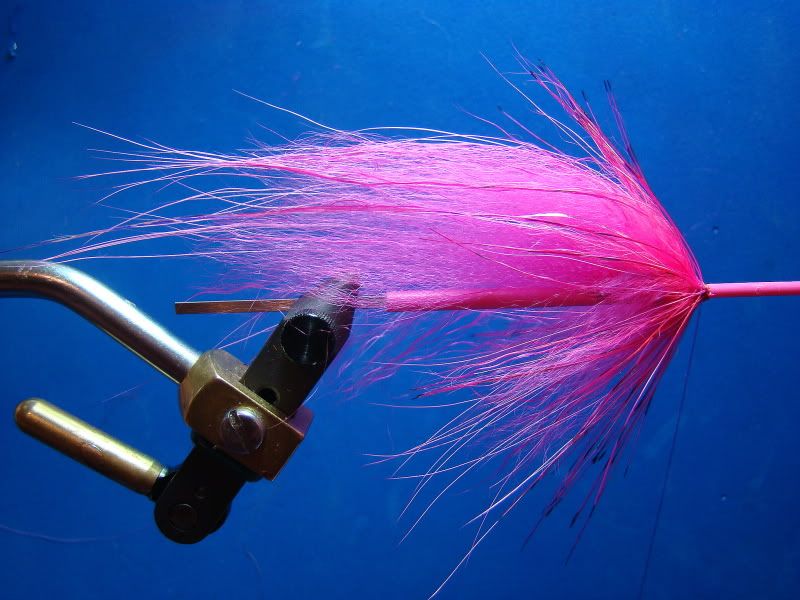
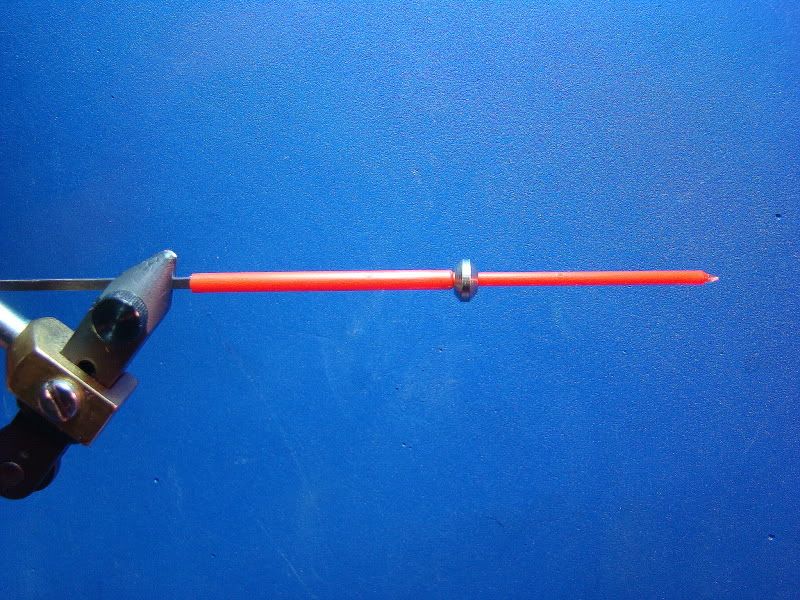
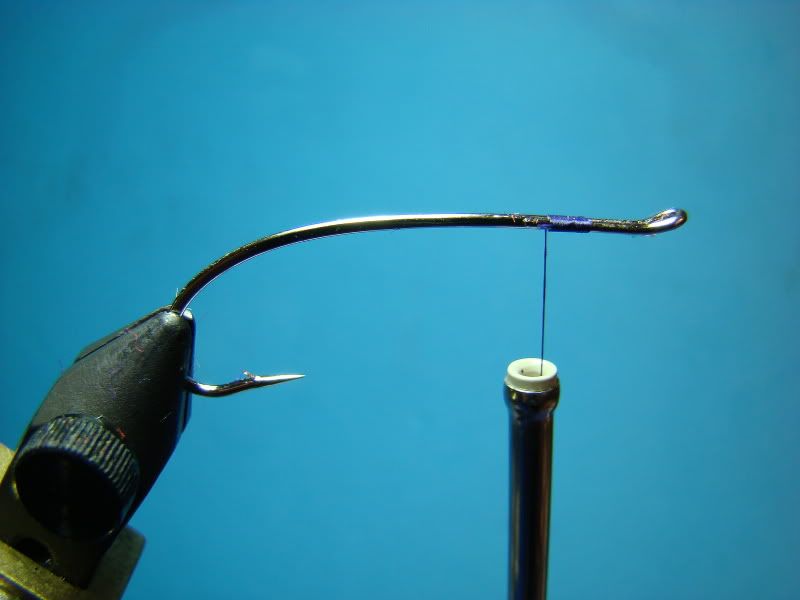
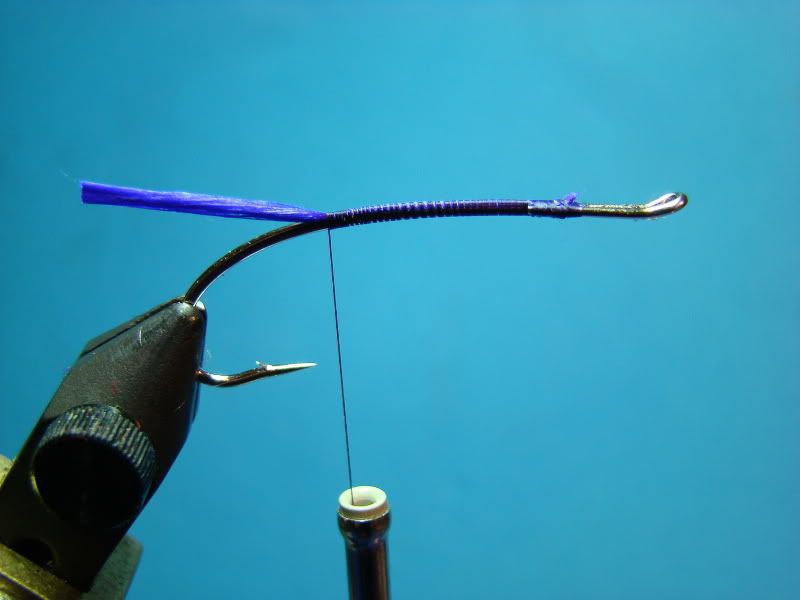
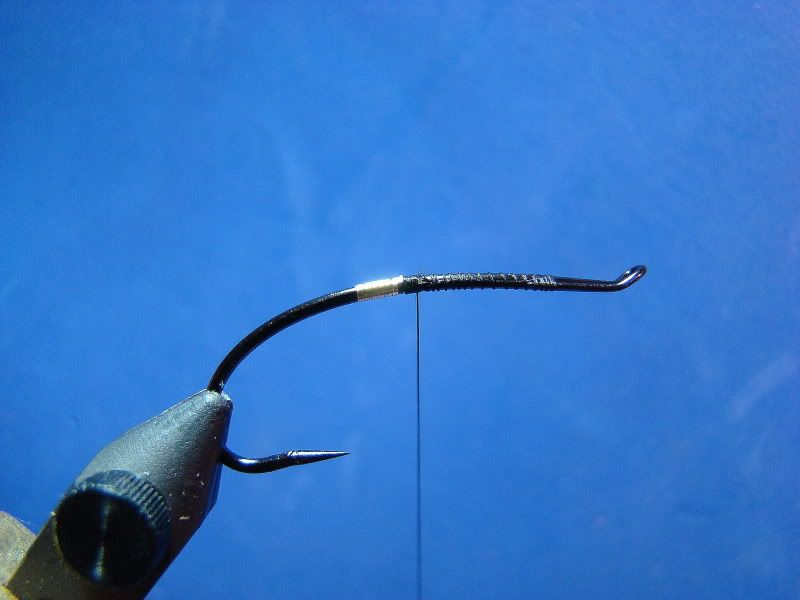
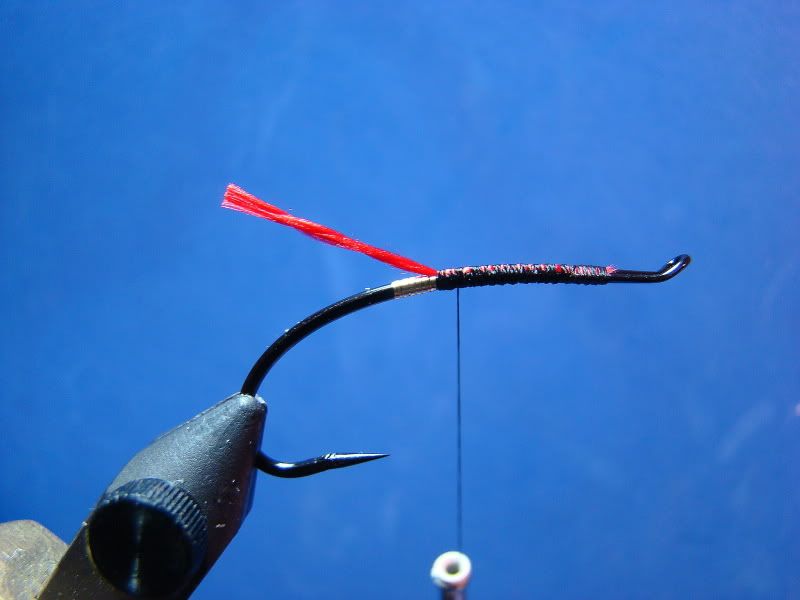
Step 1:

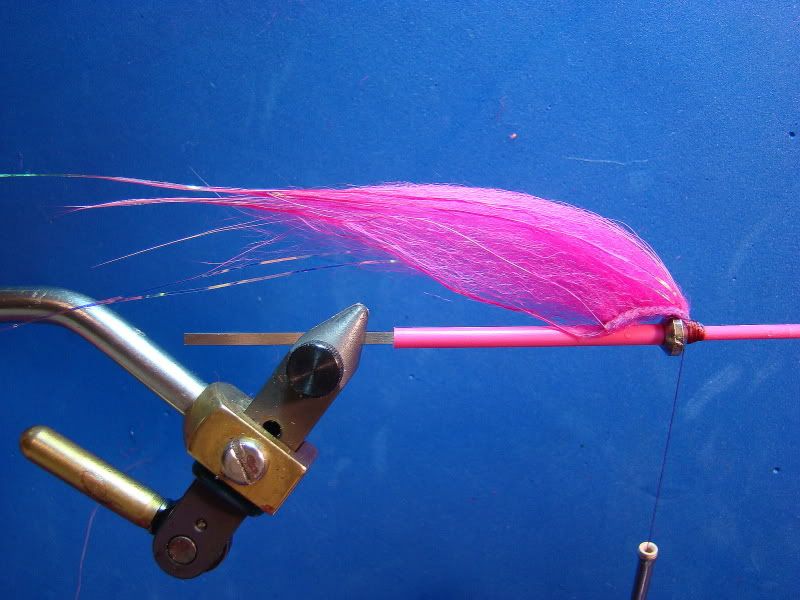
Start thread on return wire loop and wind down hook shank just past the halfway point.  Wrap tag with 4 to 6 turns of tinsel.  The end of the tag should be in a vertical alignment with the hook point.
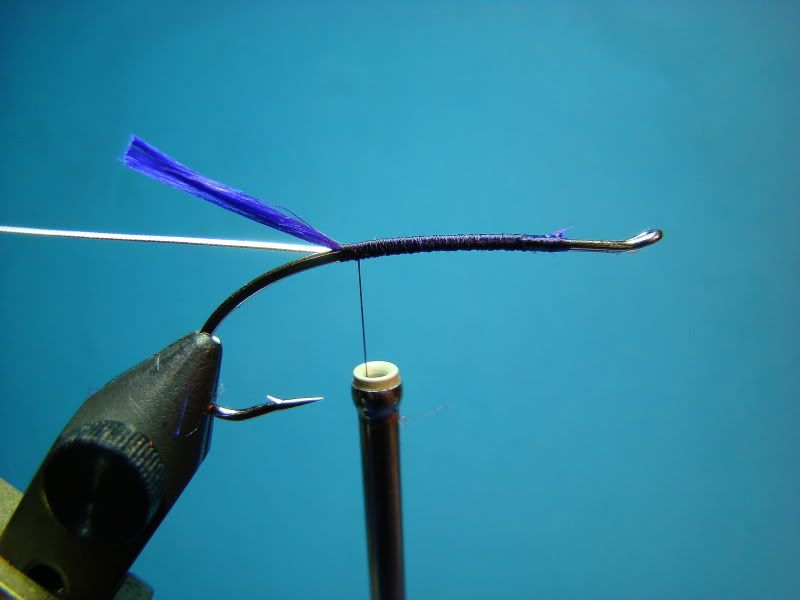

Step 2:

Tie in floss tail.   The length of the tail should be just past the hook bend.
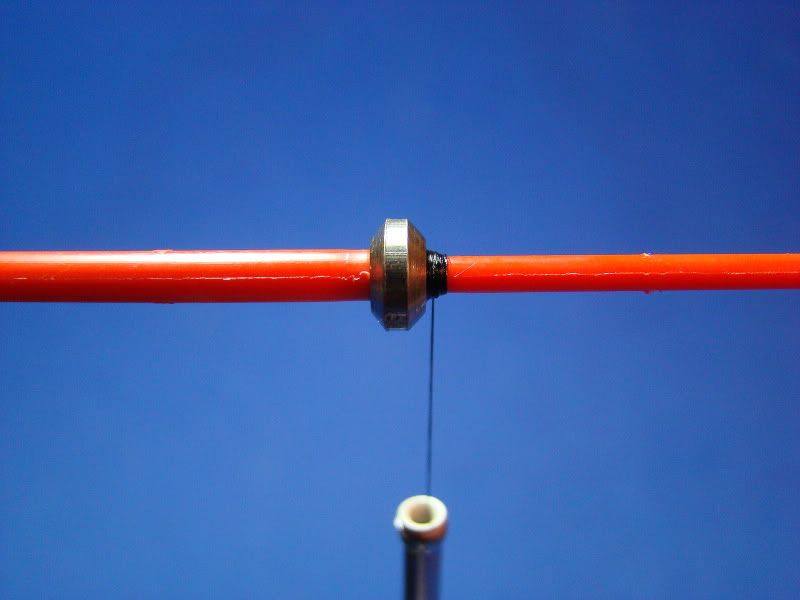

Step 3:

Tie in gold wire under the hook shank.  The wire should be secured in approximately the 7 o'clock position (near side).
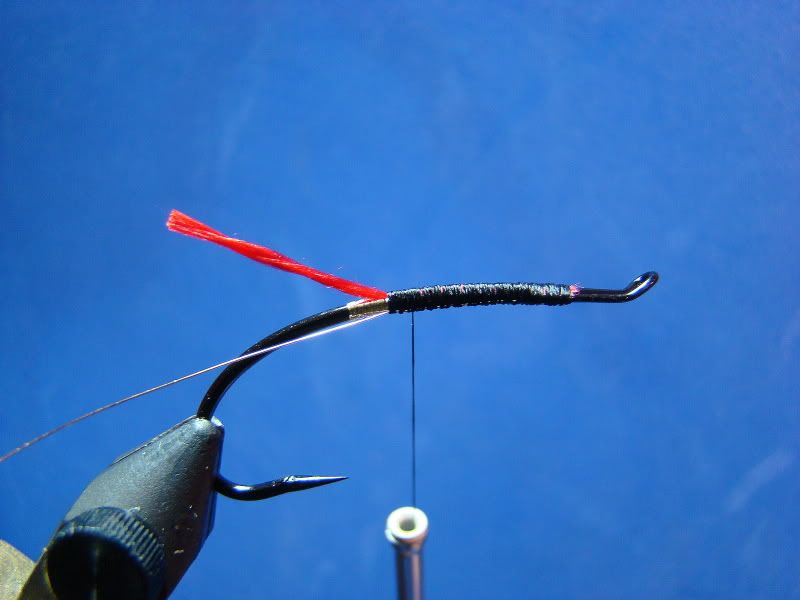
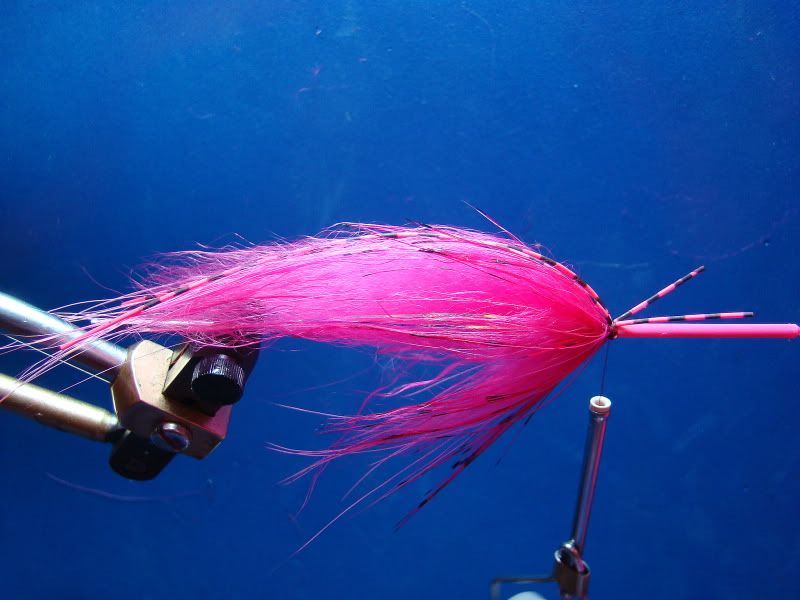
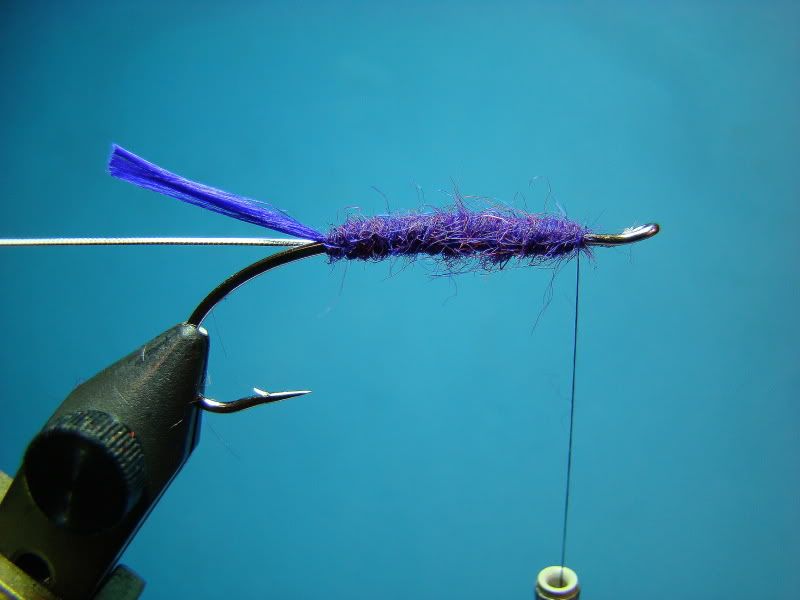

Step 4:

Tie in 3 to 5 peacock herls and wrap forward.  
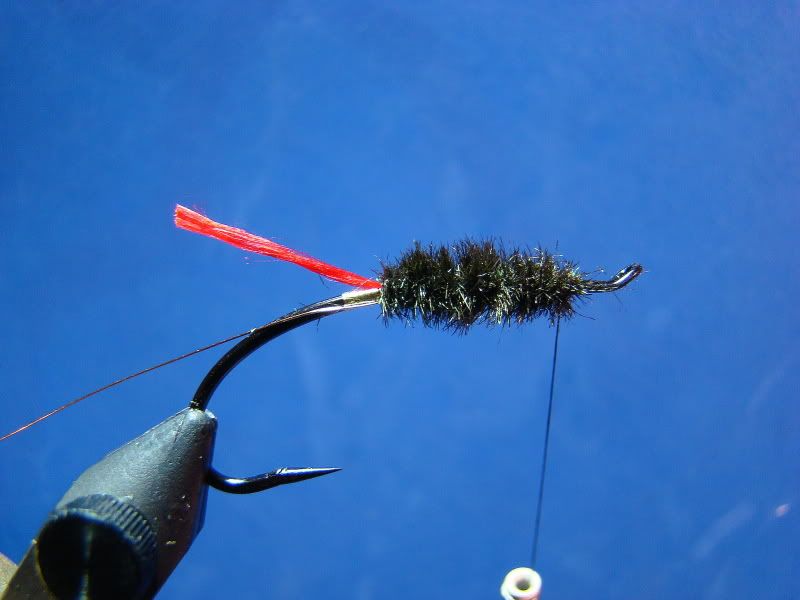
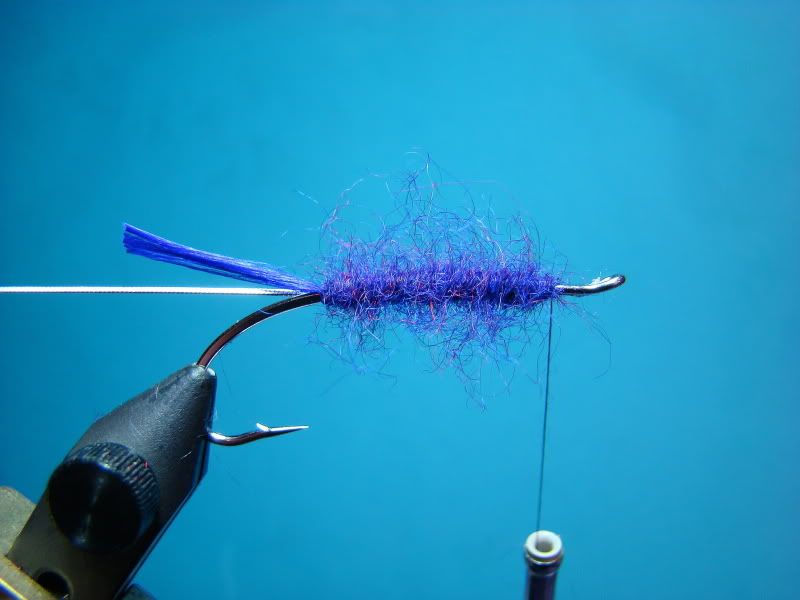
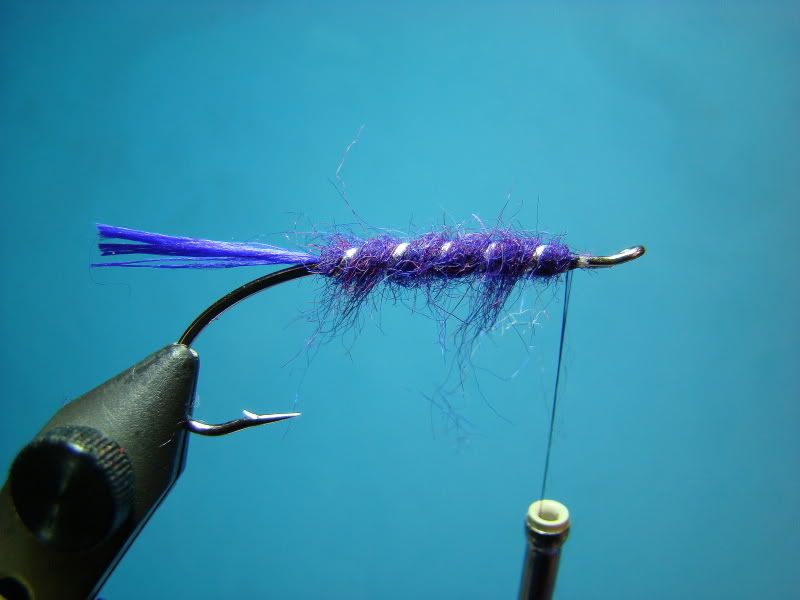
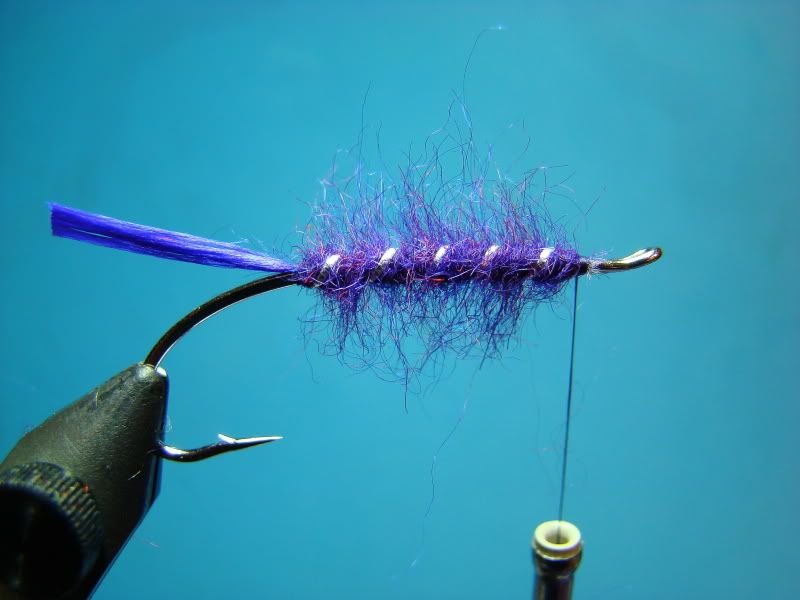


Step 5:

Wind rib forward with 5 counterwraps. 
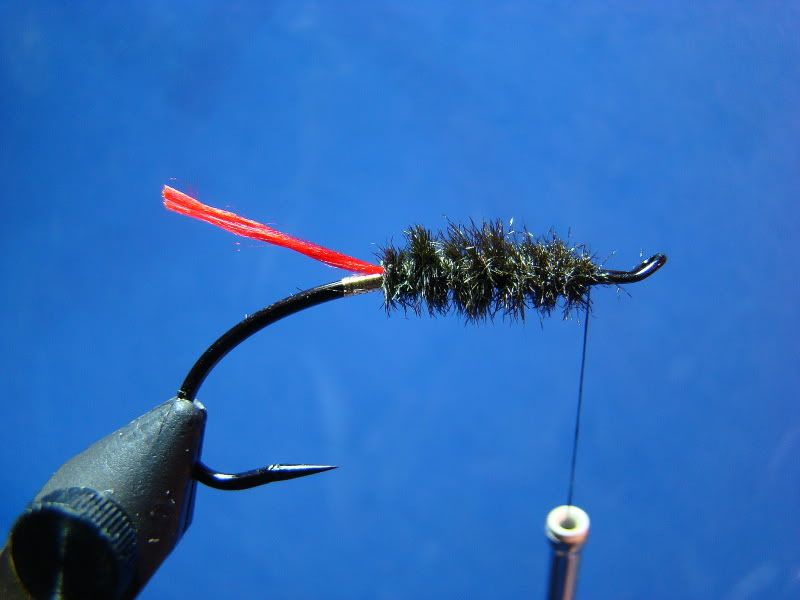
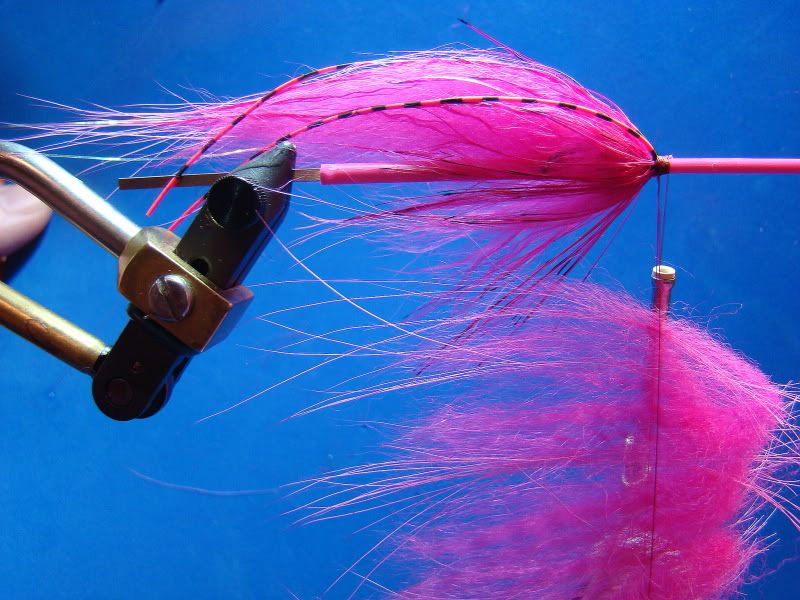
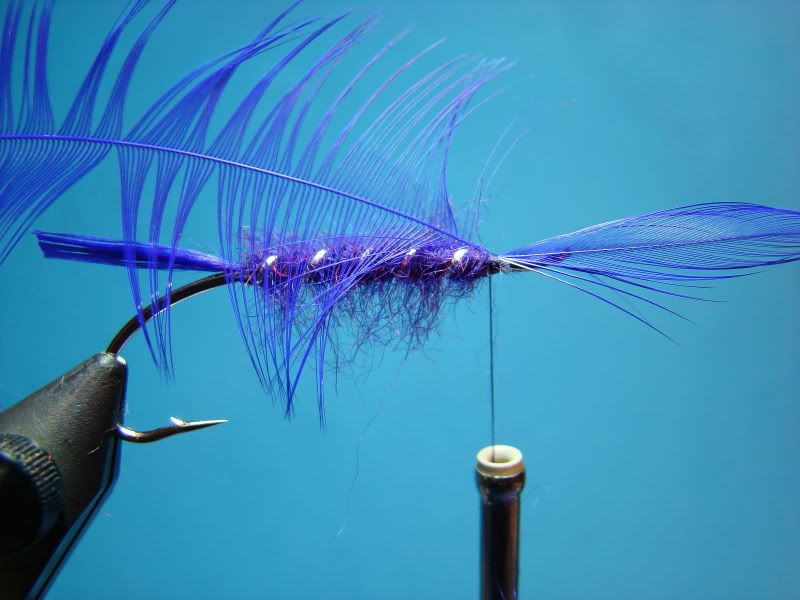

Step 6:

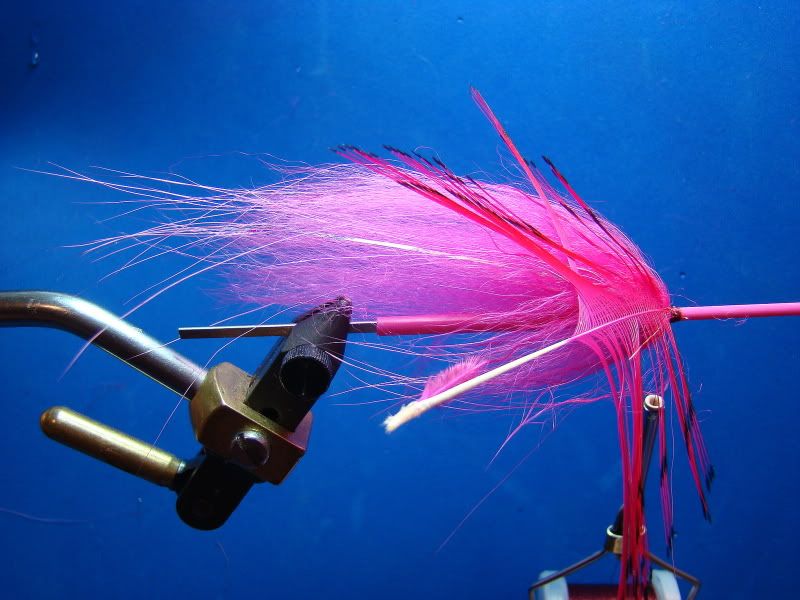
Tie in and lock brown hen hackle.  Length of hackle should extend just to the hook point or a little past it.


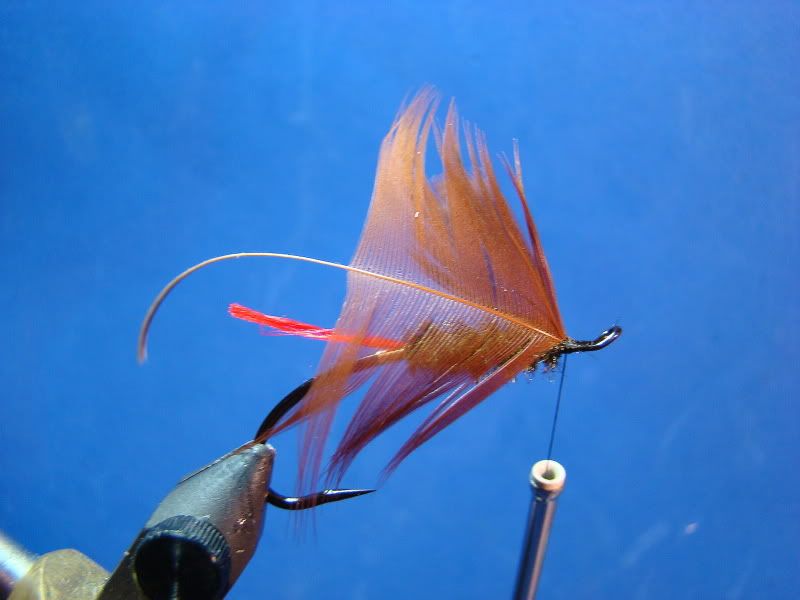
Take 2 or 3 turns of hackle.
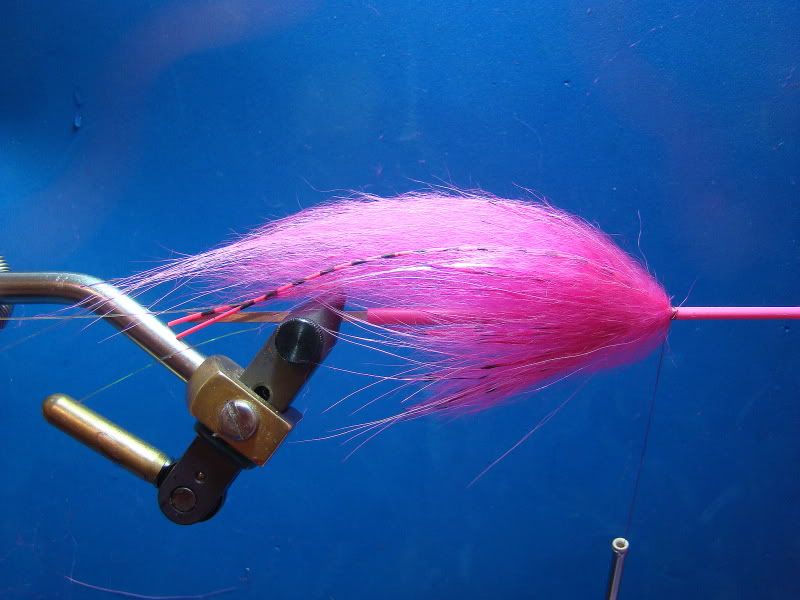
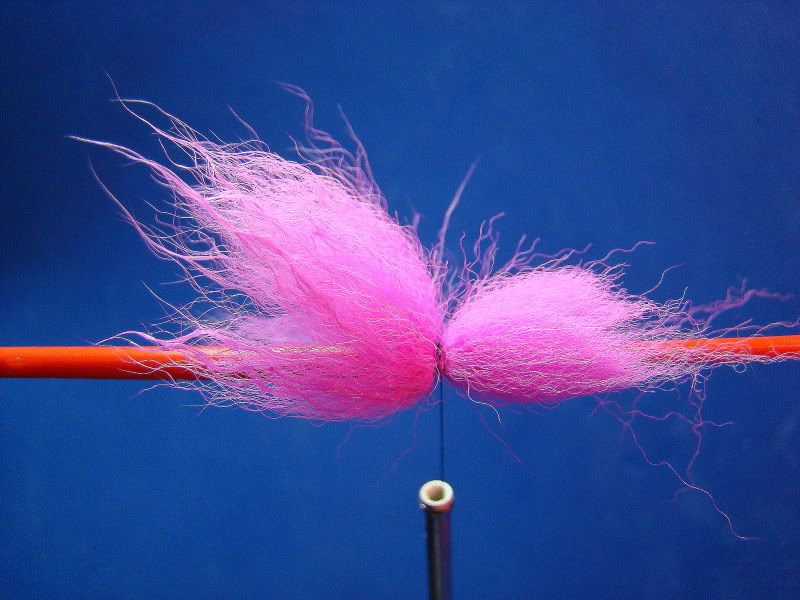
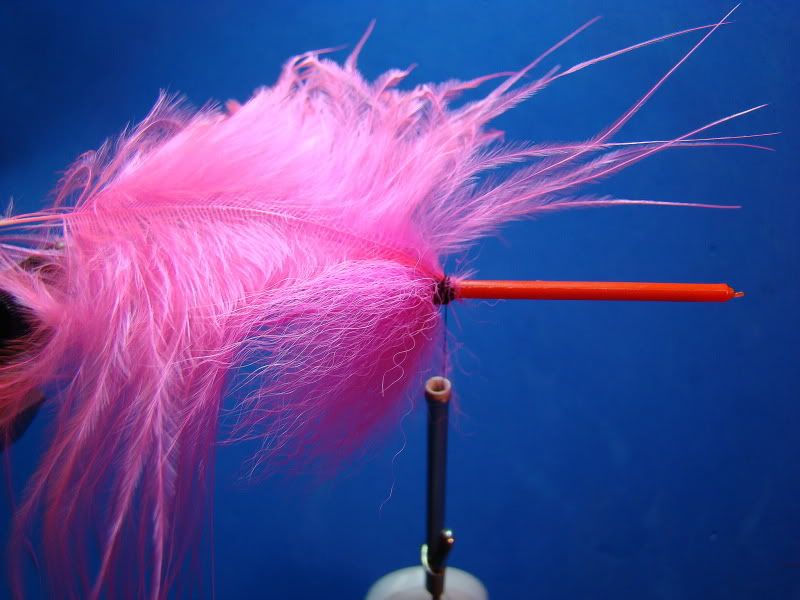
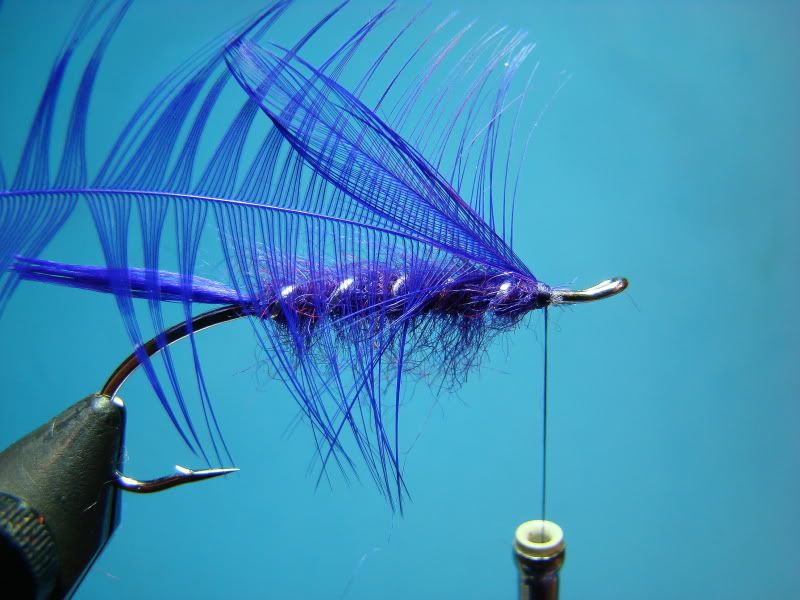
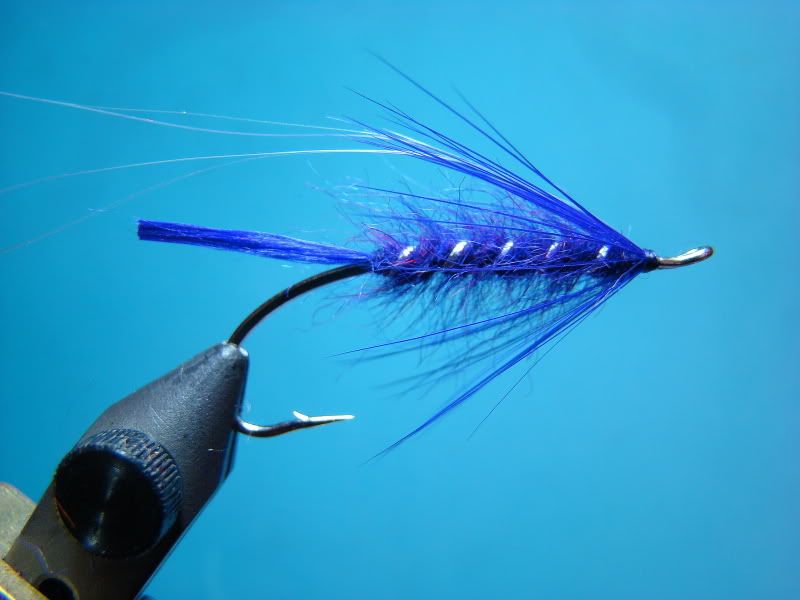

Step 7:

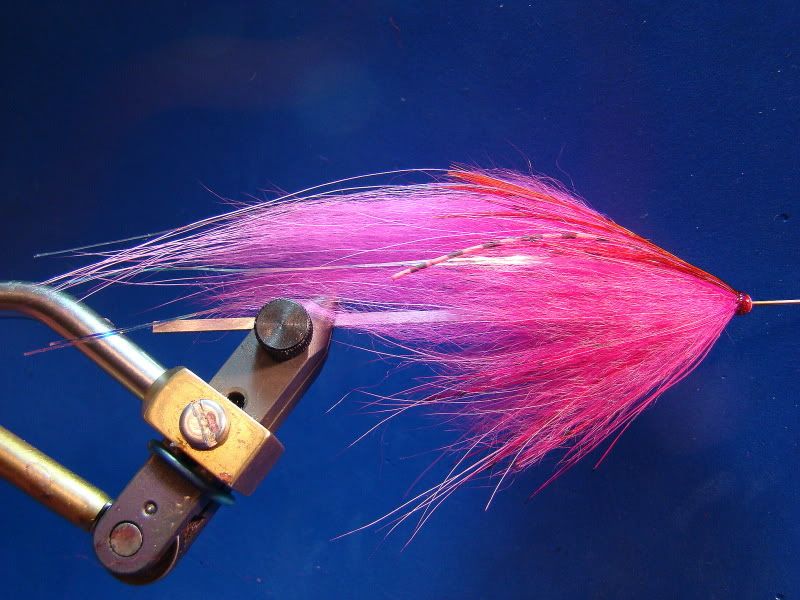
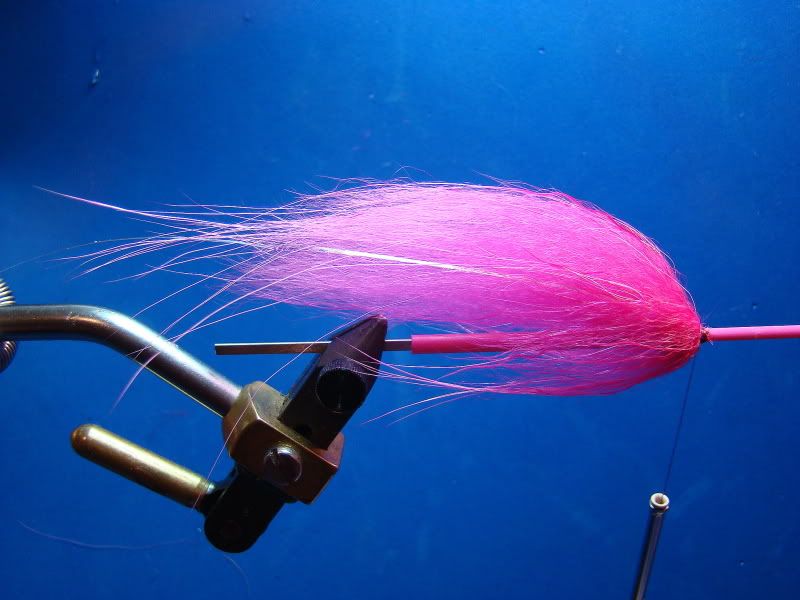
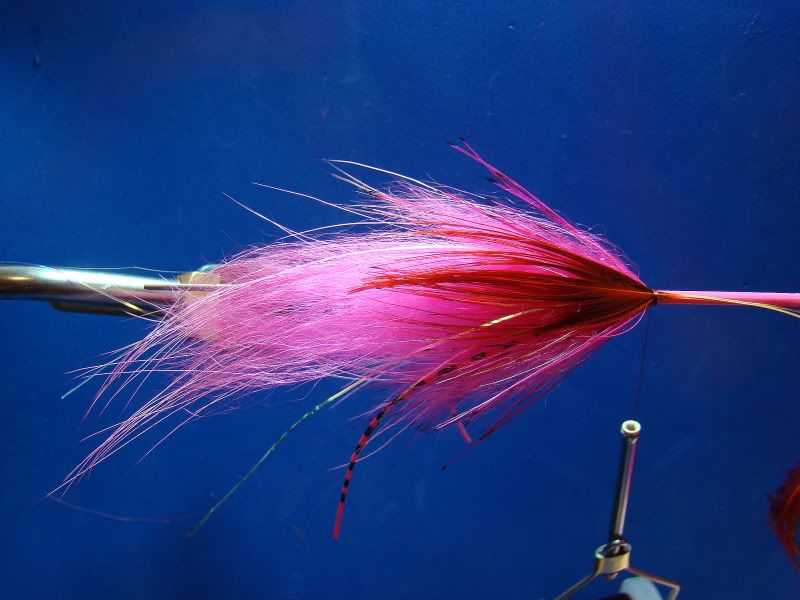
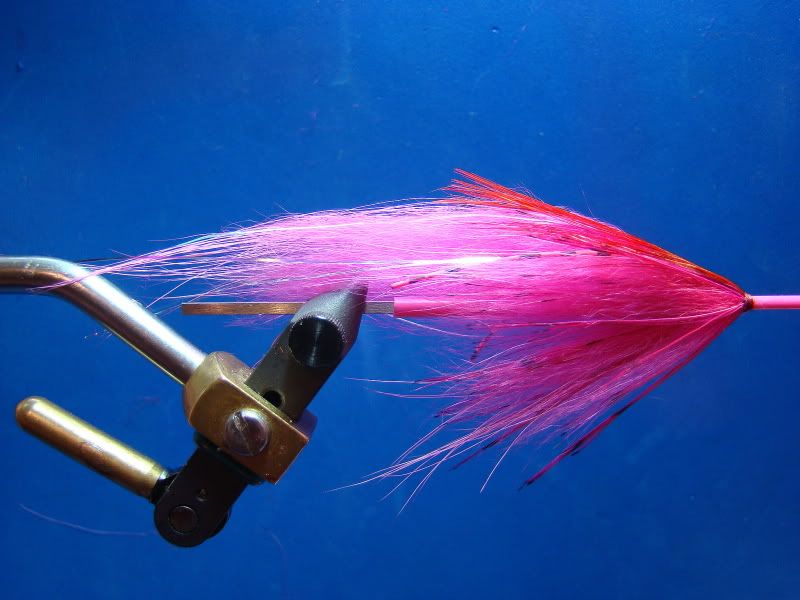
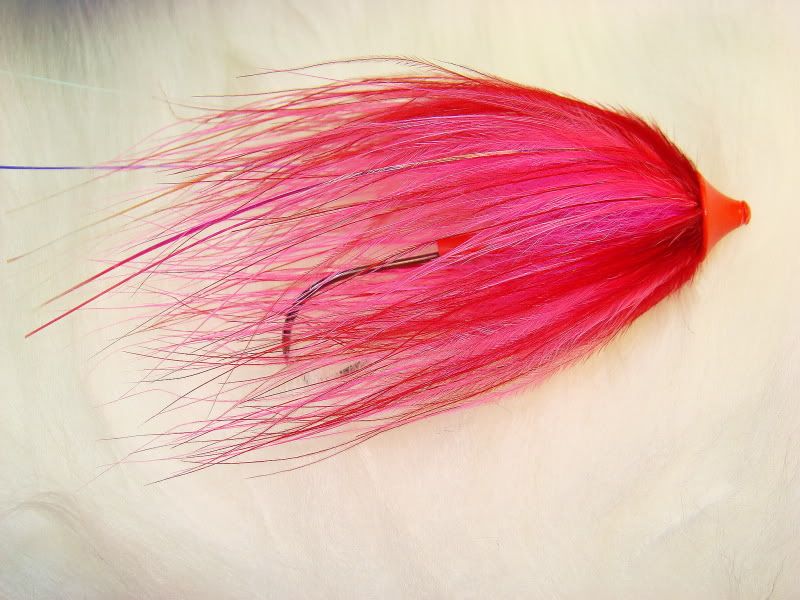
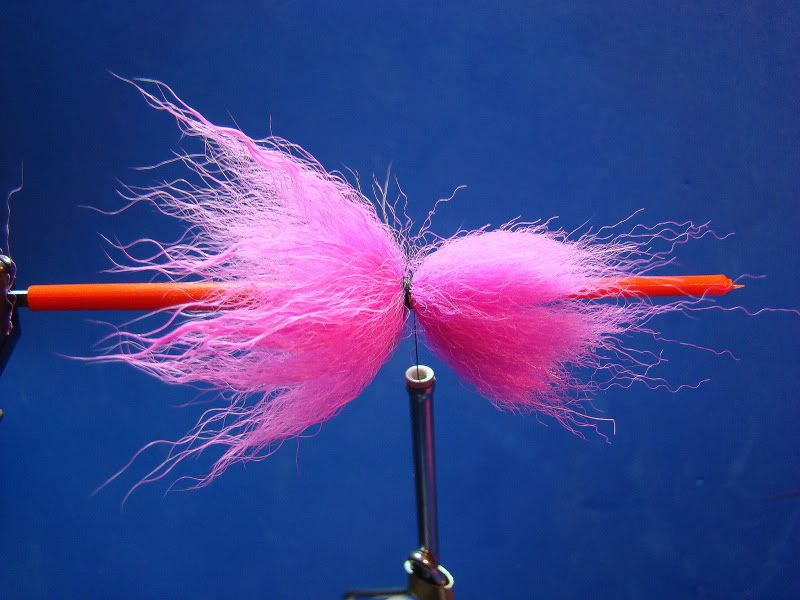
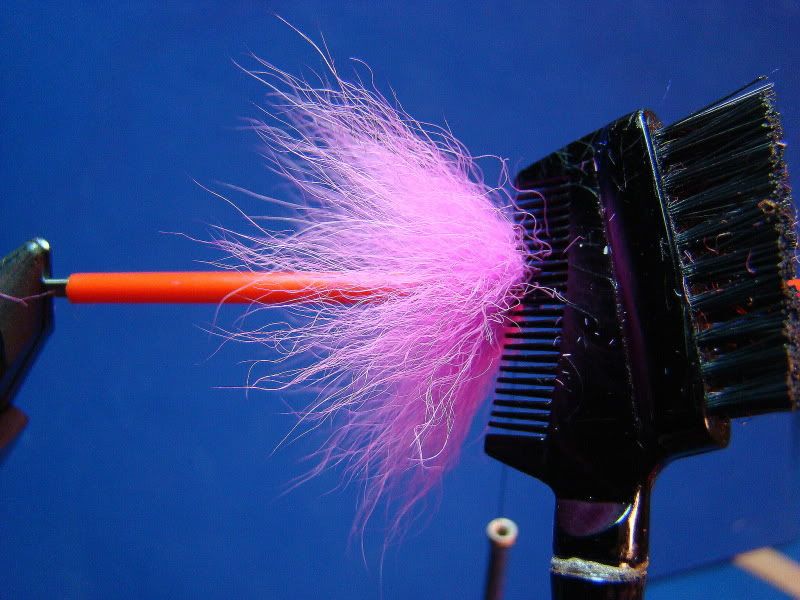
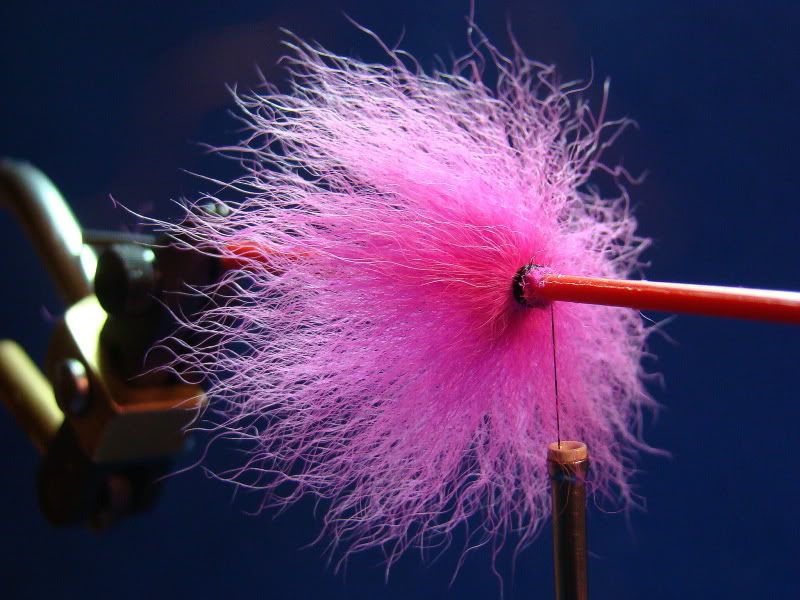
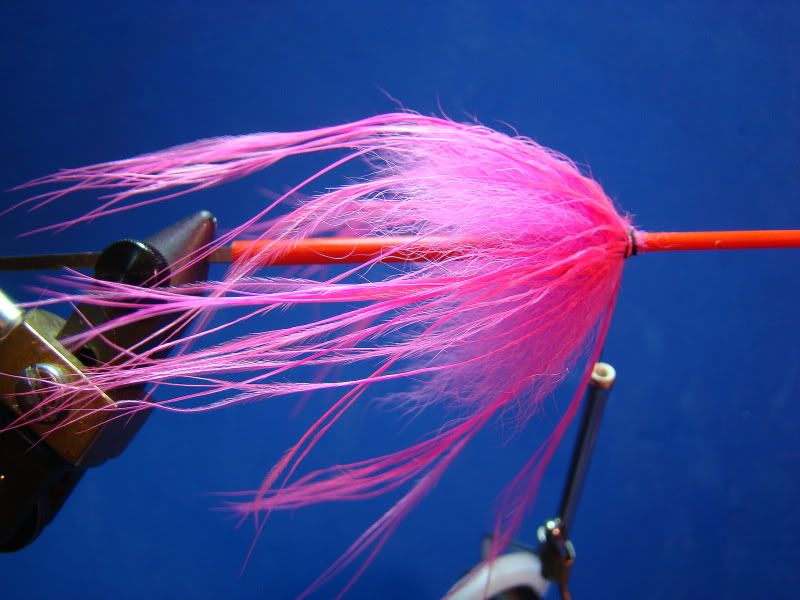
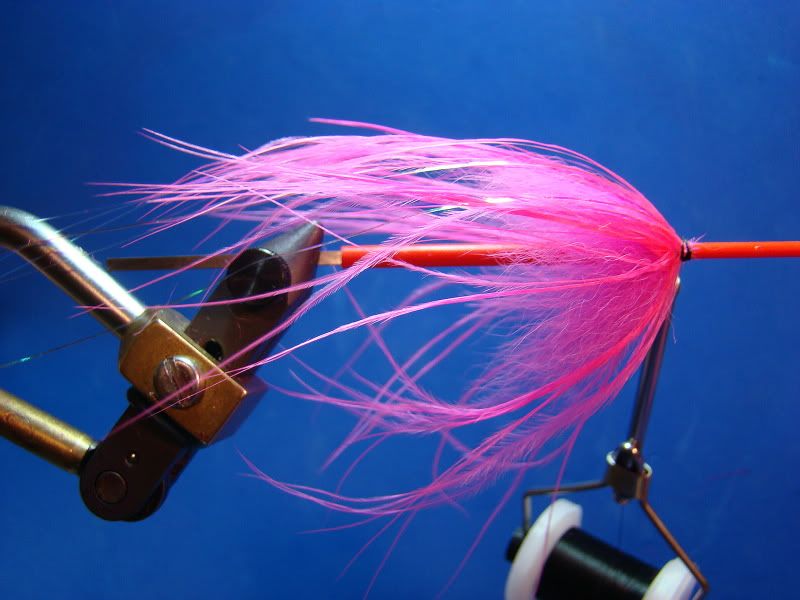
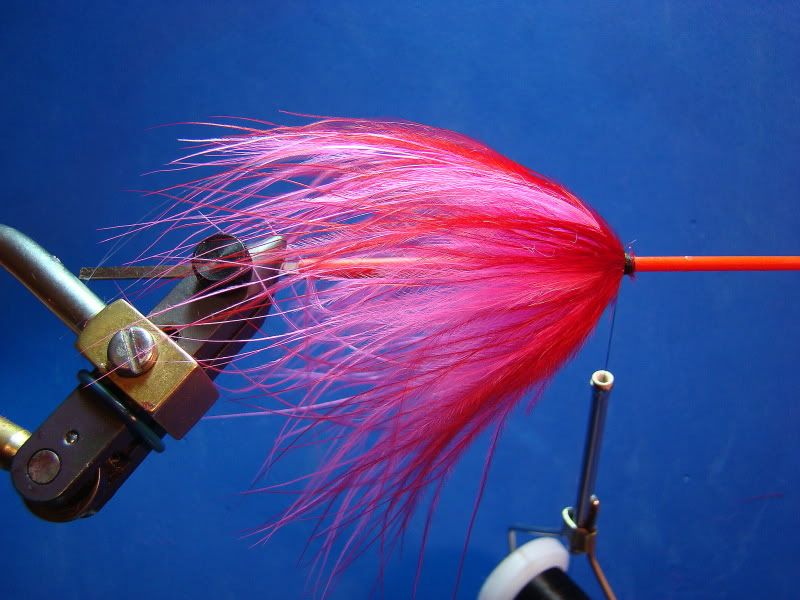
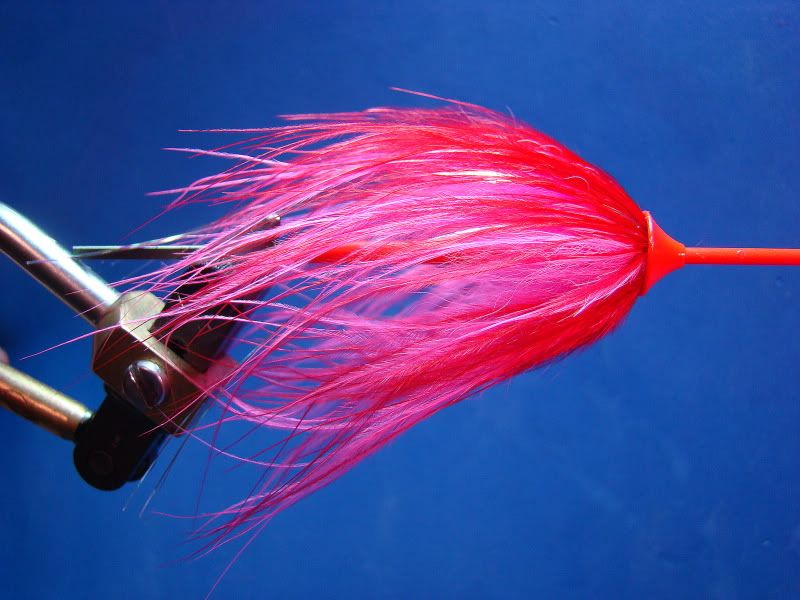
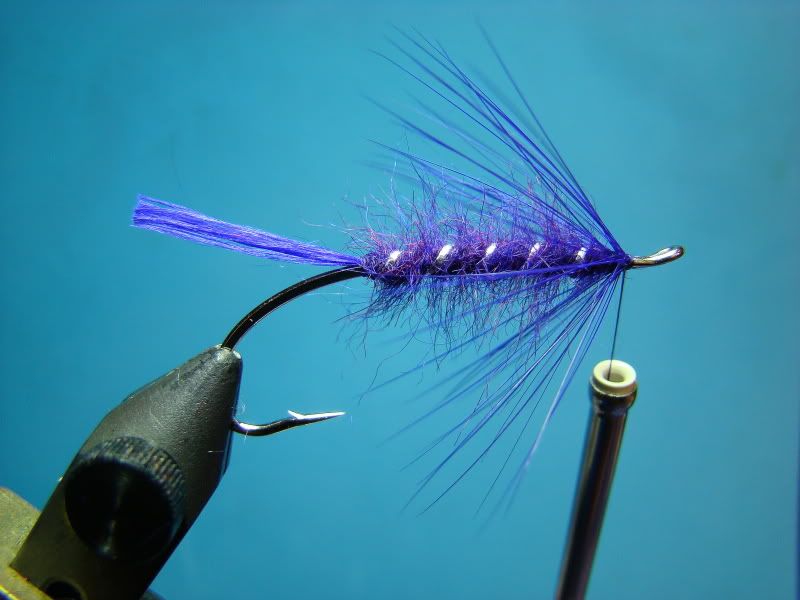
Tie in wing.  Length extends to the bend or slightly past it.  Apply two coats of thin head cement and one "finisher."


I am sure someone is going to ask.... "Where did you come across the Australian sheep?  I am very fortunate to work in the auto industry.  Some time ago I received and call from a lady that wanted to come to our dealership and take measurements of seats in the new Honda Pilot for seat covers.  I simply asked if there was any scraps laying around...  the rest is history!  The stuff is some of the most "wispy" winging material I have ever used.  It can be a wee bit of the pain to tie because of it's fine nature, but it moves in the water.  I use it mainly on smaller size 5 and 7 flies.

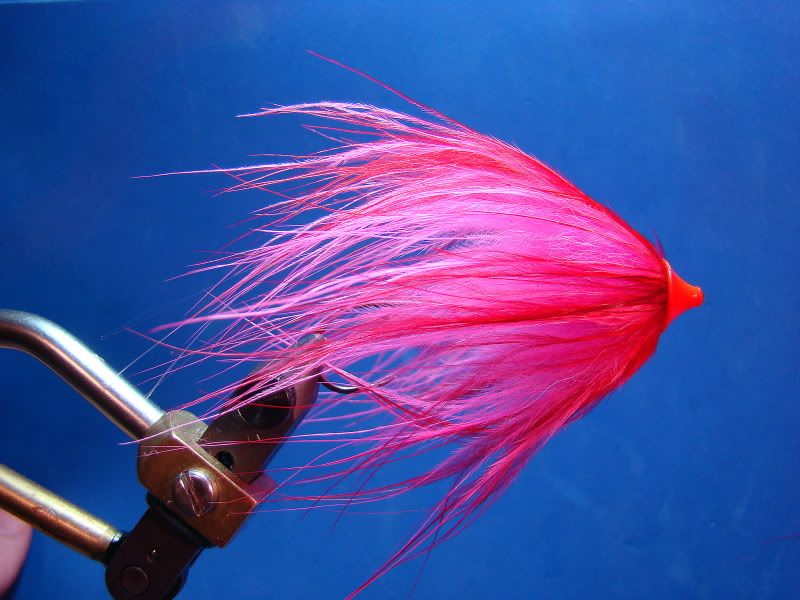
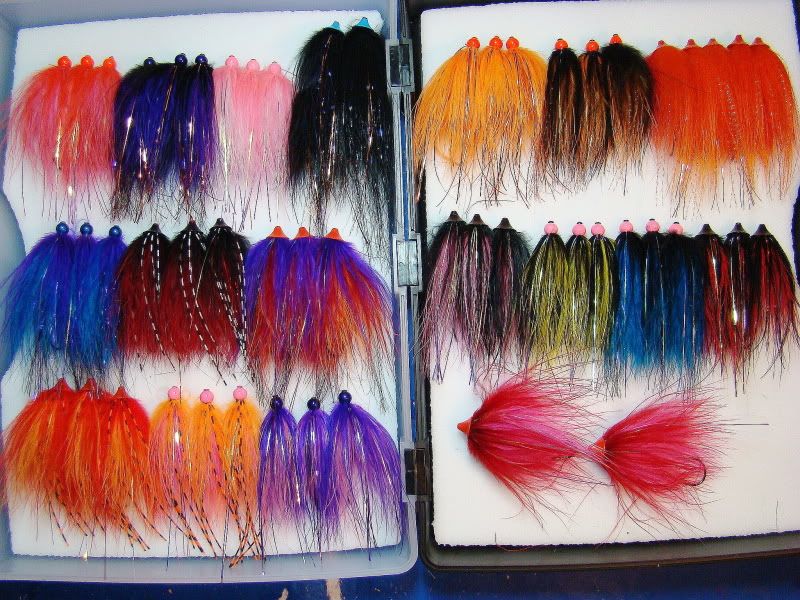
Next month I will be showcasing some saltwater flies for our Northwest waters!  Many of the flies are of my own design.  From salmon to searun cutthroat, I am sure you will enjoy reading the blog.  In fact, I hope you tie and fish them!

See you on the water!


Sunday, January 22, 2012

Simple Prawn Tube Fly

I was unpacking materials after yesterday's tying demo at the Gig Harbor Fly Shop and noticed a small piece of pink finn raccoon zonker strip in my hand.  Not only did this prompt me to start getting "a list of things I need" going, but I thought, "What in the hell am I going to do with this little strip?"  Normally, I would have utlized it for winging material, but I have plenty of flies with pink wings already.   What to do?

My gear friends do very well on large, late winter Olympic Peninsula steelhead using pink worms; which sparked me to tie up a simple leech pattern instead of using rabbit strips.  After I tied the first collar in I saw more prawn features than leech and went with the thought. 

There's a lot of potential in this style.  I am going to tinker with this idea some more.   Do you think she'll hunt just fine like this?  

I'll keep you folks posted.

Materials

Tube:  Choice  (I am tying on a Pro Tubefly System's Large 40/40mm)
Thread: 6/0 Euro thread.  Color to match.
Tail:  Finn raccoon zonker strip with two strands of Mirage Flashabou tied in at the sides.
Body:  The body is tied in two segments.  First a collar of finn raccoon spun in a dubbing loop, followed by a few turns of longer pheasant tippets.  Rubbers legs were then tied in.  The collar and tippets steps are repeated.  Four strands of Mirage Flashabou were next, then finished with two golden pheasant flanks feather tied low over the body.
Wing:  Two golden pheasant flank feather tied low over the body
Step 1:

Firmly place tube on needle (or mandrel).  Add weigthed saucer or drop weight on tube.  Secure weight in place with turns of thread.  Cut a half inch to three quarters inch piece of finn raccoon from zonker strip.  Tie in place with firm wraps.  Tie in two strand of Mirage Flashabou on wach side of the tail.  Place a drop or two of thin cement on wraps.


Step 2:

Form a dubbing loop and heavily wax thread.  Cut approximately 1-inch of finn raccoon from the hide/strip.  Place in dubbing loop and spread the fur out covering approximately 2-inches of thread/loop.  The end of the guard hairs should extend to approximately two-thirds length of the tail.  Cut the butt section close to the thread.  Spin and form a "hair chenille."   I would recommend wetting your fingers, stroking the hair towards the rear of the tube while wraping.


Step 3:

Tie in a rather large golden pheasant tippet feater by the tip and wind forward.


Wrap forward.


Step 4:

Tie in rubber leg material.    Trim excess however, do not cut to length yet.


Step 5:

Repeat steps 2 and 3.


Collar wrapped.


Golden pheasant tippets completed.  Add four long strands of Mirage flashabou. 


Step 6:

Select two golden pheasant flank feathers.  Stack feather on top of one another and tie in low to the body.  Whip finish.

(Top view)


Step 7:

Cut rubber legs even with the end (rear portion) of the tube.  Cut Mirage Flashabou to the end of the tail's guard hairs.


Step 8:

Remove tube from needle (or mandrel).  Cut front portion of the tube close to the head.  Leave approximately 1/16 of an inch.  With a lighter use the blue portion of the flame to melt (roll) the end of the tube.

Cut approximately 1/2-inch from the rear portion of the tube.  Apply two coats of thin penetrating cement to the head followed by one "finishing" coat.


Rigged with hook.


Friday, January 20, 2012

Marabou Tube Fly

If you needed a box full of winter steelhead patterns tied in a hurry, look no further than tying marabou tube flies- simplicity at it's best.  Marabou is readily available, reasonably priced, and comes dyed in numerous colors.  Once used for wings and tails, marabou is now used in host of tying techniques, including spey flies.   When incorporated with various synthetics and materials, these flies are some of the most aesthetically pleasing creations in a steelhead fly box.   What's more important than a box full of steelhead eye candy?  Answer: marabou's effectiveness at catching the fish's attention; which, is nothing short of outstanding!

Materials

Tube:  Choice (I am using Pro Tubefly System's Large 40/40mm)
Thread: 6/0
Shoulder:  Weighted nickle plated saucer (www.speyco.net) Drops weights are available from Pro Tubefly Systems.  Additional shoulder material is underfur from arctic fox.  Color should be same as first color of marabou.  However, some interesting color combinations have been devised with different shoulder colors.
Collar:  One or more color(s) of marabou wrapped by tip.  Additional facing collars of guinea and/or hackle may be added. Various colors of grizzly saddle hackles, ostrich, or small rubber leg material may be tied over the body for a different action and look.  The sky is the limit!

Step 1:

Firmly insert tube on needle then add saucer or drop weight.  If these are unavailable, a shouldler of dubbing or chenille should be built up into a ball.


Step 2:

Lock saucer or drop weight in place with a wraps of threads.  Place a drop or two of this head cement over wraps.


Step 3:

Cut a small "bunch" of arctic fox from the tail.  Remove all guard hairs and slightly thin out underfur with comb.  Place underfur over the upper half of the tube and make a couple wraps of threads.  Ensure underfur is spread 180-degrees on the top of the tube.  Make couple of firm wraps to secure underfur in place.  You can also dampen the fur with wet finger tips to manage hair.


Turn the tube tube over and repeat.


Cut away the butt section of the underfur.  Add a drop or two of thin head cement.  Comb hair out ensuring 360-degree coverage.


You should have this appearance.  The shoulder area keeps the marabou for collapsing around the tube and provides a large silhouette.


Step 4:

Tie the first color of marabou in by the tip and lock in place by bringing the tip back over the shoulder.


Slightly dampen marabou with finger tips.  This will manage the fibers while wrapping.. Make three to five wraps around the tube and secure.


Step 5:

Tie in 3 to 5 strands of favorite flash material and lock in place.  Mirage Flashabou is pictured.


Step 6:

Repeat step four with facing color of marabou.  Once marabou is secured, tie in and lock a few more strand of flash material.  Apply a drop or two of thin head cement. 

Now would be a good time to mention bulk.  I would recommend no more than a total of eight wraps of marabou regardless of the number of colors used (some will advocate even less).  This will ensure the fibers breath and do not mat together when wet.  If the marabou fibers are a little fuller when dry (before tying), lessen the amount of turns. 


Step 7:

Place a cone or bead over the tube and firmly push in position.


Step 8:

Remove tube from the needle.  Cut excess front tubing with a razor blade.  Leave approximately 1/16" (3mm) to the cone or bead.  With a lighter's blue portion of the flame, melt (roll) back the tube.  This will lock the cone or bead to the tube.  Depending on the length of the marabou you may also cut away a portion of the aft tube section.


Instead of buying expensive fly boxes specifically designed for tube flies that only hold a few flies, I find the larger slotted foam boxes more than adequate to store a large quanity.  Simply add a hook to a tube and insert.  These large boxes fit perfectly in to a back pack.  

Color combinations are endless!  Have fun, get creative, and hit the water!


The pink and red marabou tube tied step by step for the blog.


Thursday, January 19, 2012

The Street Walker

I definitely picked a good day to stay home- approximately 10-inches of snow dumped on Gig Harbor last night!   It would be a great day to be on the water chasing winter steel, but it is a better day to stay off the roads and daydream about the warmth summer instead.   Better check the summer fly boxes and see what needs to be replenished...

The Street Walker is a simple, unassuming pattern from Gordon Nash that continually accounts for many steelhead each year.   Nash devised this pattern for Oregon's Deschutes River where it remains a staple. 

The original Street Walker was tied on a nickle plated hook (Eagle Claw 1197N).  Nash felt the nickle plating coupled with the Flashabou wing made the pattern a better "attactor."   Although strongly considered a summer pattern, don't underestimate the fly's effectiveness in the cold and clear water of winter where a slow presentation is required.

I wouldn't want to be on the Kalama River without a few Street Walker's in my box.  Purple seems to be a summer prerequisite on this beautiful river.

Materials

Hook:  Choice (Nickle plated Alec Jackson #5 pictured)
Thread:  6/0 red, wine, black, or purple.  (6/0 purple is pictured)
Tail:  Purple silk floss (Originally purple hackle fibers)
Ribbing:  Medium oval silver Lagartun
Body:  Purple dubbing (Originally purple chenille) (Pictured is a custom mixture of 60-percent purple arctic fox under fur, 20-percent chopped purple Antron, and 20-percent chopped red Antron.
Hackle:  Purple hackle fibers (I used chinese rooster) (Purple rabbit can be substuted)
Wing:  Mirage Flashabou

Step 1:

Start thread just behind the eye.  Tie in floss and wrap/secure thread down the hook shank.  Stopping point is equal vertically to the hook point.  Cut tail slightly longer than normal.


Step 2:

Tie in tinsel and secure with firm thread wraps.


Step 3:

Dub body using standard dubbing technique.


Pick out dubbing for a "buggy" appearance.  I use velcro on a popsicle stick to roughen up the dubbing.


Step 4:

Rib body with five firm yet even and incremental turns of tinsel.


Pick out or roughen up the dubbing again. 


Step 5:

Select a chinese rooster feather with a thin stem and tie in by the tip with two turns of thread.  The length of hackle is a personal choice, but should look proportionate to the overall fly.  Anywhere between three quarters of the body length to the hook point is sufficient.  Double hackle fibers and take two to four turns.


To aid in tying a small head, secure the hackle with two turns of thread forward then fold stem to the rear and lock it in place with two more turns.  Trim tip.


Take 2 to 4 turns of hackle. 


To secure feather utilize the same as the tie in- two wraps to pinch the feather against the hook shank, fold feather back, and take two more turns of thread.  Note in the picture above how little bulk there is after cutting the feather.

Step 6:

Take 3 to 5 strands of Mirage Flashabou and slightly wet them.  This will help manage the strands during this step.  Secure strands under a wrap of thread by taking the strands under the shank and bringing them over the top (The floss technique on the Green Butt Purple Peril.).  Once strands are in place take one firm turn of thread over of the strands behind the first wrap.  While still holding the bobbin tightly bring the strands back over the body and take two turns forward.  Next, whip finish with four turns wrapping to the rear.  Trim thread.  You will have a nice, neat, and small head.
Slightly pull wing over back and cut to length o the hook bend.


Step 7:

Apply two coats of thin penetrating head cement and one coat of "finisher."   It is important to allow each coat of thin cement to dry before apply the final coat.


I bet you'll catch a fish with this pattern, but you have to tie a few and get them wet! 

Hope to see you on the water.  If not, you can always find me on Facebook- "The Benchside Fly Tyer."