 Ponder this question for a moment. Are there any other patterns that has enjoyed the success of the Royal Coachman? In one form or another the Royal Coachman has been tied and fished for nearly a century and two score! Simply amazing. The pattern is synonymous with fly fishing. It was certainly one of the first patterns I caught trout on. How about you?
The first Royal Coachman was tied by professional fly dresser John Haily in 1878. The abbreviated story is told that a gentleman ask Haily to tie extra strong Coachmen. Hailey in turn added a band of red silk to the peacock to keep the body from fraying and added barred woodduck for the tail. A sample of the fly was sent to the Orvis family. A few evenings later they were "disputing the fly question." One of the present party members said: "What can you do? Here is a fly intended to be a Coachman, yet it is not the true Coachman; it is quite unlike it, and what can you call it?" Mr. L. C. Orvis, brother of Mr. Charles Orvis, who was present, said: "Oh, that is easy enough; call it the Royal Coachman, it is so finely dressed!" (1)
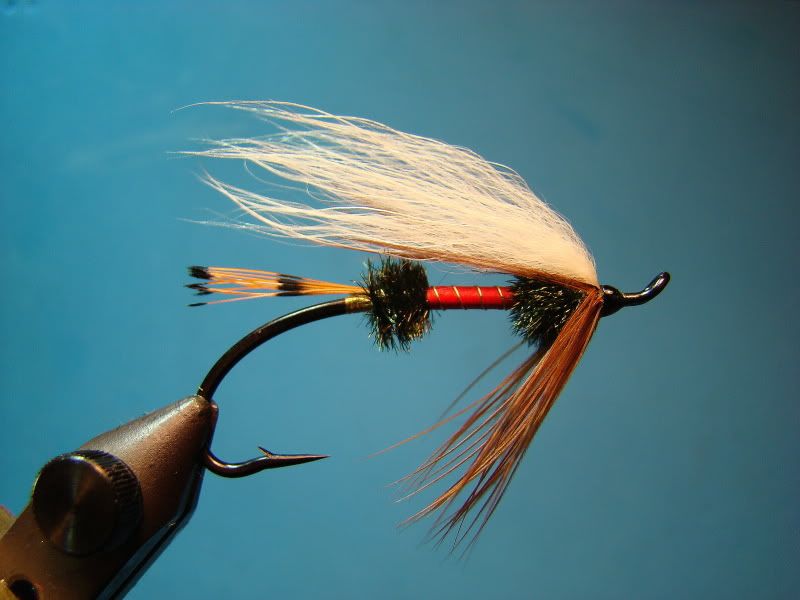
Something magical happens when flies are tied and fished with peacock incorporated into the pattern. They are amazingly beautiful to the human eye and hypnotize fish when wet. If you take a look at a lot of trout flies that have endured the test of time many incorporate peacock. There is even a well known pattern that almost became banned due to it's success- the Alexandra. Let's tie a steelhead fly which possesses both elegance and grace, the Royal Coachman steelhead style!
Materials
Hook: Choice (Pictured is an Alec Jackson Steelhead Iron)
Thread: White UTC 140 and Black 6/0 Euro thread
Tag: (Optional) Small flat gold Lagartun
Tail: Golden pheasant tippet fiber
Ribbing: (Optional) Fine gold wire
Body: Peacock herl and red silk floss
Hackle: Coachman brown hen hackle
Wing: Finn raccoon under fur with shorter guard hairs
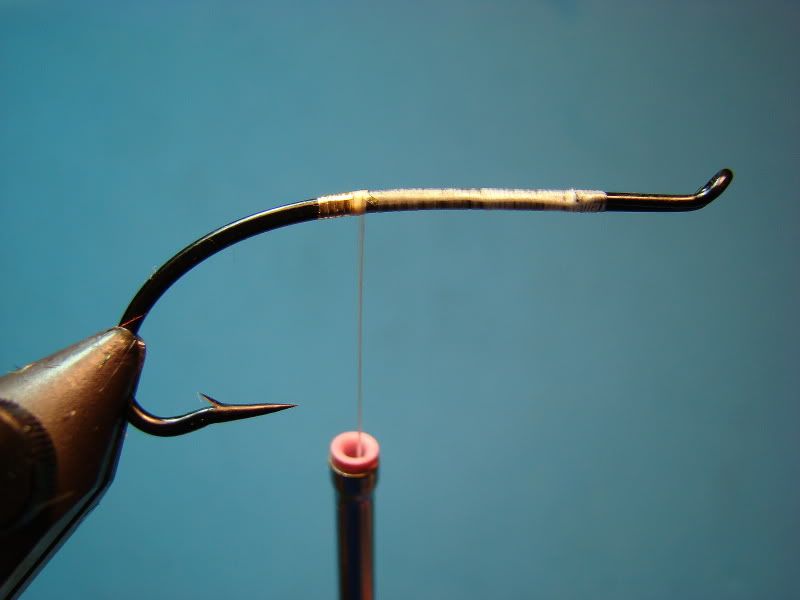
Step 1:
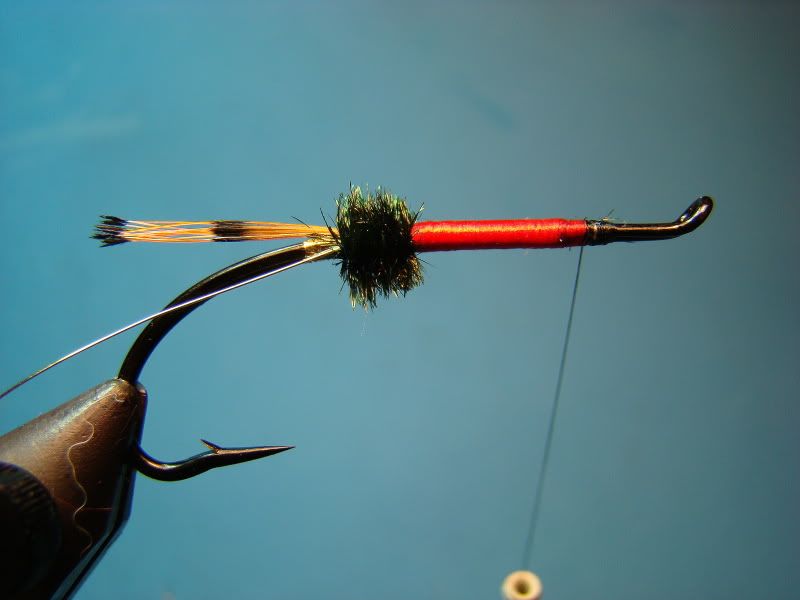
Start thread just behind the eye to close returning wire loop. Flatten thread and wrap back just forward of the hook point- room enough for a tag. Wrap a tag (3 to 5 turns) of small flat gold tinsel. The end of the tag should be aligned vertically with the hook point. Be sure to keep all thread wraps flat for the next few steps.
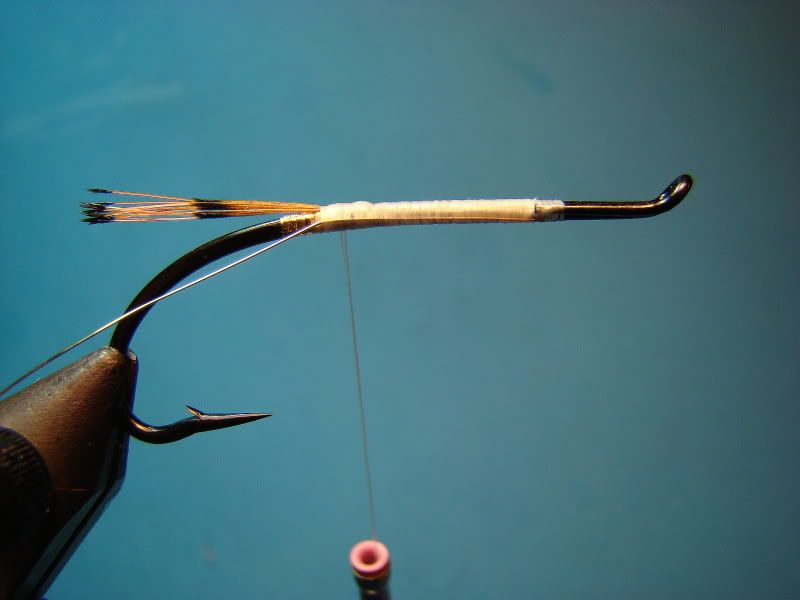
Step 2:
Select a golden pheasant tippet feather appropriate for the hook size. You'll want a feather that will measure proportionately from the tie in point to the end of the fibers. (Notice the picture below. The middle black bar segment is in equal increments for and to the tie in point to the end of the fibers. This is one sign of a well porportioned fly.) In order to get equal coloration of orange on both sides of the tail clip the center section of the stem away. You should have a "V" appearance on the rest of the feather. The next step will be leaving the first 5 fibers on each side of the stem and removing the excess below these fibers away. Then carefully fold over one side of the fibers directly over the top of the other side. Then simply stripe the fibers from the stem and tie in. Wrap thread forward keeping thread flat. Additionally, remember those professional looking porportions for the tail.

Step 3:
Tie in fine gold wire. The tie point is directly behind (if not slighty touching) the point of the return wire loop. Normally the ribbing would be tied in on the far side of the hook, but because we are going to counterwrap the ribbing it is tied in on the near side. Wind close flat thread wrap back to the tag area. There will be a slight hump, but don't worry, this will be covered by a section of peacock herl.
Step 4:
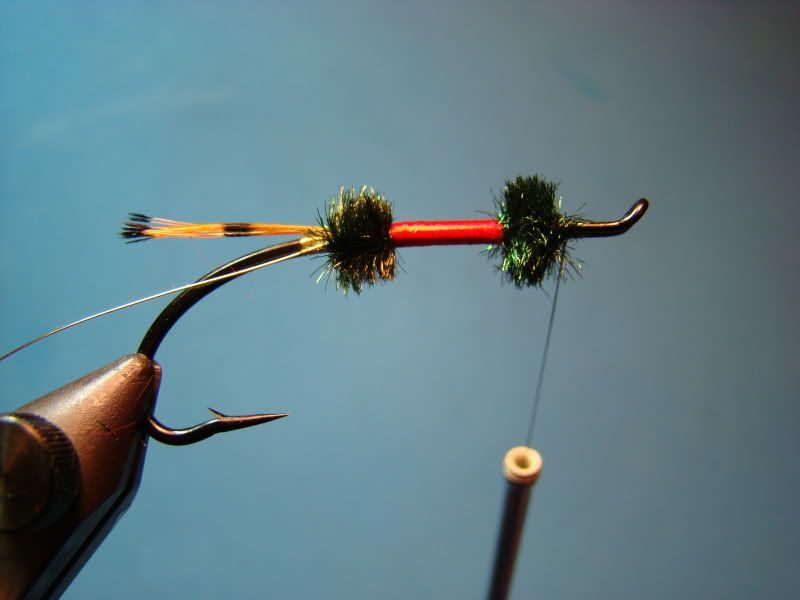
Select two "juicy" herls close to the eye. Herl just below the eye is where you can find the thickest and strongest stems. Clip away about an inch from the butt setion. This is where the herl starts to soften yet is still quite strong. Tie in by the butts.

Most tyers prefer to place the herl in a dubbing loop at this point. This will definitely make the herl segments stronger, but we are going to counterwrap the entire body with fine gold wire saving a little time.
Wrap herl clockwise (over to under) and form a section (or ball). While I haven't seen anything specific on the body porportions for a Royal Coachman, I like to keep it as close to 25/50/25. In other words, 25-percent of the body is peacock herl, 50-percent is red silk, and the remaining 25-percent is peacock herl. You'll have to "eyeball" these porportions while completing the body section.
Another note to keep in mind is you should have two turns of ribbing through each "peacock ball."
Secure the herl with flat wraps of thread forward to the returning wire loop. This will keep the "red band" section flat for the floss. Flat and clean wraps of floss is yet another sign of a well tied fly.

Tie in red floss. Once floss is tied in secure change over to black thread. The black thread can be used to secure the white thread.
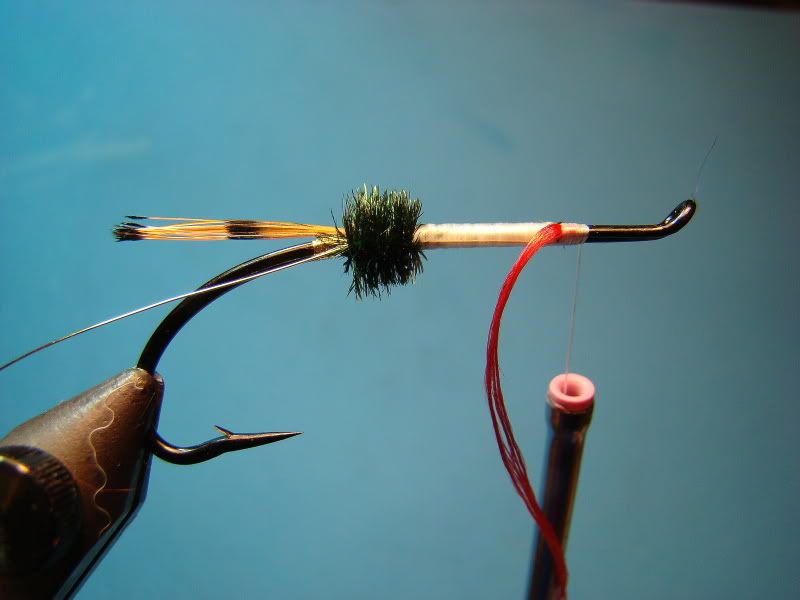
Wrap floss in slightly firm yet flat wraps. You should have very little overlapping. Notice center section is flat and clean looking.
Tie in and complete forward section of peacock herl like the rear section.
Step 5:
Bring the ribbing forward by counterwrapping in even increments. Ideally you get two complete turns over each peacock herl ball. This will securely lock it in place.
Step 6:
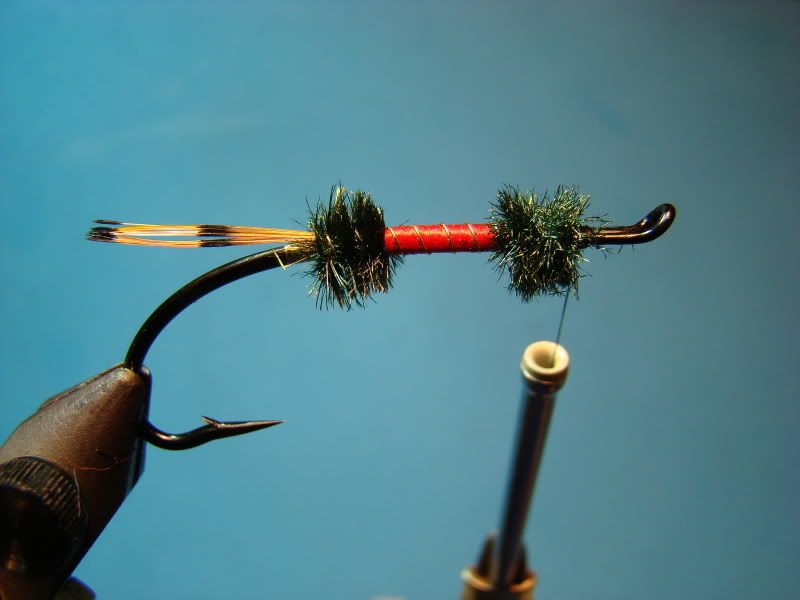
Select a coachman brown hen hackle. (Substitute a normal brown hackle if needed. The fish don't care!) The hackle fibers should extend just forward of the hook point. Tie in by the tip, fold, or double the hackle fibers, and take 2 or 3 turns. Notice I have secure the hackle with minimal thread wraps. This is the foundation of a small head.
Step 7:
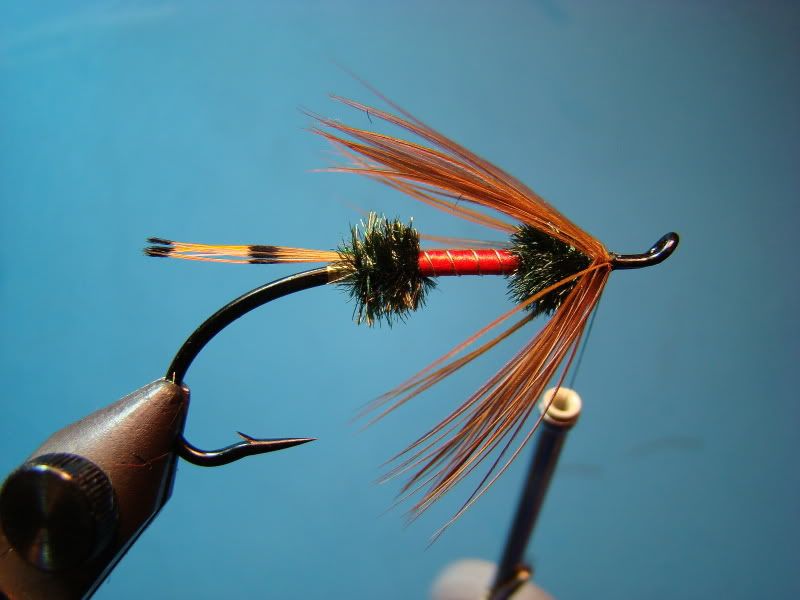
Cut a small portion of finn raccoon from the hide. Remove the longer guard hairs. Cut butt section to appropriate length and secure. Finish wrapping head with minimal thread wraps. Apply two coats of very thin head cement followed by one coat of "finisher (thicker cement)."
The million dollar question... Would you fish this fly?
End note:
(1) Taken from Mary Orvis Marbury's, Favorite Flies and Their Histories (1892)
No comments:
Post a Comment