 The first of the popular "demon" patterns first came to the steelheading world in the early 1930's when Zane Grey returned with the Golden Demon from a trip to New Zealand. He introduced the pattern to steelhead on Oregon's Rogue River. The rest, shall we say, is history...
In researching this pattern for the blog I couldn't find a single reference other than the pattern recipe in Trey Combs, Steelhead Fly Fishing and Flies, 1976. Is it possible or even safe to assume that the Copper Demon came to fruition around the same time as C. Jim Pray's Black Demon and Silver Demon (circa 1935)? In fact, I couldn't even find the originator's name to give credit to one of my favorite flies! (If any of my reader's happen to know or could point me in the correct direction I would be forever grateful.)
I am continuing with a few more hairwing patterns this month. Not only are these patterns beautiful, easy and quick to tie, but they offer a look at the past - something I feel most of us shouldn't forget - tradition! Above all, hairwings are still effective- as long as you have confidence in fishing with them.
The Copper Demon has been one of my most productive flies, and it is another pattern that falls under my "Top 10." It produces superbly in the fall and winter when the water has a slight amount of color and when all other patterns fail. I especially like to fish the Copper Demon behind someone in the run. It never seems to.
Materials
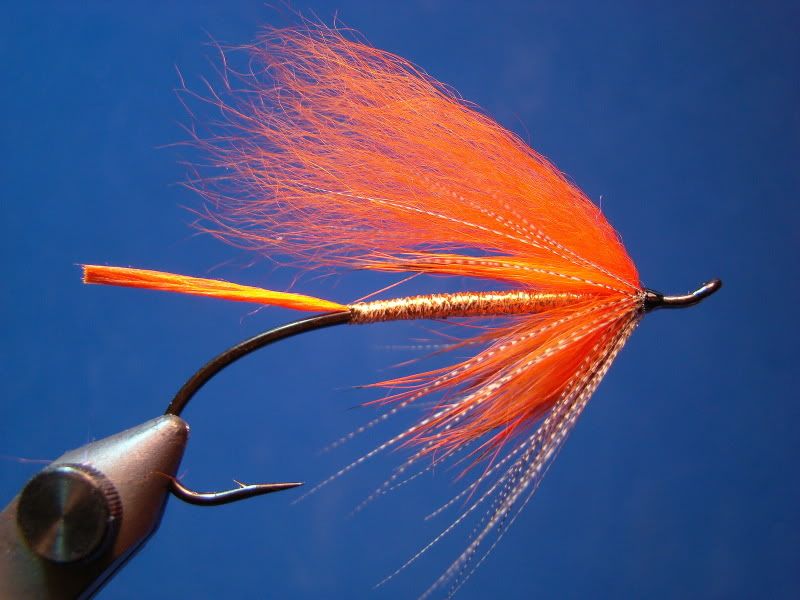
Hook: Choice (picutred is an Alec Jackson)
Thread: Black 6/0 Euro thread
Tail: Orange floss (originally a tuft of hot orange marabou)
Body: Copper diamond braid (originally copper tinsel)
Hackle: Orange/black Jailhouse rabbit followed by two turns of bronze mallard (originally hot orange hackle)
Wing: Hot orange finn raccoon underfur (Originally hot orange polar bear)
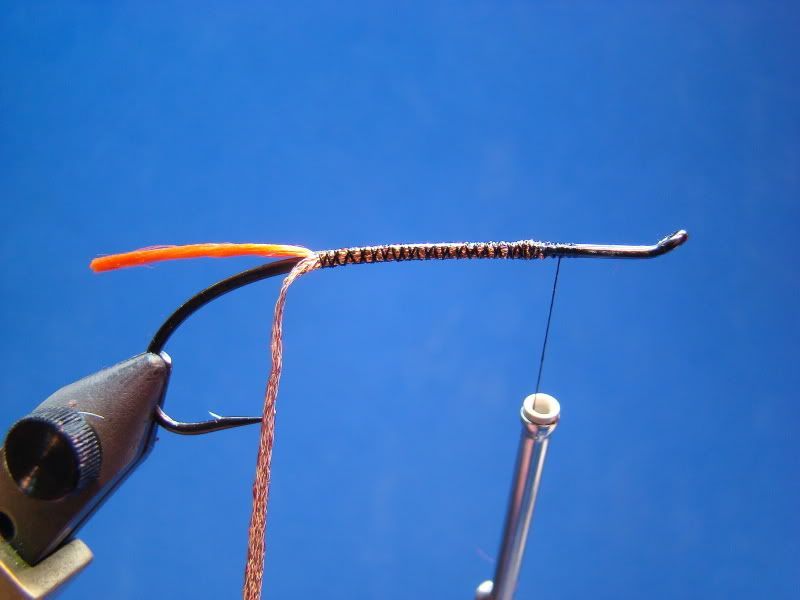
Step 1:
Place hook in vise and start thread just behind the eye. Tie in orange floss and make firm thread wraps back towards the hook bend. Once thread is even with the hook point wind thread back to starting point. Cut floss. I like to make floss tails a slightly longer than normal.

Step 2:
Tie in copper daimond braid just behind the point of the return loop. Make firm wraps to secure the braid as you did for the floss tail. Once secure, cover the wraps of thread with a nice coat of head cement.
Step 3:
Once the head cement becomes slighty tacky wrap diamond braid forward. The head cement will penetrate the braid and reinforce it to keep it from unravelling after a fish. Additionally, I have wrapped a slight taper to the body by keeping the diamond braid flat during the wrapping process. While keeping the braid flat the rear wraps are made as close as possible to the previous. As the wraps are continued forward up the hook shank, wraps are then made overlapping the previous wraps with greater overlapping of material the closer to the eye.

Step 4:
Form a dubbing loop and spin rabbit into a chenille-like material. Take 3 to 4 turns of rabbit around the shank and secure. The overall length of the rabbit should be just shorter than the body.

Step 5:
Tie in bronze mallard by the tip.

Fold bronze mallard over and take two wraps. I like the length of the bronze mallard to extent to the hook point or slightly longer.

Step 6:
Cut a small amount of orange finn raccoon from the hide and remove all guard hairs. A small amount goes a long ways! Tie in and secure. Apply a couple coats of head cement.
I really like finn raccoon underfur. It slims down wonderfully and moves like nothing else! Couple this with the floss tail and rabbit collar you have one great steelhead fly! Tie up a few and give 'em a go. I feel you'll be pleasantly surprised.
No comments:
Post a Comment