If you have noticed... a few of my patterns on Facebook (The Benchside Fly Tyer) have little "spins" or tying techniques that add and look for that "special extra." This keeps the creative juices flowing and the Summer Hare is no exception!
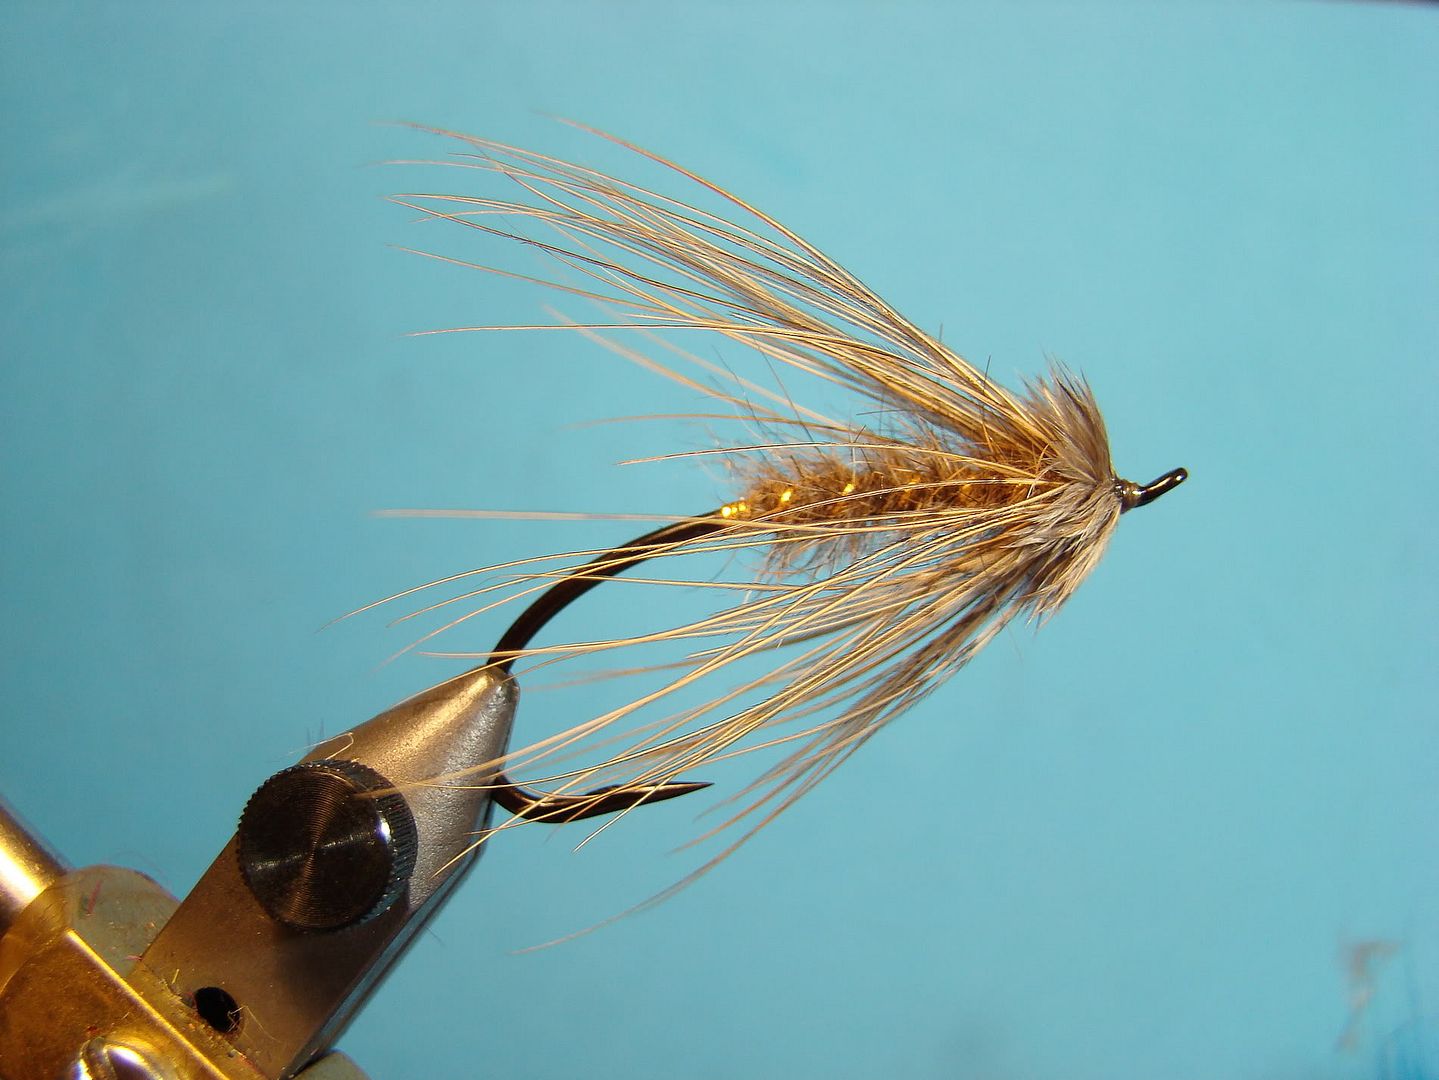
The Summer Hare is a combination of flies- part caddis, part Carey Special, part March Brown, and part Steelhead Spider, that is very easy to tie. It is a pattern that can be fished year around however, late spring through the early fall periods are the best months to drown this fly. While many will consider this pattern a "tailout fly," I have no problem fishing this fly through the hard hit areas on the river. In fact I rather enjoy watching the gear guy's faces when I hook into a fish after the run has been bombed and pounded hard with every color of lure under the sun.
Materials:
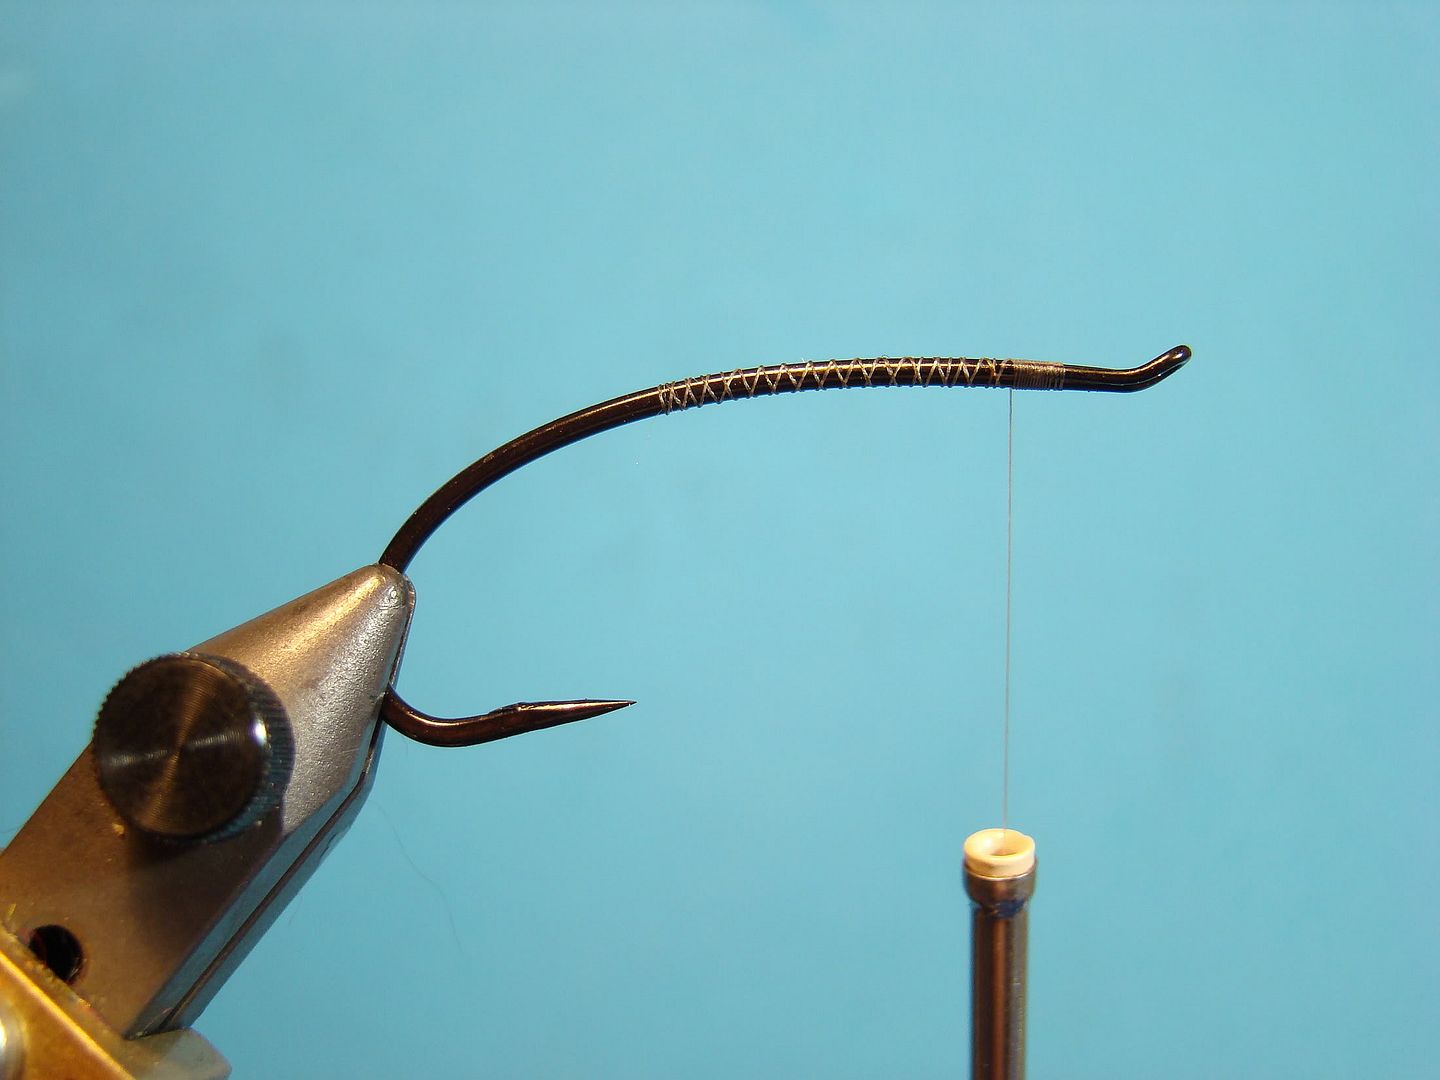
Hook: Daiichi (Alec Jackson size 3 - 7)(Pictured size 3)
Thread: 8/0 Tan or color to match body
Tag: Oval gold Lagartun tinsel (medium medium)
Tail: (Optional) Pheasant rump fibers
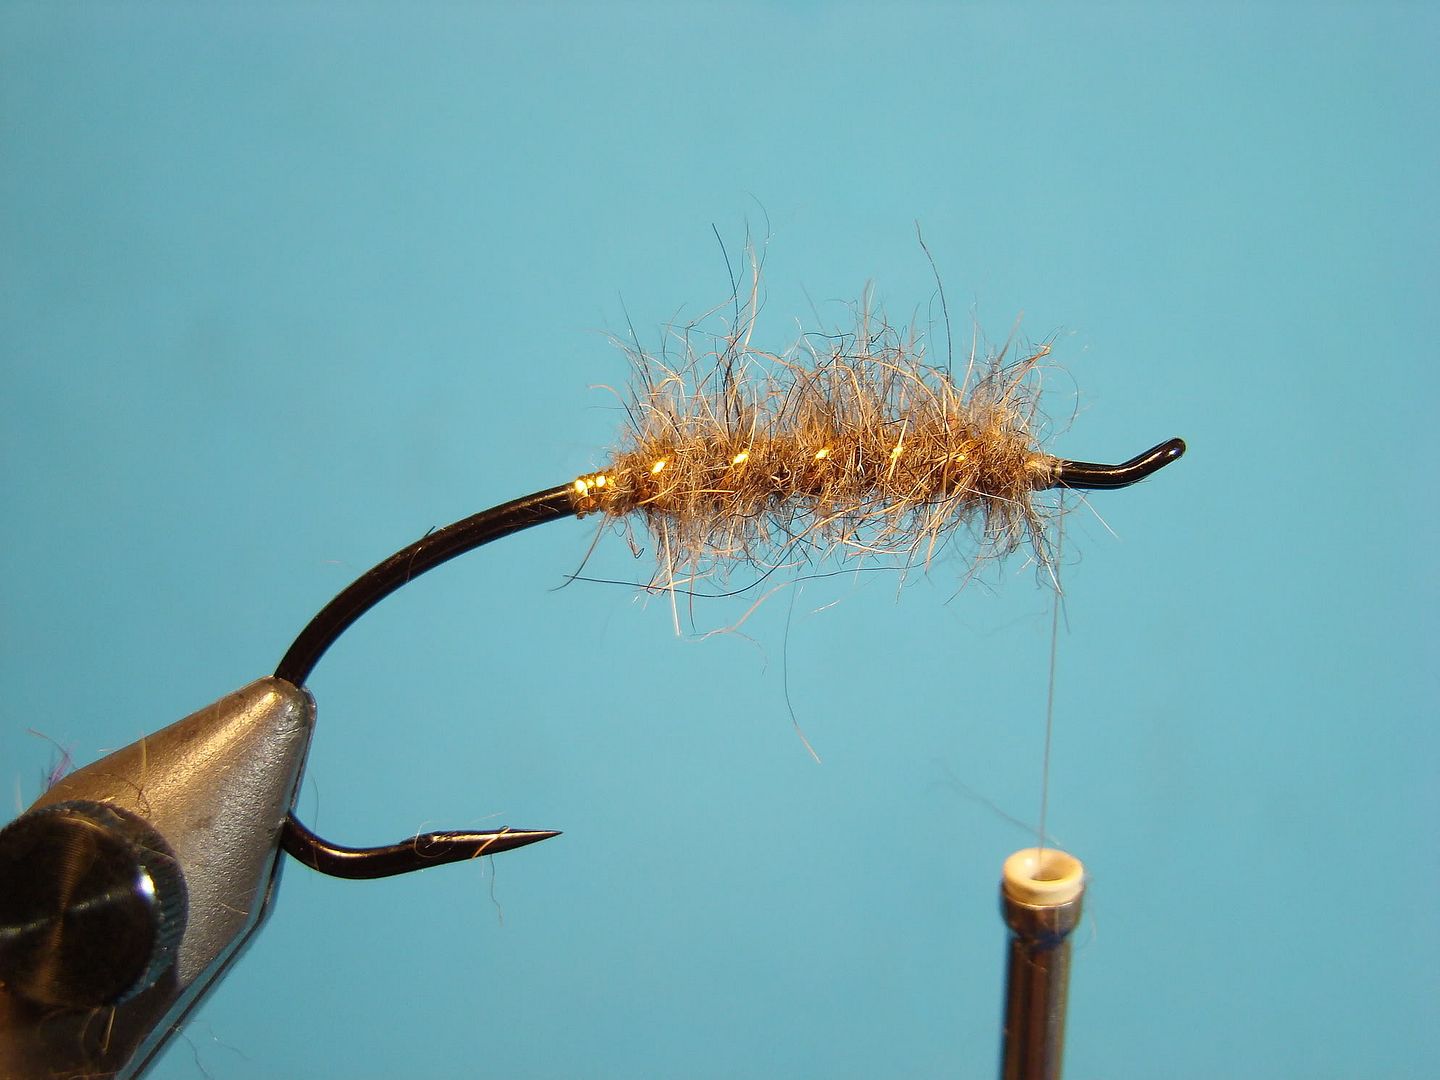
Body: Natural hare's ear
Rib: Oval gold Lagartun (4 to 6 turns)
Collar: Pheasant rump (natural color). Dressed heavily.
Head: Pheasant filoplume (natural color)
Step 1:
Start thread approximately two eye lengths behind the eye to secure the returning loop wire. Wind thread to the rear of shank and return to starting point. This will lay a foundation for securing the tinsel.
Step 2:
Firmly secure tinsel to the backside of the hook shank stopping directly even with the hook point.

Step 3:
Dub natural hare's ear. Note: I started just forward of the hook point. This vacated area will become the butt section. (The butt section and ribbing is one step or single continuation of one another.)

Step 4:
Wind butt and ribbing. The butt and ribbing should have 3 to 5 wraps each. Once complete, rough up the body for an extra "buggy" appearance.
Step 5:
Select a pheasant rump feather. Look for fibers that will extend just past the hook bend.
Tie in by the tip.
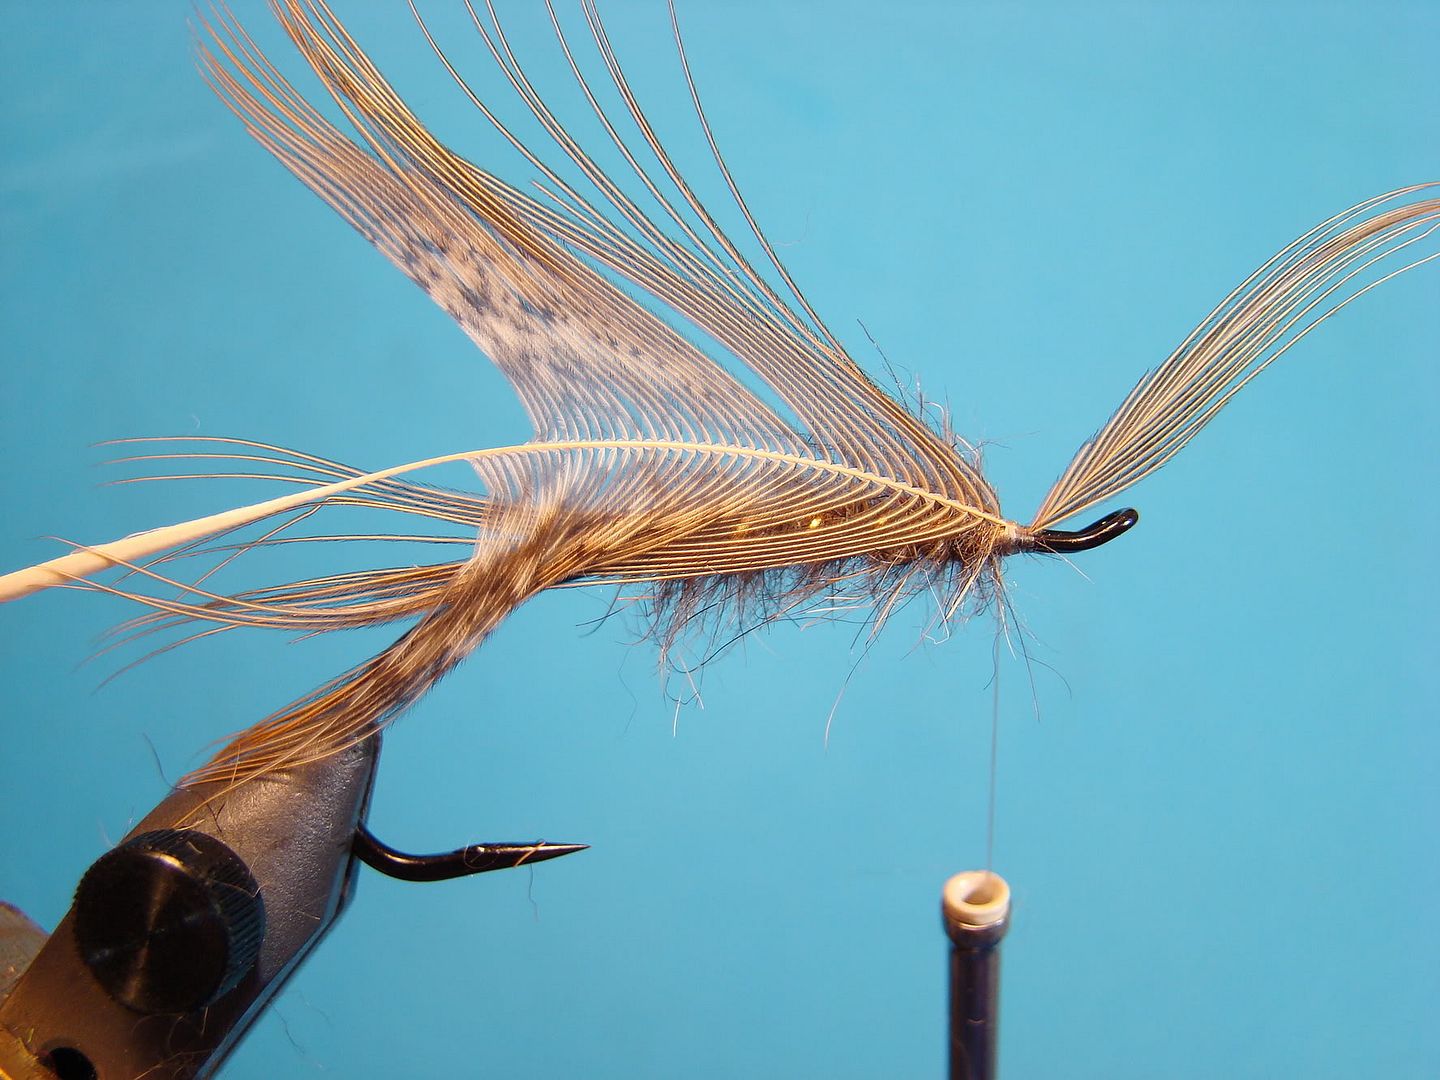
To secure/lock feather in place bring the tip back over the body and secure with a few wraps of thread. Note: the picture shows the tip nearly vertical and is for illustration purposes.

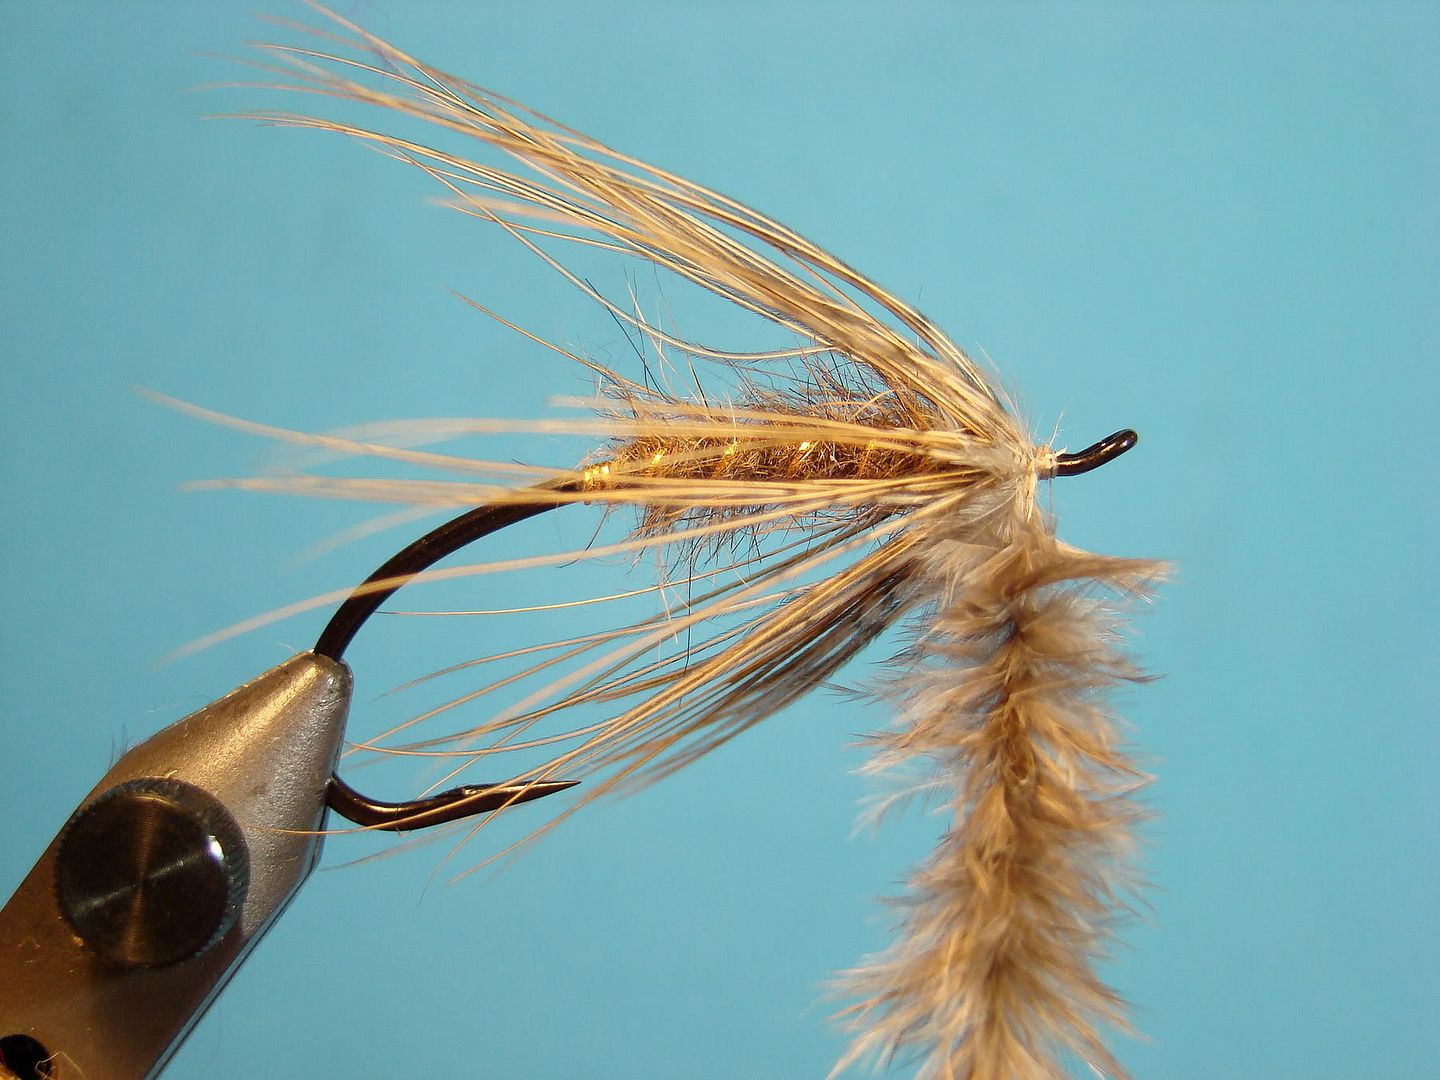
After the feather is secured it is brought straight up and the fibers are stroked to the rear of the fly prior to wrapping. You may need to repeat the process several times while wrapping the collar to ensure no stray fibers get trapped during the process. Additionally I tend to over-dress my hackle. I prefer a little more fibers for the heavier currents I fish. I can also do some discreet trimming while streamside for softer tailout waters. Once the collar is complete lock in the stem as described above.

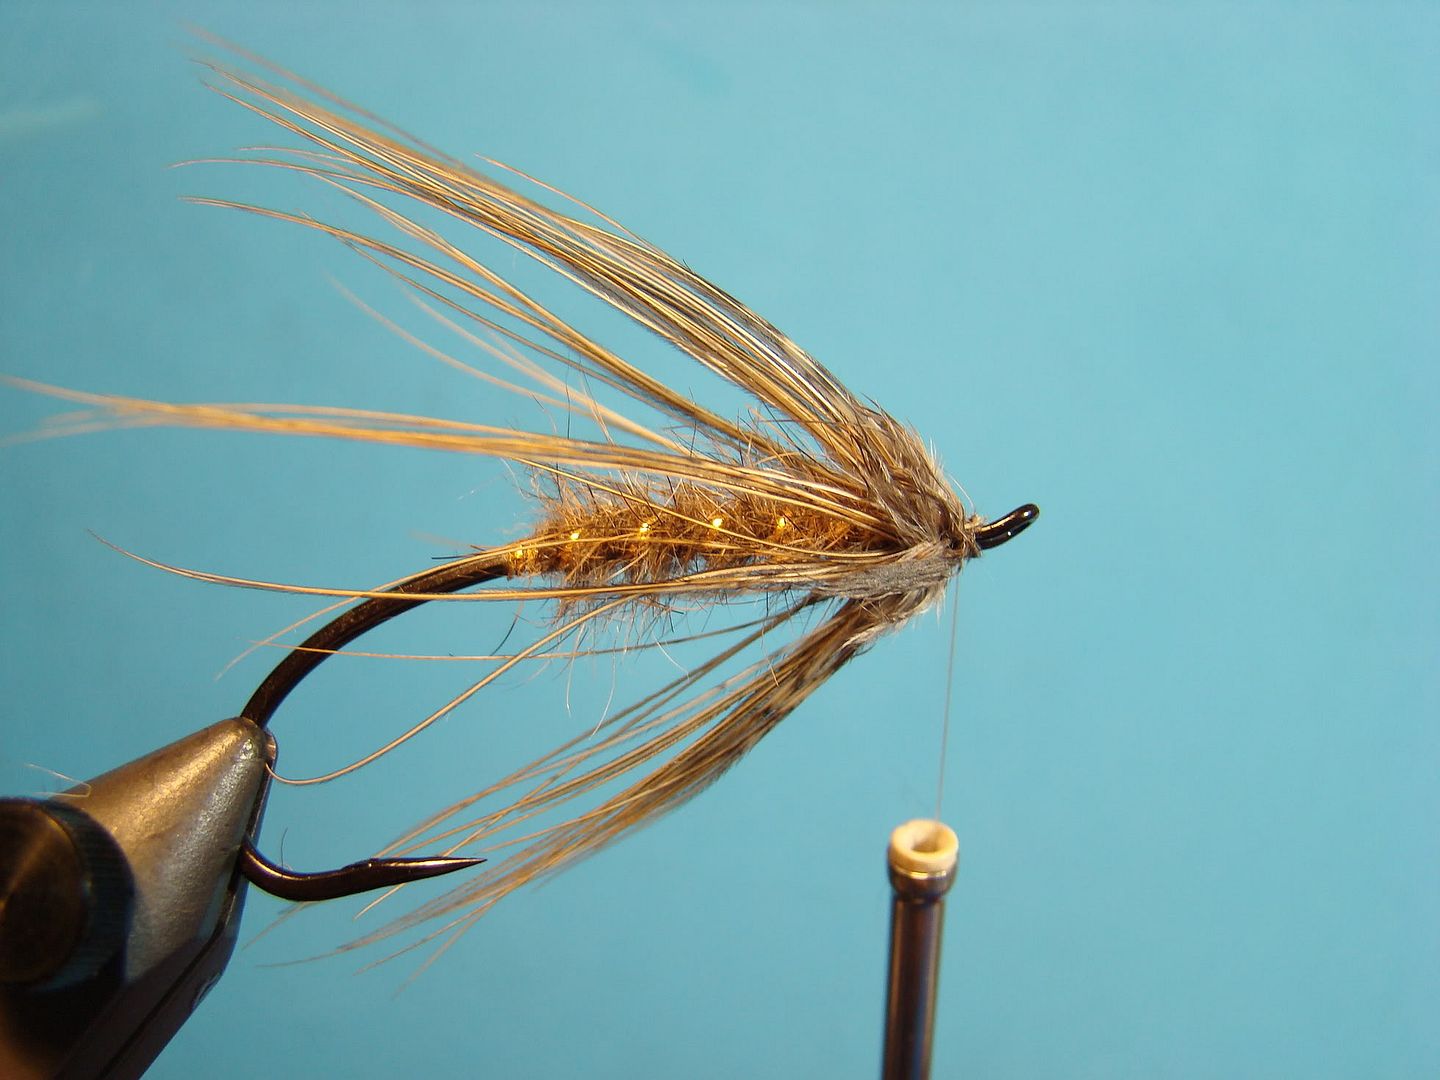
Step 6:
Filoplume brings some class and grace to a finished fly. It's movement in the water is first rate however, it can be a little tricky to work with- very weak stem. Therefore, in order for the fly to last a day on the water the filoplume must be wrapped in a dubbing loop.
Tie in two filoplume feathers at the bottom of the stem.

Once secured make a small dubbing loop and place the feathers in the loop and attach hackle pliers to the loop and feathers. You'll need to twist the hackle pliers slowly without a lot of pressure. The soft fibers of the filoplume will start to standout at an angle to the thread. Do not over twist or tighten.
Take two or three turns. A helpful little hint when wrapping the filoplume is to moisten the fibers and stroke to the rear. The will keep the area clean and allow for a small head.
Step 7:
Tidy up with a nice small head, whip finish, and cement.
I am sure you'll have a blast tying the Summer Hare and even a better time catching a fish or two on this pattern.
See you on the water!
No comments:
Post a Comment