Wednesday, February 29, 2012

Clouser Minnow

I'll finish up the month with Puget Sound's most popular streamer pattern- the Clouser Minnow.  I won't spend a lot of time writing about the history of the most famous streamer pattern in existence.  There's absolutely no need to here- it would take days, if not weeks, perhaps months, or even years! 

The Clouser Minnow's pedigree is long, distinctive, and rest assured, will live on for generations to come.  I highly doubt there will ever be another streamer pattern to surpass the Clouser's legacy. 

If you fish Puget Sound, or any freshwater/saltwater destination, the Clouser Minnow is a MUST HAVE fly!

Material:

The myriad of materials used are numerous.  Everyone seems to have a favorite and I am no exception!  Here's what I utilized, and normally use, for fishing and this step-by-step pictorial:

Thread:  Uni-thread Mono, clear, 4m
Hook: Daiichi 2546 #6
Eyes:  Spirit River Real-eyes Plus, Nickel/Pearl, 5/32"
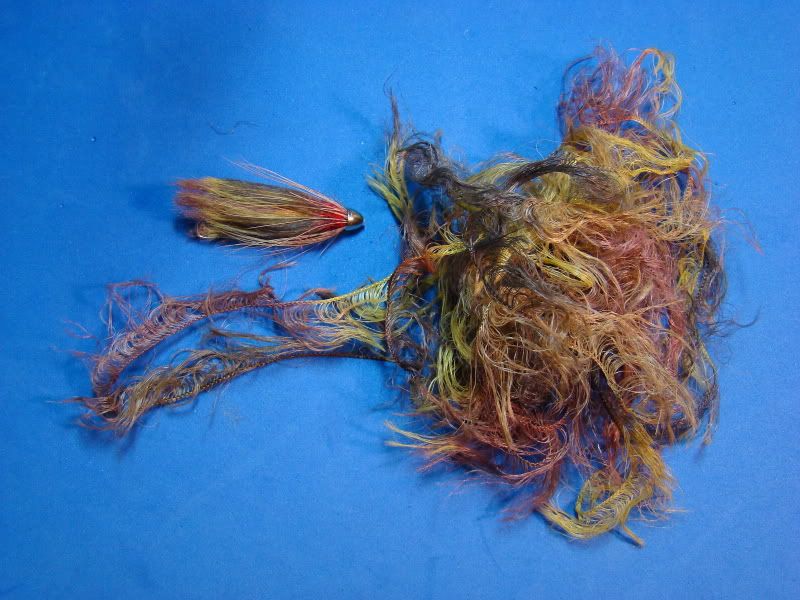
Wing (bottom):  White australian sheep
Wing (top):  White autralian sheep over a few strands of UV Minnow Belly.
Topping: Black Light Angel Hair
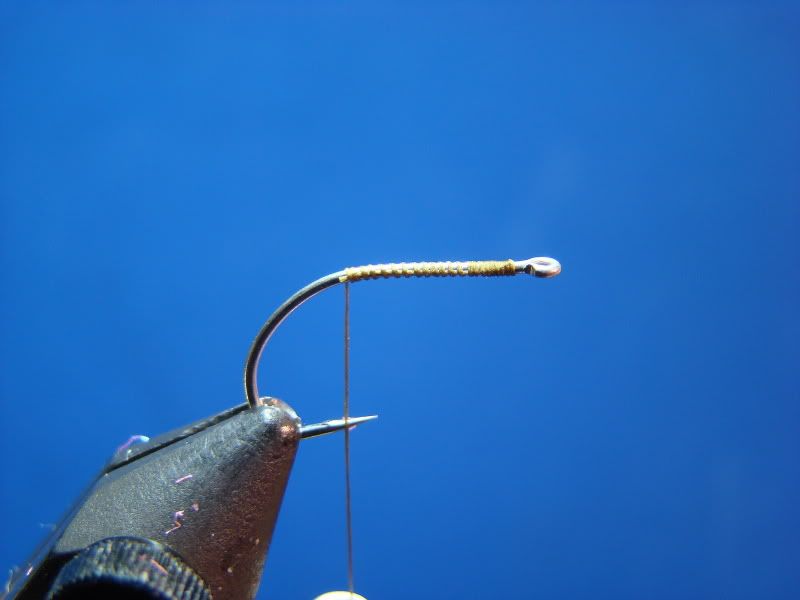
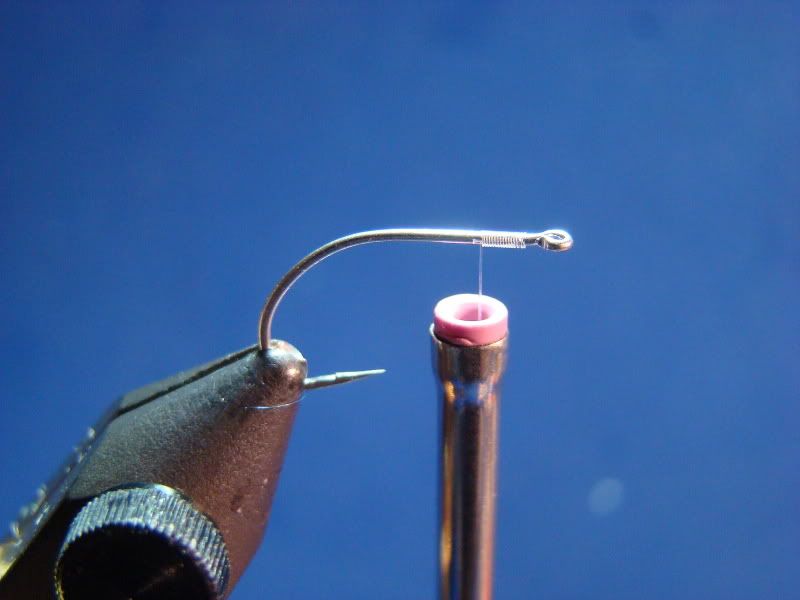
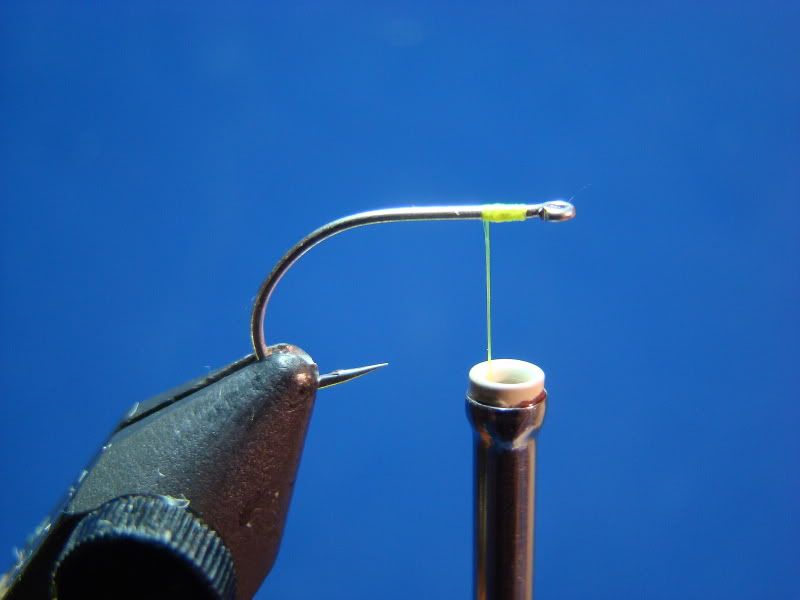
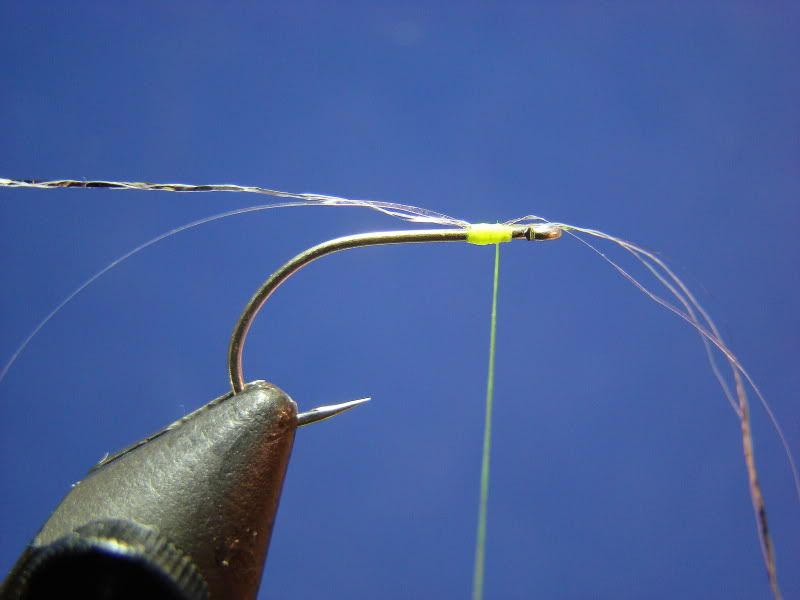
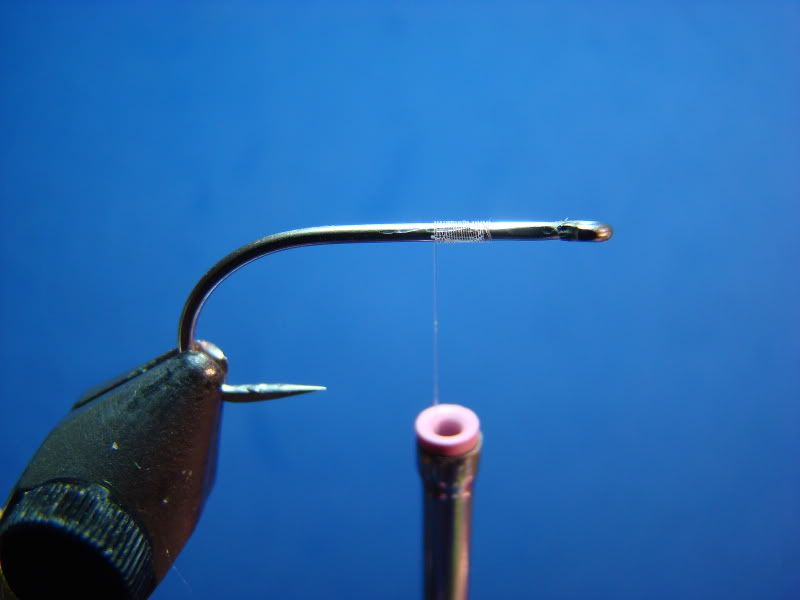
Step 1:

Place hook in vise.  Wind a single layer of thread at approximately 1/3 of the hook length.
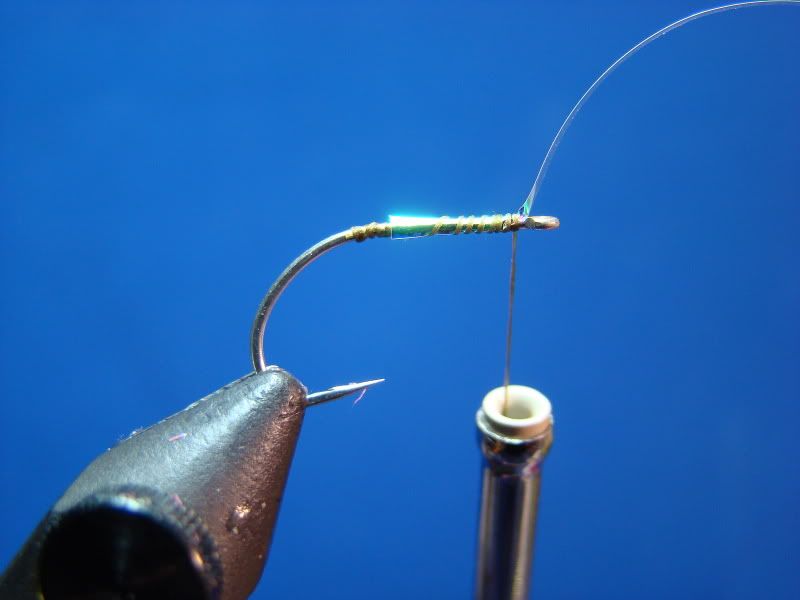
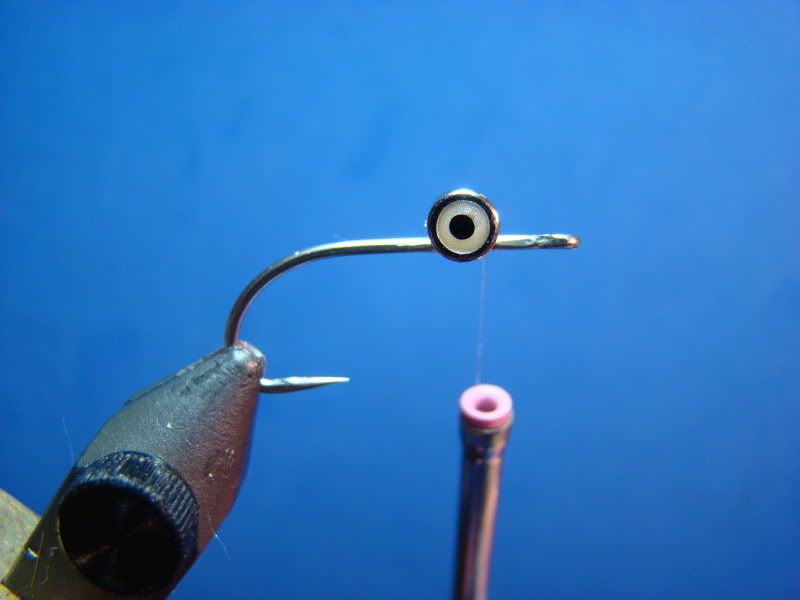

Step 2:

Place eyes over the layer of thread and make a few figure 8 wraps to ensure proper position.  If satisfied with positioning, apply a small drop of Zap-A-Gap to thread wraps.  Continue with firm wraps and super glue as necessary.
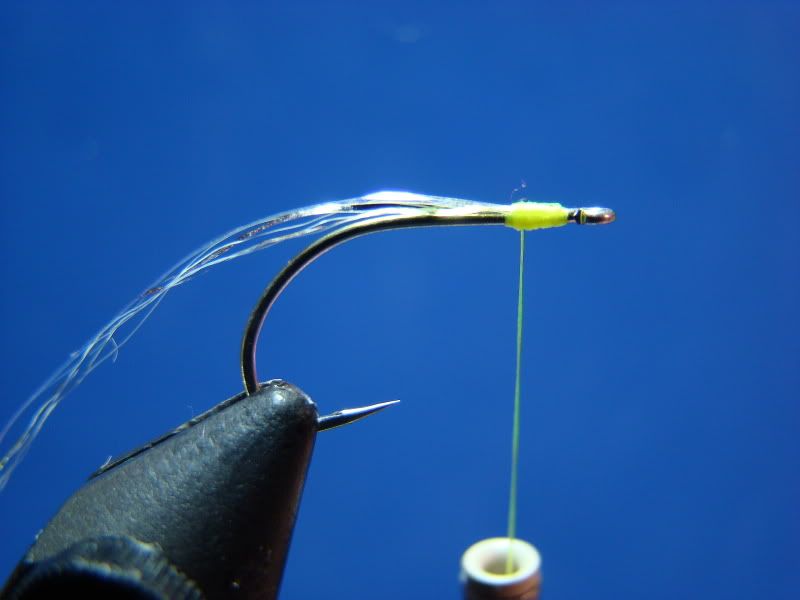
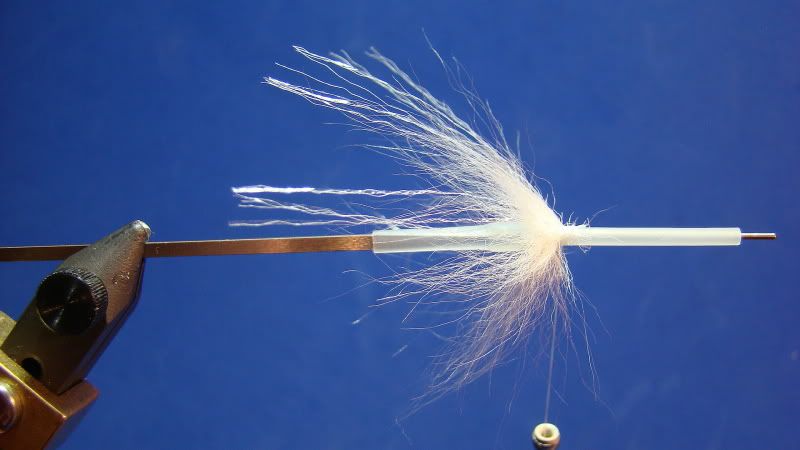

Step 3:

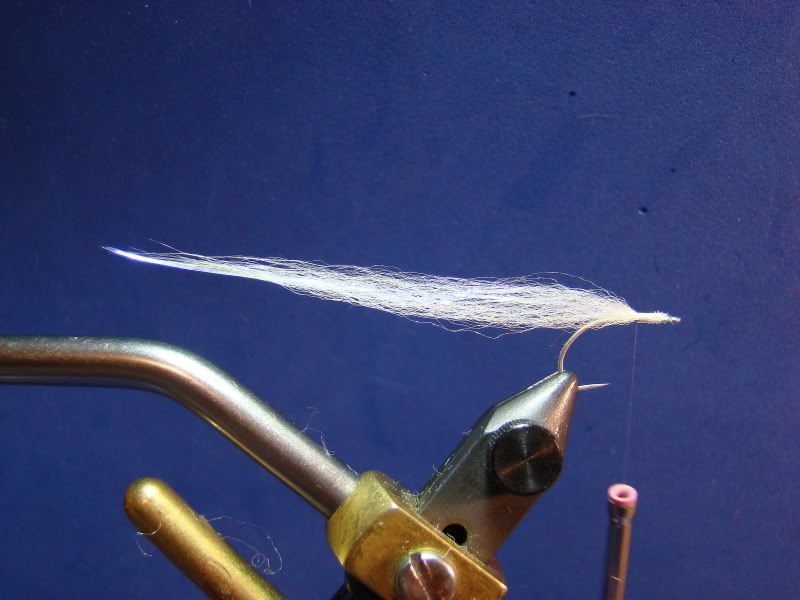
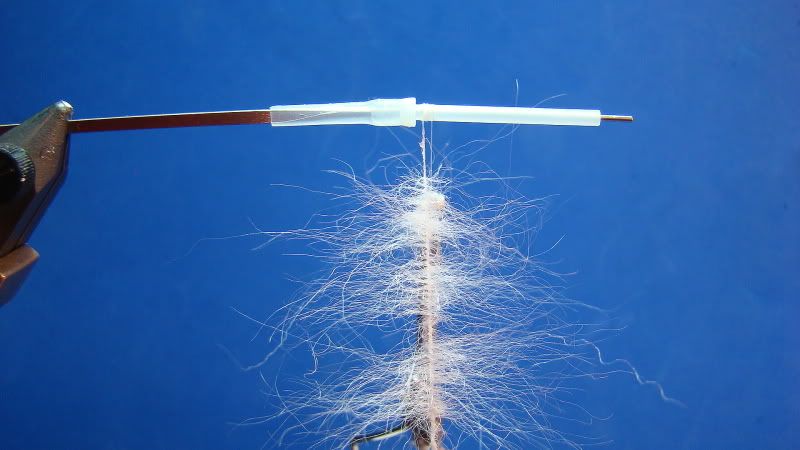
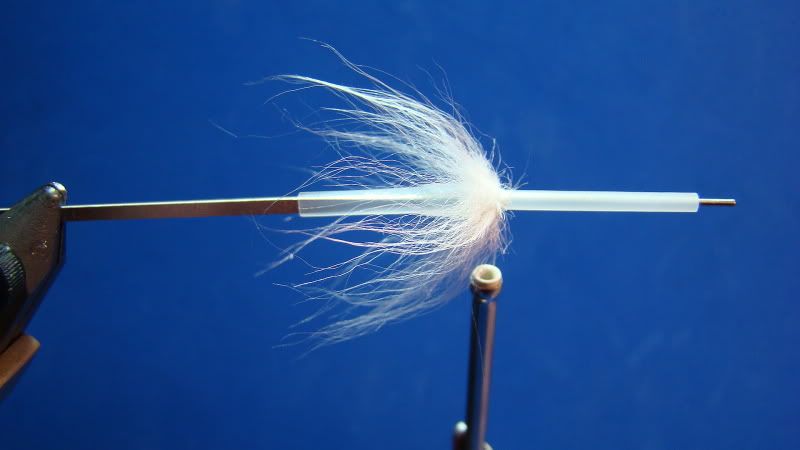
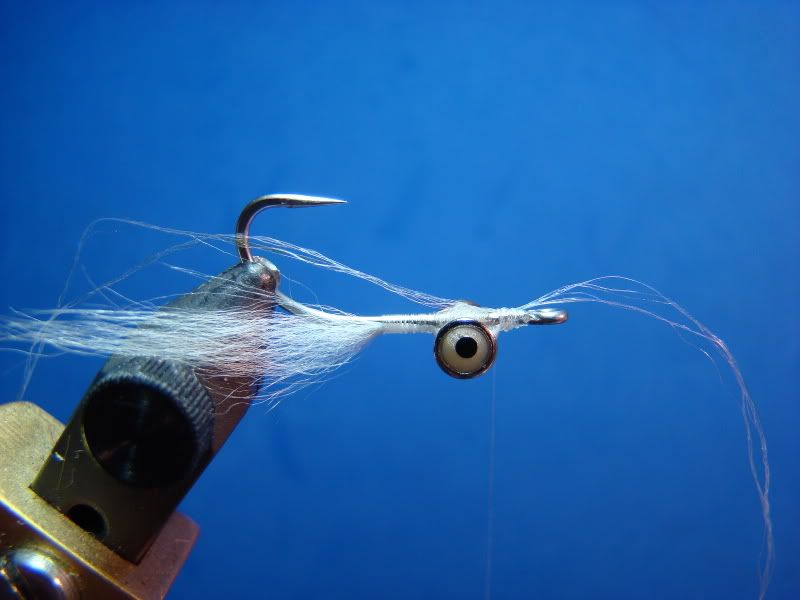
Tie in a small bunch of australian sheep behind the eyes and secure with wraps winding to the hook bend and returning to the starting point.  Wind thread forward of the eyes.  Bring butt ends over the eyes and secure bottom wing.
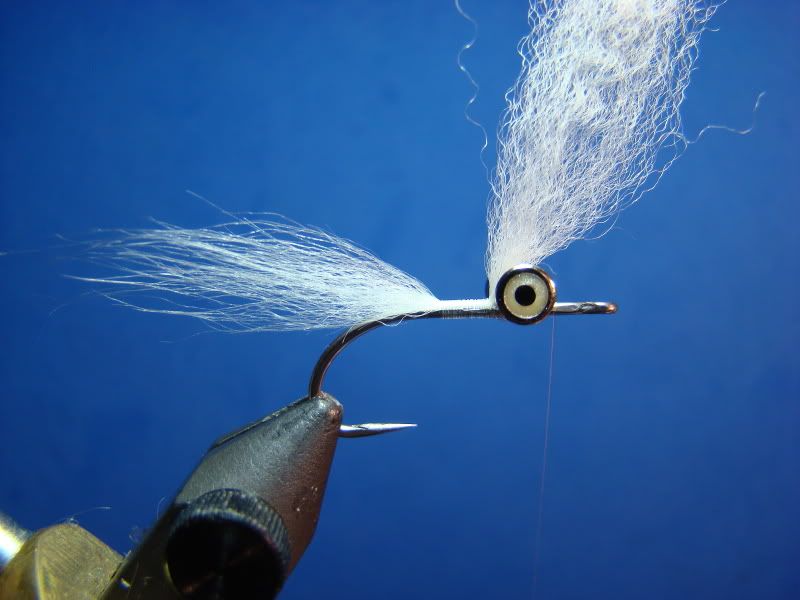
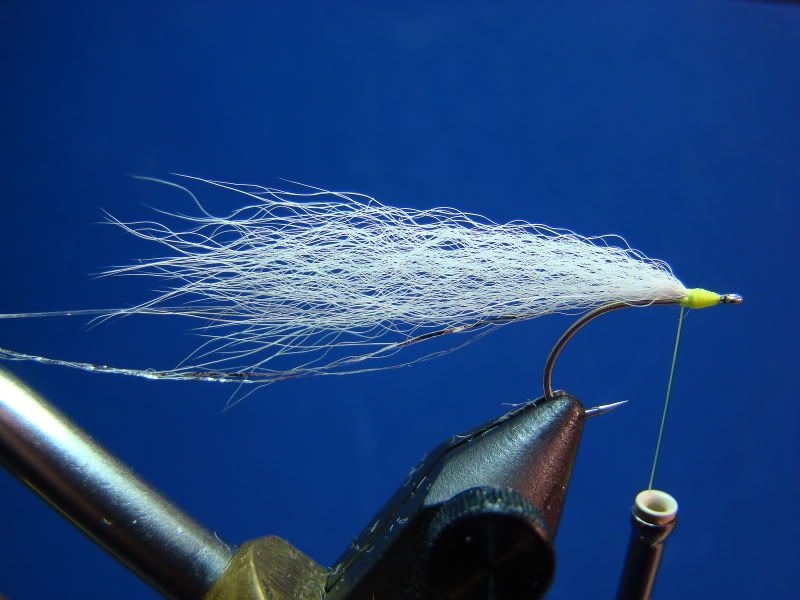


Step 4:

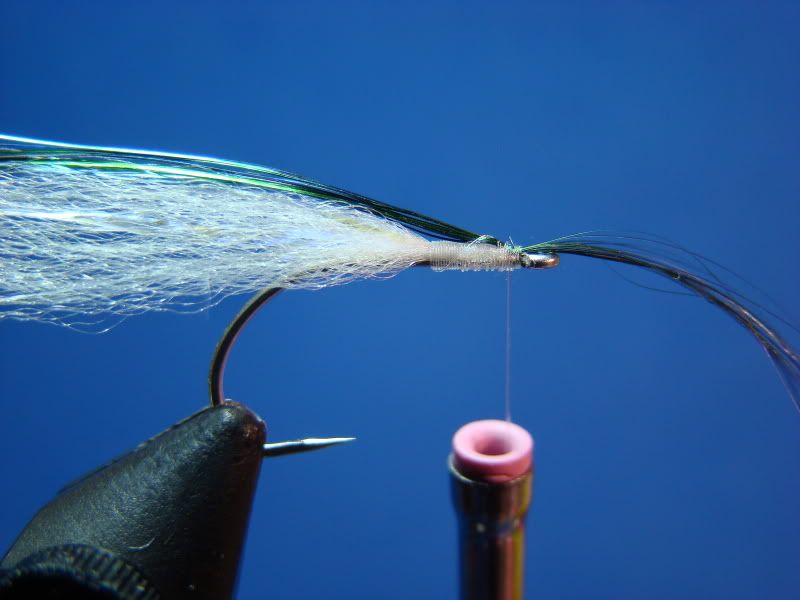
Remove hook from vise.  Place fly upside down in vise and lock in place.  Tie in a few strands of UV Minnow Belly in at the mid way point.  Lock material in place by bring the UV Minnow Belly back over the eyes.
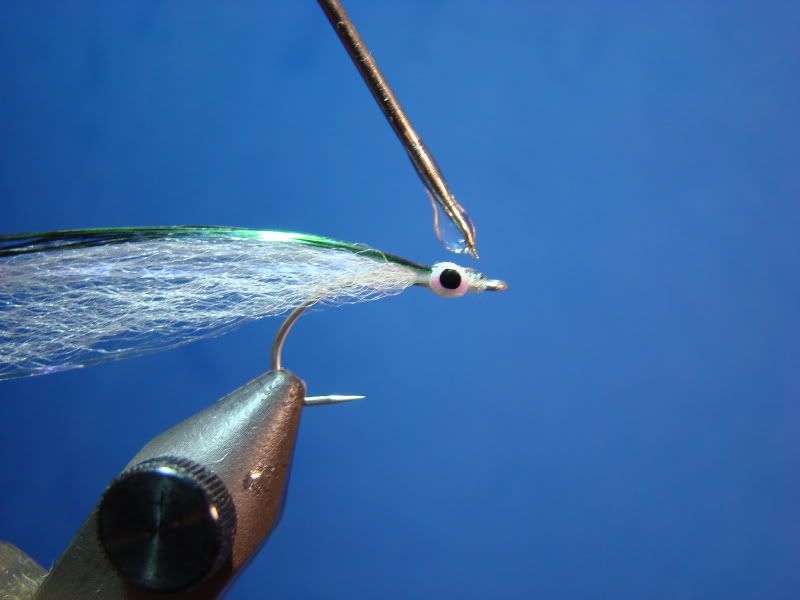
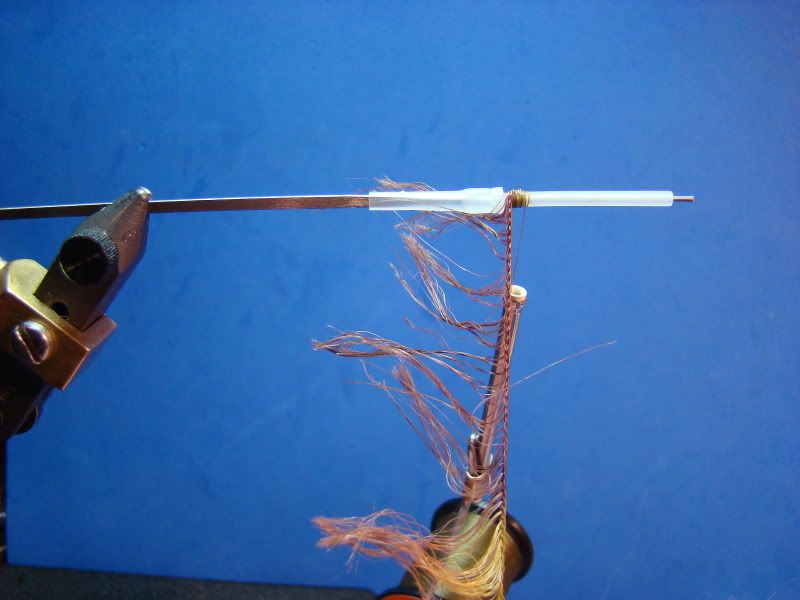
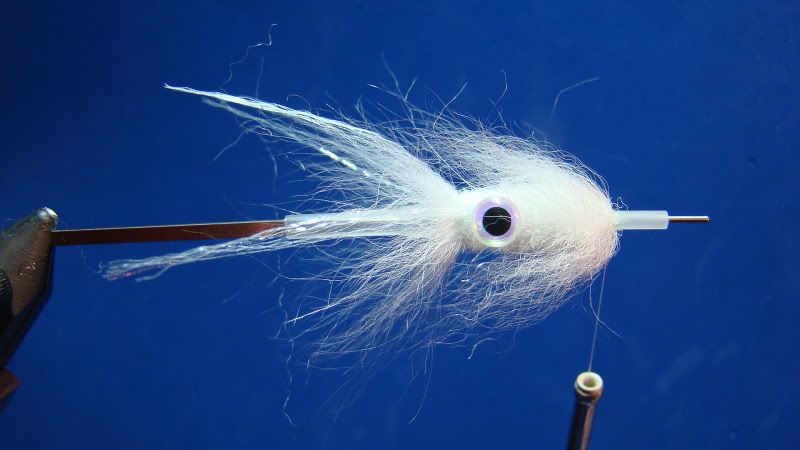
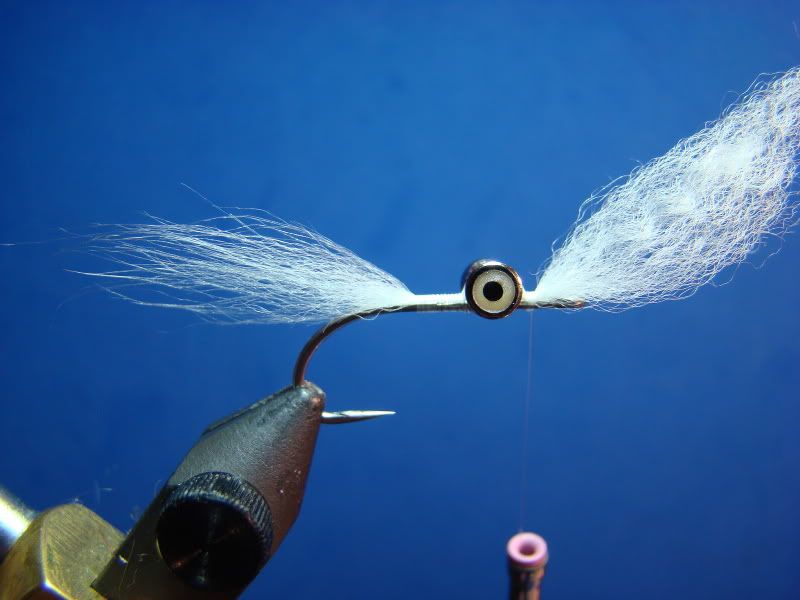
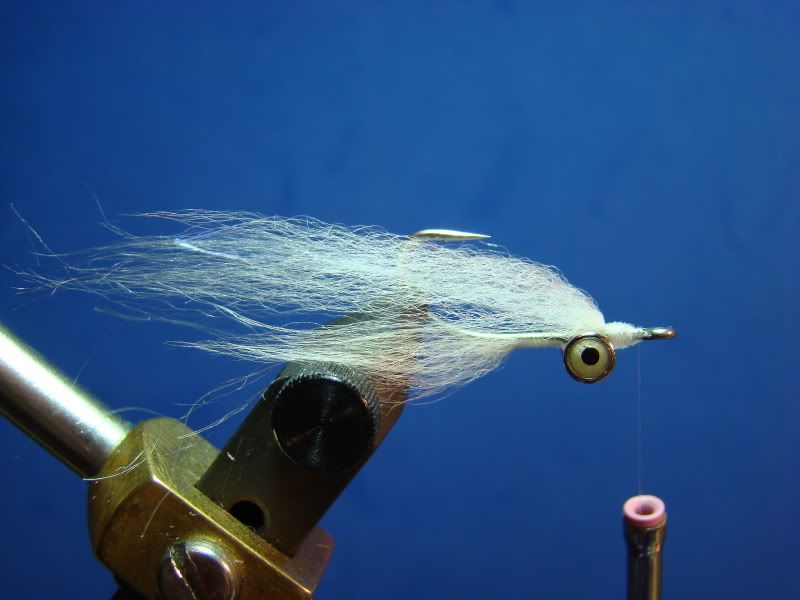


Step 5:

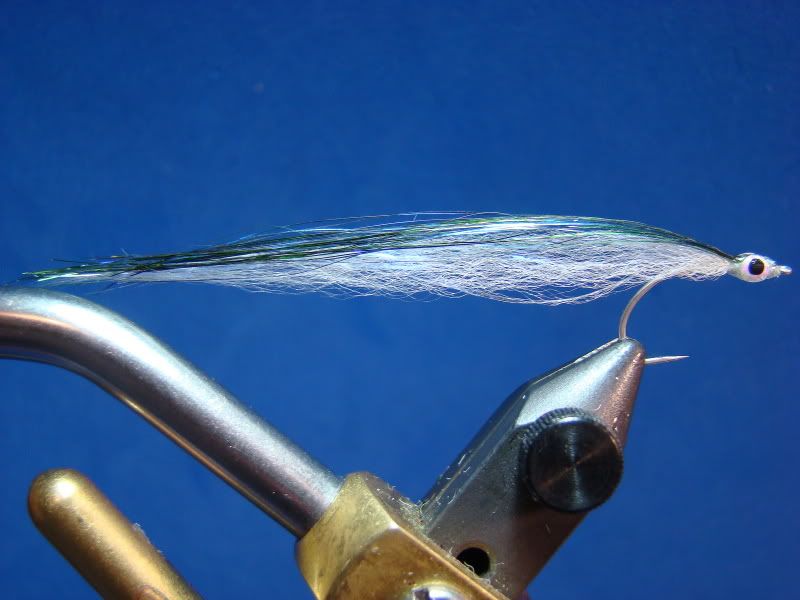
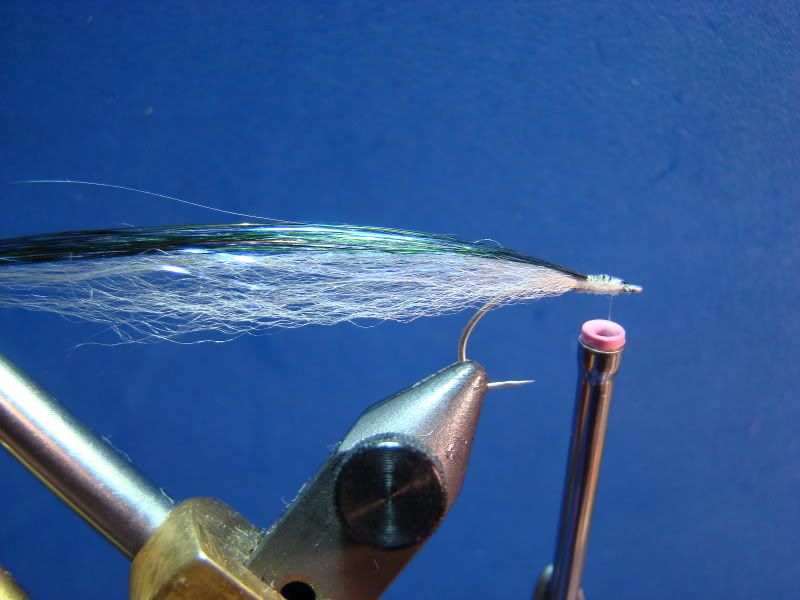
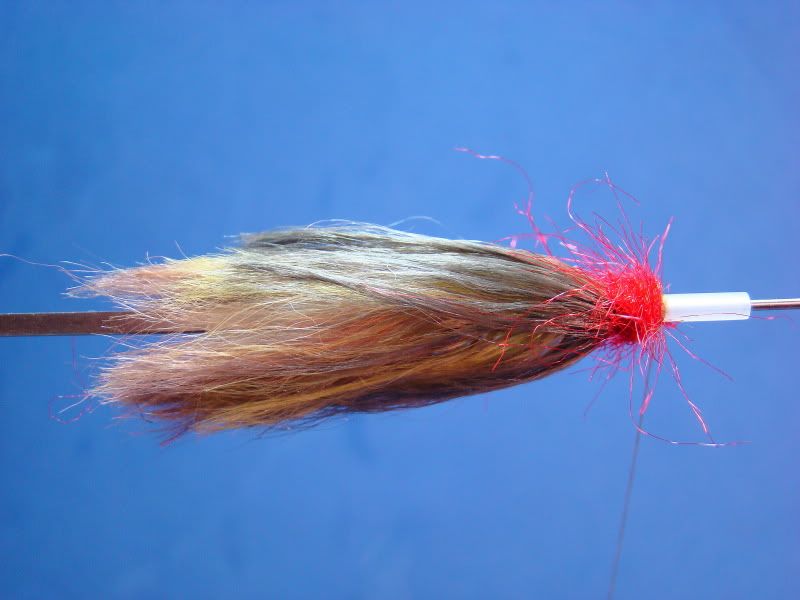
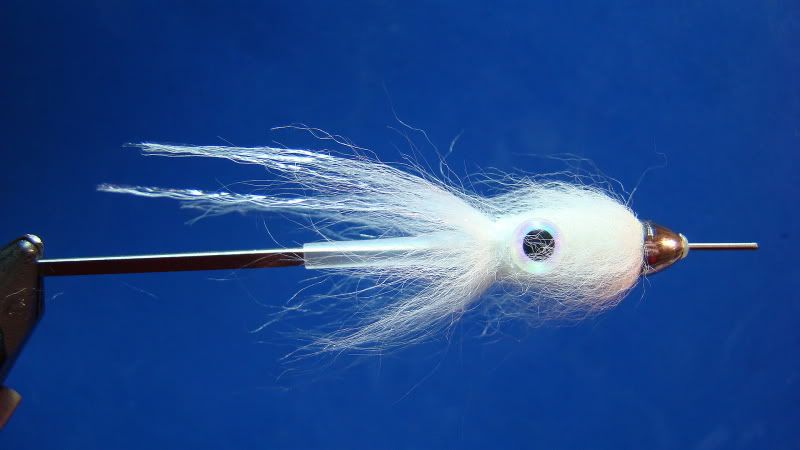
Tie in top wing.  Use a little more hair to provide more profile.  The hair should be slightly longer than the bottom wing.
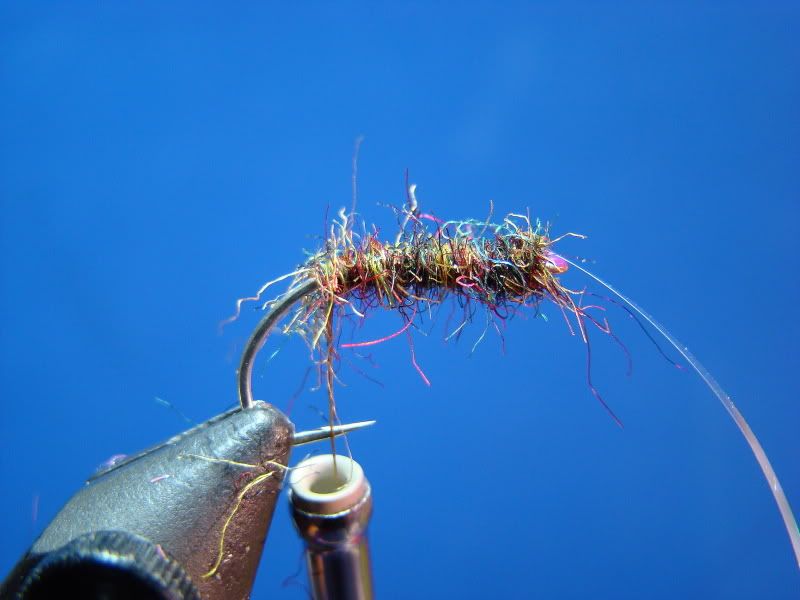
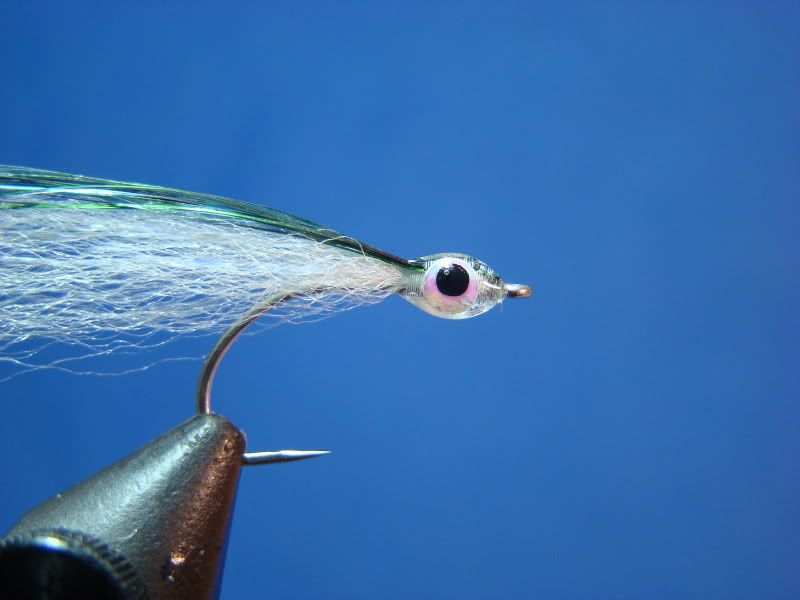
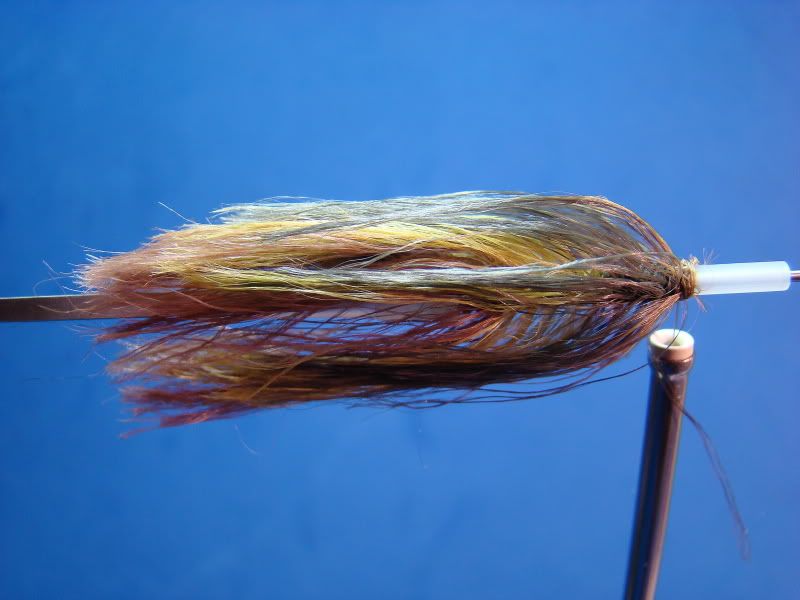
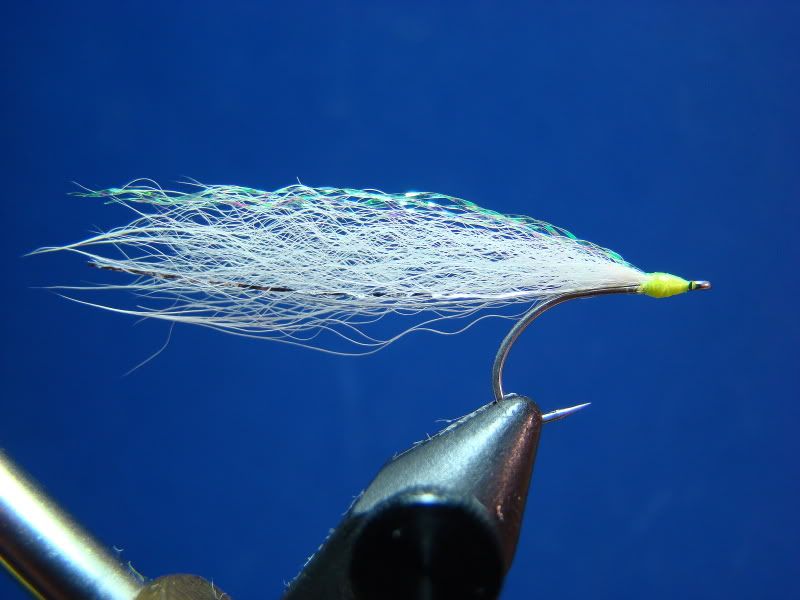
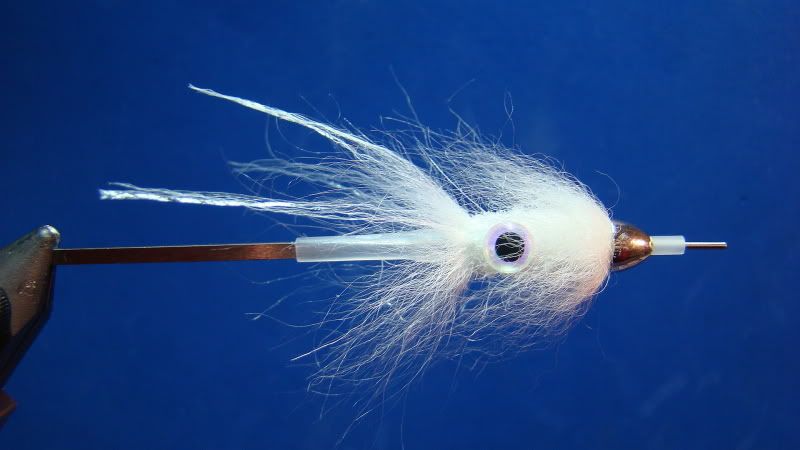


Step 6:

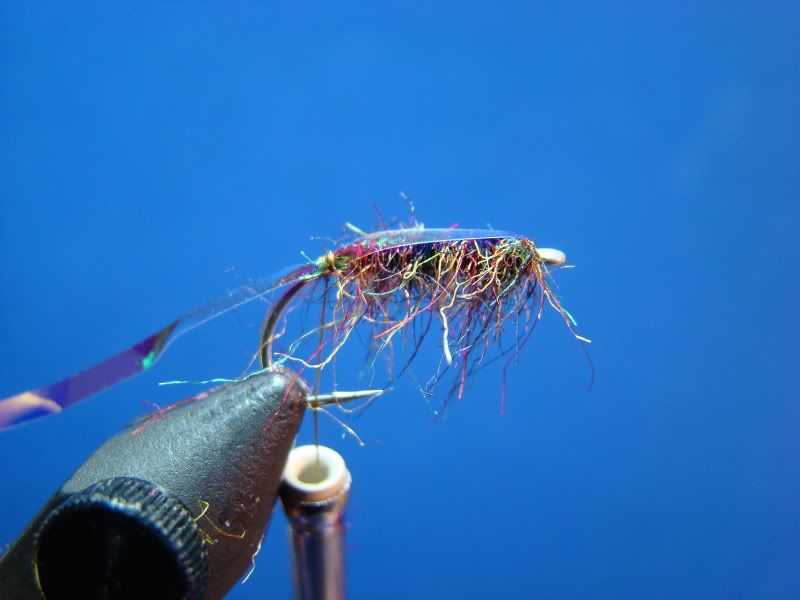
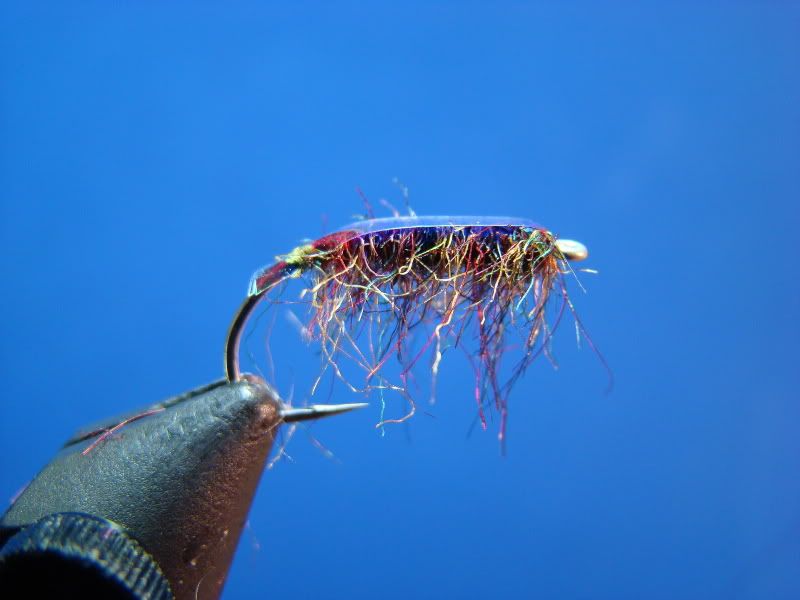
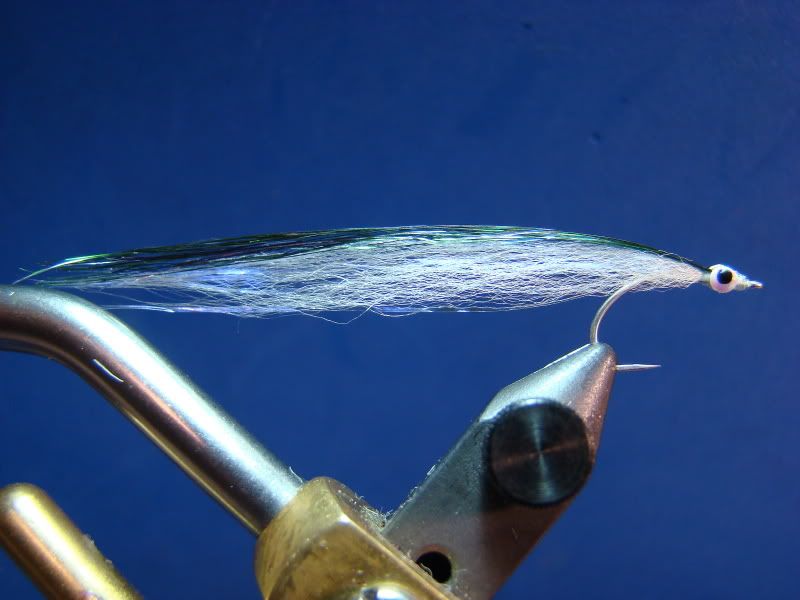
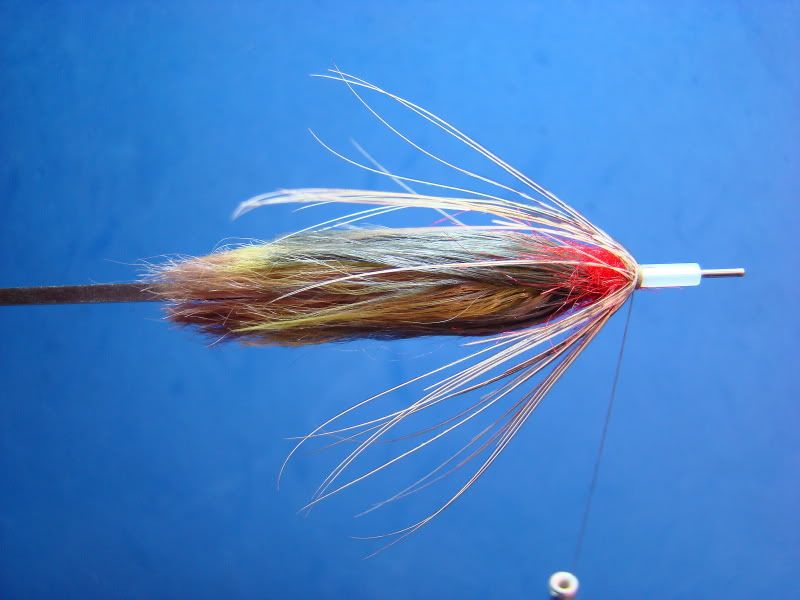
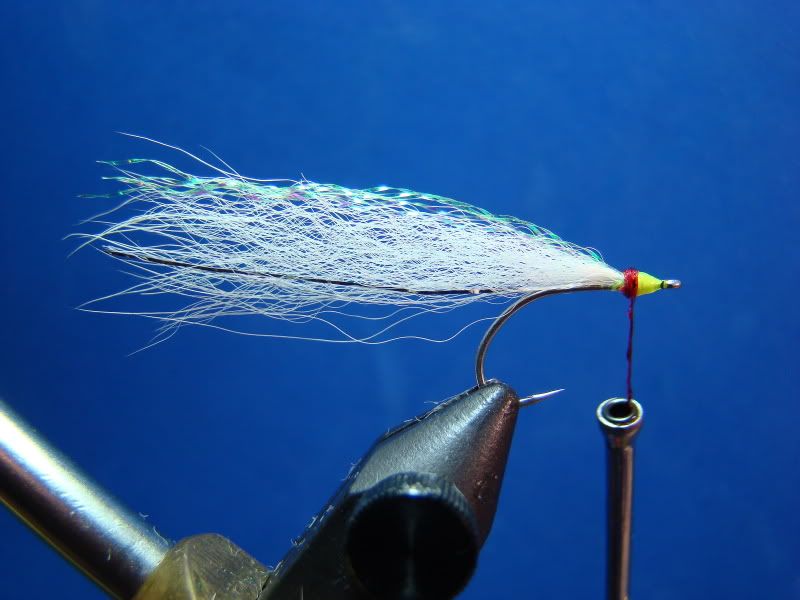
Tie in approximately 15 to 25 strands of Angel Hair at the midway point.  Lock in place by bringing the Angel Hair back over the eyes.  Build a small but proportionate head with thread.  The Angel Hair should be visible through the thread wraps.  Apply a few coats of head cement (or apply a single coat of epoxy). 
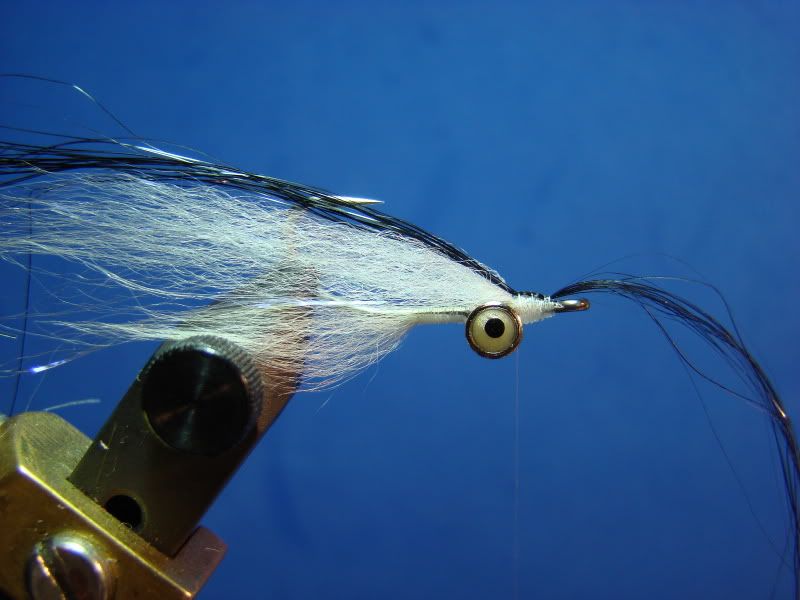
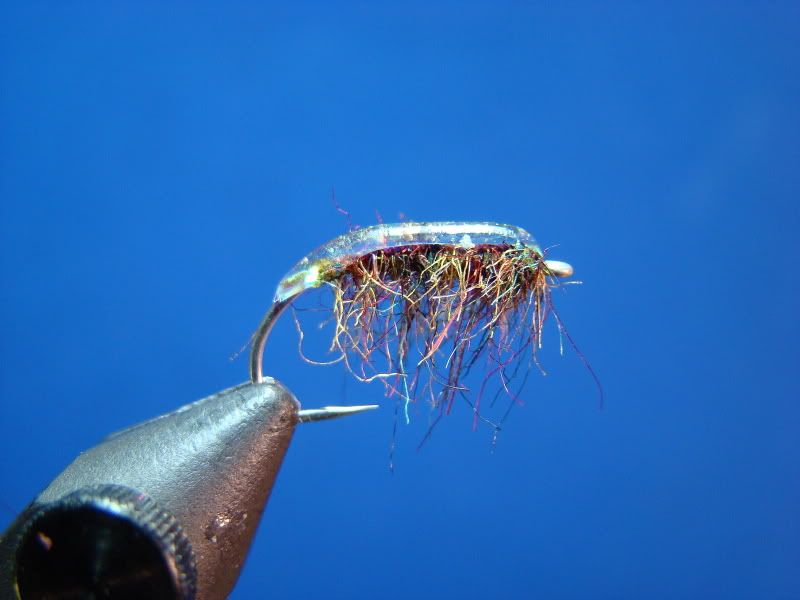
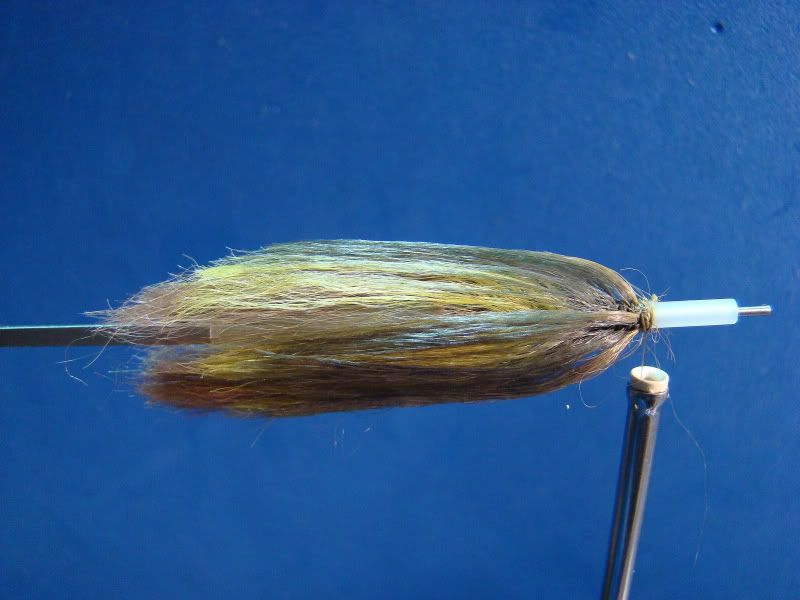
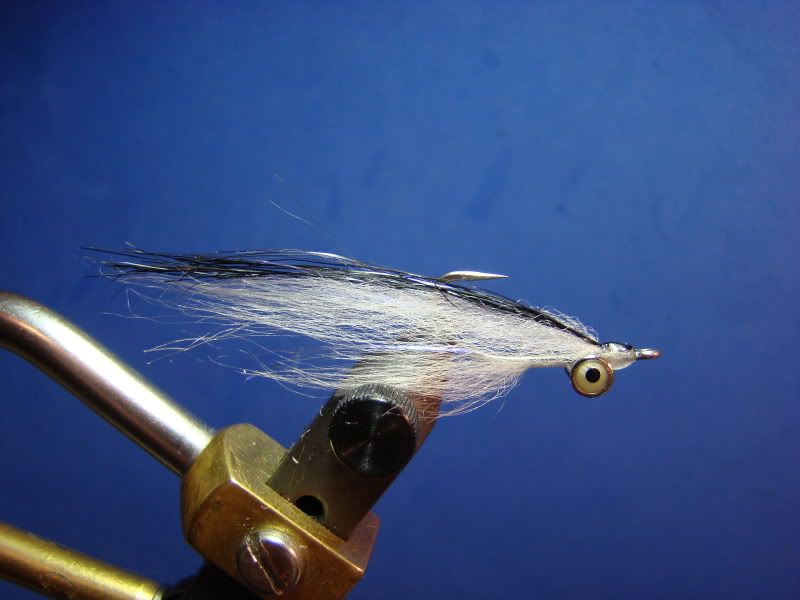


Finshed!


A couple things to keep in mind:

1)  Do not tie the eyes too close to the hook eye.   The number one mistake most tiers make.
2)  Tie the wing(s) sparse. 

If you haven't had a chance to hit the "Benchside Fly Tyer's" "Like" button on Facebook now would be a great time to do so...  I will be drawing a name around 4PM ( 01 March) for a large patch of australian sheep.

Enjoy!


Friday, February 24, 2012

JAB's Kelp Hopper (Isopod)

I won't put you to sleep writing about the particulars of isopods, there is plenty of literature to do that for me, but they do resemble the pill bug we played with as kids (curled into a ball).  A quick rule of thumb for chosing a color to fish is simply looking to the water.  Use various shades of brown to brownish red in areas of kelp and shades of olive to brownish olive patterns in vicinity of eel grass or rockweed.  The size of isopods vary from minute to 1 1/2-inches within Puget Sound, and though  some anglers (including myself) tie patterns in the #14-#20 range, I have had much better results utilizing patterns in #6 or #8. 

The best news.... if you can tie a freshwater scud pattern you are in business in short order!

Materials

Hook:  Gamakatsu SC15 (Size 6 or 8)(Size 6 pictured)
Thread:  Color to match body
Body:  Various shades of olive to brown.  I mix Mr. Peacock (spectrumize) Dubbing and Arizona Peacock dubbing to produce many vivid shades of the aforementioned colors
Shellback:  Mirage Flashabou coated with Clear Cure Goo or Liquid Fusion.


Step 1:

Start thread just behind the eye and wind to the bend.


Step 2:

Tie in Mirage Flashabou and wrap forward butting the eye.


Step 3:

Apply dubbing to the thread and wind just past the bend.


Step 4:

Bring Mirage Flashabou back over the body and secure with a whip finish behind the body.


Step 5:

Hold shellback straight out, parallel with shank, and cut even with the bend of the hook.  The shellbeack with follow the contour of the bend.  Cut thread. 


Step 6:

Apply Clear Cure Goo or Liquid Fusion on entire shellbeck.  You are ready to fish!


Enjoy!

Monday, February 20, 2012

JAB's Sand Lance

I have seen a lot of different sand lance patterns over the years.  The most successful patterns are tied with a thin profile, possess unparalleled movement, translucency, or a combination of all three- realistic for these eel-like fish.   The myriad of material combinations are endless however, it will appear over time the simple ties are the most effective.    

My own JAB's Sand Lance has been a phenomenal producer.  The tying techniques are nothing special; therefore, this is a great fly to learn how to tie sand lance patterns.  However, the uniqueness comes from the wing material- australian sheep.  The hair is extremely translucent, wispy, and possesses great movement in the water.  In fact, I have been steadily replacing arctic fox, marabou, and some synthetics with australian sheep for my small harwing style patterns.

Should you decided to spend any amount of time throwing flies in the saltchuck it is highly recommended that you carry a few sand lance patterns.  They flat out produce!

Lastly,  by shortening the wing and adding a little more bulk you can effectively convert this into herring, sardine, or anchovy pattern. 

Materials:

Hook:  Gamakatsu SC15 (Size 4-8) (pictured is a size 6)
Thread:  Uni- mono, clear/fine, size 4m
Wing:  Australian sheep mixed with 4 to 6 strands of UV Minnow Belly or UV Lite Brite
Topping:  Baitfish or peacock (color) Angel Hair
Eyes:  Pearl 1.5 coated with Liquid Fusion

Step 1:

Start mono thread approximately one half eye length behing hook's eye.  Wrap towards the rear approximately 15-turns.  Apply a small drop of Zap-A-Gap.  This will keep the wing from spinning over the hook shank.


Step 2:

Select a small amount of australian sheep from patch.  Comb out shorter hairs.  Cut 4 to 6 strands of UV Minnow Bellow (or similiar) and mix into the wing.  A quick way to mix the two materials is combing the UV Minnow Belly into the hair, or you can also use the "rolled" method.  "Rolling" is best described as folding the material over itself until the two materials are equally mixed.  When satisfied with the correct amount and mixed material cut a slight taper at the butt end of the hair.  This will alleviate a sharp cut off point (or hump) at the tie in point.  Secure with tight turns of mono thread. (Do not use excessive turns of mono thread to secure wing- keep it thin.)  The length of the wing is approximately 5-hook lengths.


Step 3


Select approximately 15 to 20 strands of Angel Hair and tie in at the mid way point (as pictured).   The wraps should be tight to the eye.  Once secured bring the Angel Hair back over the wing and wrap close intervals to the rear.  Whip finish and cut mono thread.


Step 4:

Remove an eye from backing and place into position.  Repeat for opposite side.  There are many ways to place adhesive eyes, but I find it easiest to use my bodkin.  Normally the head of a fly would be a slightly larger diameter than pictured making eye placement easier.  However, since we need to maintain a thin profile the eyes probably will not fully adhere to the contour of the head (as pictured).  However, I have a solution!

Apply a small portion of Liquid Fusion like you would epoxy.  One the greatest attributes this urethene glue has is it's shrinking nature when drying.  Therefore, the eyes will receded onto the thread during the drying/curing phase.


Freshly applied Liquid Fusion.


Cured and ready to fish!


Enjoy!

Are you new the The Benchside?  Now would be a good time to mention I am giving away a nice patch of australian sheep on my Facebook page (The Benchside Fly Tyer).  All you need to do is hit my page's "like" button and the "like " button under the Squidley Do-Right fly.  I'll will pick someone at the end of the month.  This material is absolutely gorgeous!

Sunday, February 19, 2012

JAB's Moa Boa Sculpin

Have you ever ran into an off-the-wall material at the craft store?  I did.  Approximately three years ago I was tagging along with the "Scrapbook Queen" at Michael's in Tacoma (Washington) and decided to venture off on my own.  I have been in this particular store several times and figured I knew every nook and cranny (where the good stuff is found).  However, on this day, I stumbled upon the Mother Lode of materials.  Passing through the yarn section was a large flat table with a couple hundred skeins of an unique crochet type material called Moa Boa (www.sierrapacificcrafts.com) .  Brown, black, olive, maroon, and/or a mottled combination of these colors were piled high with a large sign - CLEARANCE $1.00.   Wow, a dollar for a skein of 85-yardsl!  I can only describe the material as strung thread (like strung marabou or peacock herl)(unique eh?). After a closer "touchy feely" look the wheels upstairs starting to burn up the bearings (so to speak).  "Wow, what a wonderful leechy material," I thought.  Once home I immediately hit the bench and began tying different patterns.  First, I tied various leech patterns (nice).  Next were various dragonfly nymphs... (killer)  "Wait a minute!" "I bet this mottled stuff would make a dynamite sculpin!," thinking aloud.   After several different patterns I settled on tying this specific one.  Simple, quick, and  deadly- just they way I like my flies. 

A couple of notes, (1) the more you fish one pattern, the more effective it becomes.  The material is a little stiff at first, but individual strands unravel over time becoming soft, marabou-like.  (2) It is particularily effective in faster tidal movements where the fibers react more, and (3) HANG ON!   

Material:

Thread:  6/0 color to match body (pictured is olive dun)
Tube:  Pro Tube Fly System's Microtube with hook guide
Body:  Mottled Moa Boa crochet material
Collar (1): Red STS dubbing (loose)
Collar (2): Natural pheasant rump or schlappen (or color to match)
Cone:  Spirit River modified nickel plated cone
Hook:  Choice (I am using a Gamakatsu SC15 #4)

Step 1

Apply a drop of Zap-A-Gap to the rear portion of the mircotube.  Join mircotube with hook guide.  Place on needle.  Start thread at the rear of the tube (as pictured).


Step 2

Tie in Moa Boa and wind forward.  Wind each wrap close to the preceding turn, but do not overlap.  This will allow the fibers to breathe and swim freely.


Note the excellent mottled effect- brown plus light and dark olive.


Step 3:

Use a brush and/or comb to unravel the thread fibers.  This will take a few minutes.


The fibers should have a softer appearance upon completion.  Again, the fibers will further soften after fishing.


Step 4:

Loosely dub a small collar of red dubbing material (red STS dubbing is pictured).


Step 5:

Select, tie in, and fully wrap a longer pheasant rump hackle (color to match) or schlappen.


After winding pheasant rump, whip finish, apply Zap-A-Gap to thread, and immediately slide cone over the tube.


Step 6:

Remove tube from needle.  Use a razor blade to remove the front portion of the tube.  Leave approximately 1/16 of an inch.  Use the blue portion of the flame to flare or roll back the tubing against the cone locking it in place

You are all finished!


Here's approximately 10-feet of Moa Boa.  This stuff is awesome!  Can you see the sculpin pattern? 

Saturday, February 18, 2012

Sandstrom Baitfish: A Variation

Garry Sandstrom is the creative mind behind some of the most productive flies an angler can use on Puget Sound.  His Sandstrom Baitfish is no exception.   This simple, unassuming pattern was originally tied on a long shank hook, a body of silver tinsel or diamond braid, and a wing of polar bear topped lime lame. 

Frankly, I am not a fan of long shank hooks for a few reason.  (1)  A long shank hook provides the fish more leverage to throw the hook.  (2) The wire diameter is typically double the thickness potentially causing harm to the fish, and (3) the hooks are a bugger to sharpen, or keep sharp.

I have simplified Garry's pattern...  The hook has been replaced with a short shank Gamakatsu SC15, a wing of arctic fox under fur, a topping of Krystal Flash, and instead of using red thread for the collar, replaced with Glimmer Thread.  Instead of a body of tinsel I have replaced this component with an under wing of a few strands of Spirit River Crystal Wraps material.  Lime thread?  It has been a long time since I have seen any.. so how about chartreuse?

Material:

Thread:  6/0 chartreuse
Hook:  Gamakatsu SC15 (size of choice)(pictured #6)
Underwing:  Crystal wrap strands
Wing: Arctic fox underfur
Wing topping:  Chartruese Krystal Flash
Collar:  Red Glimmer Thread

Step 1:

Start thread approximately one eye length behind the eye.  Wind towards the read of the hook approximately 15-wraps.  Ideally we will have a little bigger yet elongated head upon completion of using the chartreuse thread.


Step  2:

Pull one ultra violet and one silver strand from a strip of Crystal Wrap.  Tie in at the halfway point.  You should notice a distinct "V" shape in the strands- this is your tie in point.


Lock strands in place by folding material over the hook shank and securing with a few wraps of thread.


Step 3:

Cut a small portion of arctic fox from the tail.  remove all guard hairs and shorter under fur.  The length of the wing is a personal choice, but personally I like a length of 3 to 3 1/2 times the hook length.

Step 4:

Tie in two strands of chartreuse Krystal Flash and secure by bringing the material back over the wing and winding a few wraps.  At this point, the head should have a slight oval look.  Whip finish.


Step 5:

Once chartreuse thread whip finished and cut, apply Zap-A-Gap on the head.  Immediately take a few turns of Glimmer Thread for the collar.  Before you cut the Glimmer Thread, apply a small drop to the head.  Once tacky to dry, cut the Glimmer Thread.   Please note I didn't whip finish the Glimmer Thread.  It is a lot thicker than thread and whip finishing would have created a large hump.  Once Zap-A-Gap is completely dry add a couple of coats of head cement.  You're finished!


Enjoy!


Saturday, February 11, 2012

Squidley-Do-Right (Squid Tube Fly Pattern)

Psssst.. I have a secret fly pattern here- the Squidley-Do-Right.  Unlike Squidley's cartoon character cousin Dudley, who always succeeded with pure luck on his side, this pattern has "eat me" written all over it!  Rest assured, if there's fish around, Squidley will "do right."

A myriad of materials can be used to tie this pattern, but what I truly like about tying the Squidley is it's simplicity.  It is one of the few patterns that I tie incorporating chenille; which, speeds up the tying.  Adding glow in the dark materials for night fishing has been deadly, as well as, replacing arctic fox (original material) for the tail and collar with australian sheep has proven to be more effective. Regardless of the materials you choose, this is a killer blackmouth, coho, and searun cutthroat fly!

Materials

Tube:  Pro Tube System Mircotube and hookguide
Thread:  White UTC 70 denier
Tail (The squid's head):  White australian sheep spun in a dubbing loop.  Marabou, rabbit, or any soft underfur is acceptable.
Tentacles:  A few strands of pearl Baitfish Emulator tied over the top of the tail.
Body (Mantle):  Medium white trilobal chenille.
Eyes:  Pearl 3.5 3-D eyes super glued to body.
Collar (Stabilizer fins):  White australian sheep spun in a dubbing loop. Marabou, rabbit, or any soft underfur is acceptable.
Cone:  Spirit River Nickel

Step 1:

Place tube with hook guide on needle or mandrel.  Start thread near the junction.  Form a dubbing and spin australian sheep.  The length of the fibers should extend slightly past the hook guide.  Take two to three full turns of sheep with the first turn butted against the junction.  This will flare the hair.  Sparse is key...


Step 2:

Tie in 6 to 10 Baitfish Emulator fibers over the top of the tail.  Length is approximately two tail lengths.


Step 3:

Tie in chenille and wrap forward with approximately 10-turns.  Leave plenty of room behind the end of the tube.


Step 4:

The eyes can be tricky, but here's how I complete this step.  Using a bodkin, lift and turn over eye from wax paper.  Hopefully, the bodkin's tip is still adhered to the eye.  Place a small drop of Zap-A-Gap on back the of the eye.  Lift and place eye into desired position.  Slowly remove bodkin then press firmly with the half hitch end of the bodkin.  Repeat for the far side of the tube,


If desired, the fly could be finished at this step.

Step 5:

Form a dubbing loop and spin sheep hair taking three or four turns (sparse).  Whip finish and cut thread.


Step 6:

Place a drop of Zap-A-Gap over the thread and slide modified Spirit River cone over the tube.  Press firmly over the collar. You can refer to the Simple Baitfish Tube for modified cones here


Step 7:

Remove tube from needle or mandrel.  Take a razor blade and remove all but 1/16 of an inch.  Use a lighter and apply the blue flame portion to the tube.  This will roll back or flare the tube which locks the cone on to the tube.


Enjoy!